EFRC Admin Guides
EFRC – MPT5 – Cashier Guide
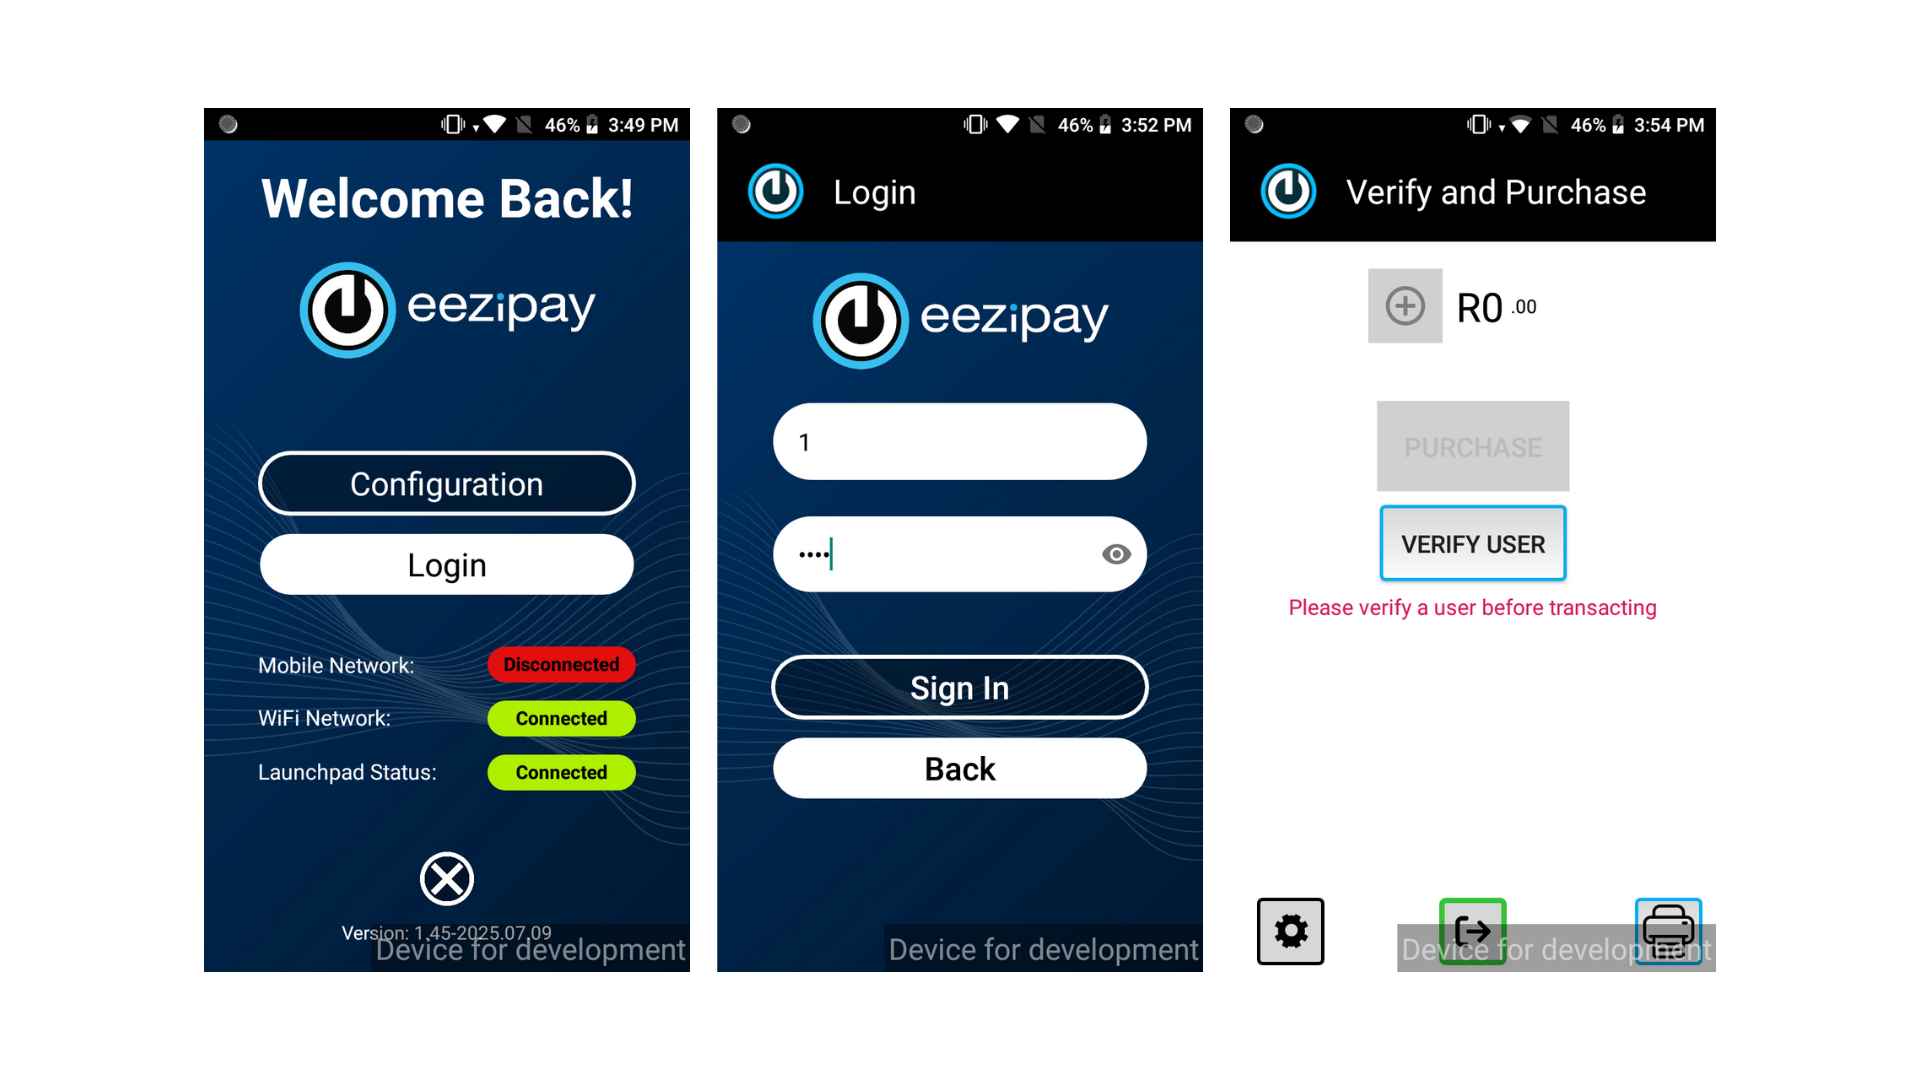
1. How to Log in to the Application
How to log in.
1. Click on the Login button to proceed with the login process.
2. Enter your user code and password in the fields provided and click on Sign In.
3. You will be directed to the main screen, titled Verify and Purchase.

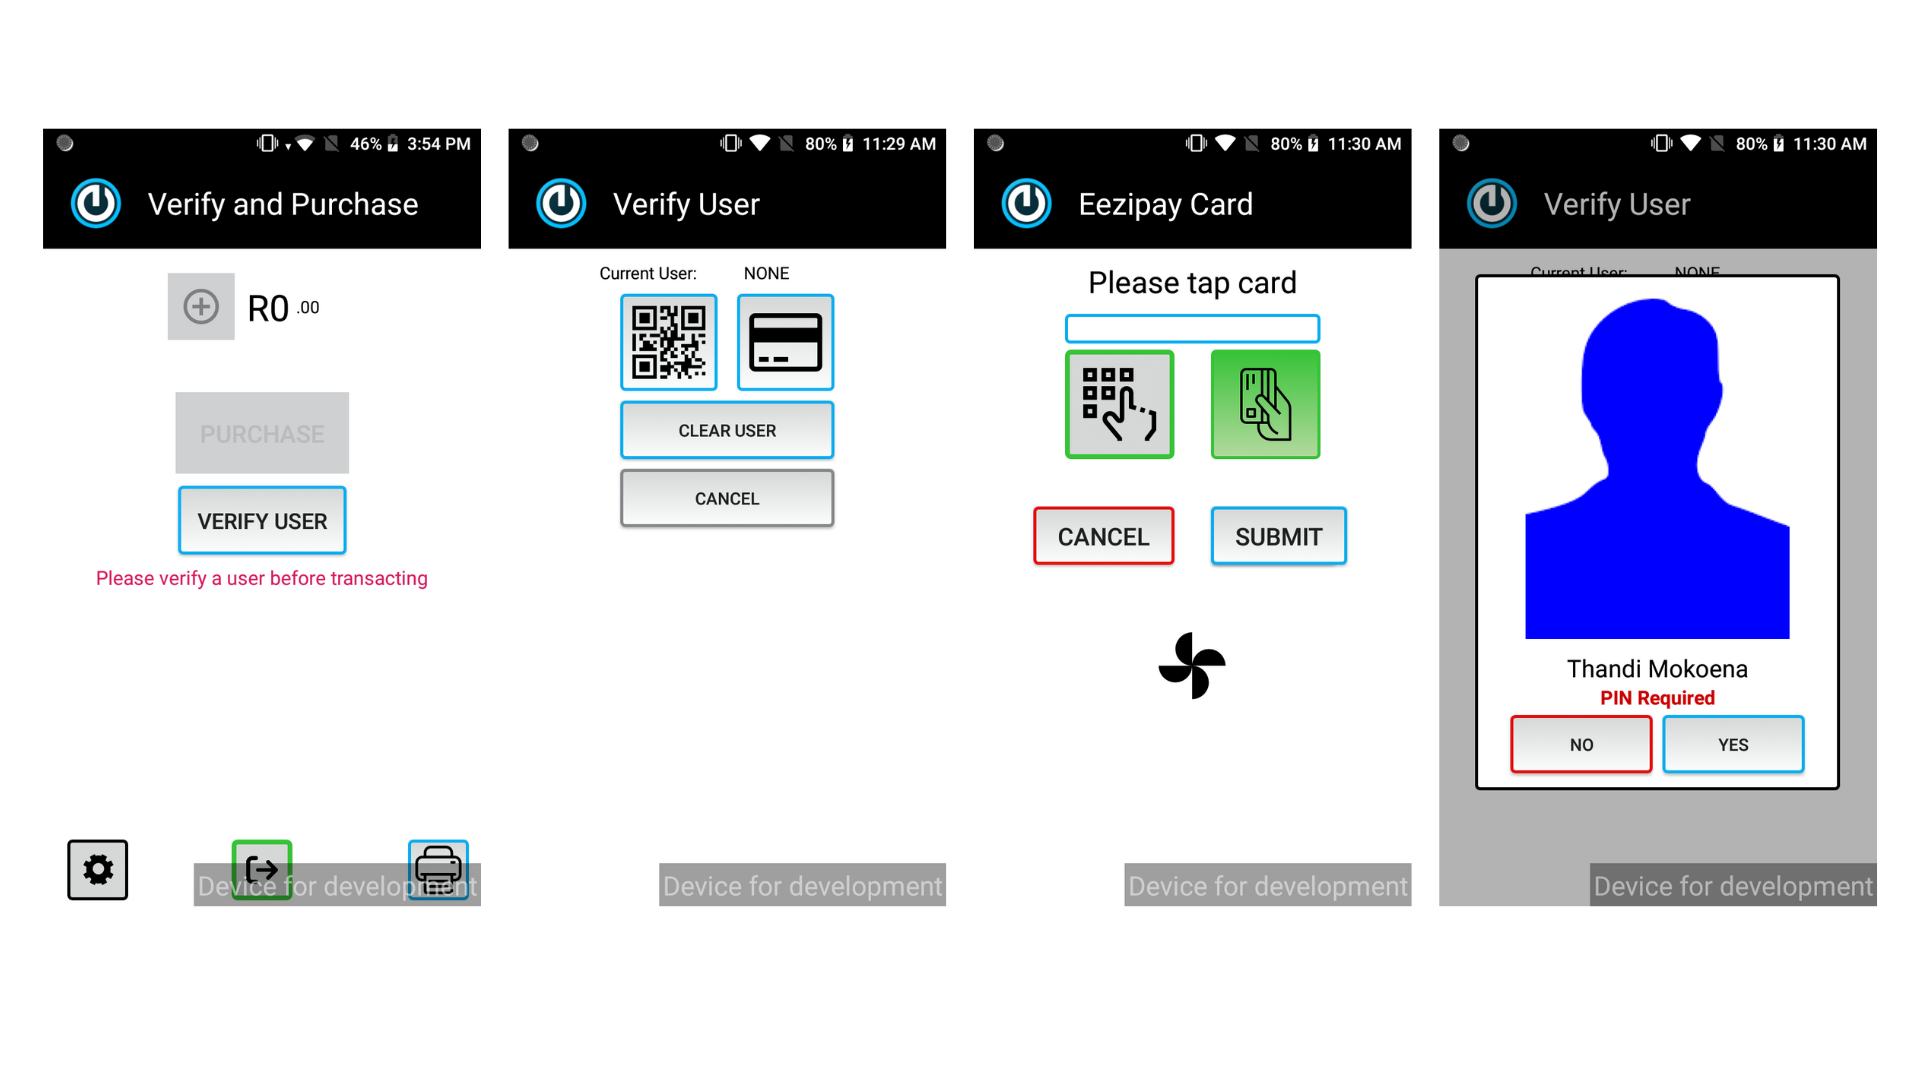
2. How to verify a user for a transaction
The security of each person’s account is paramount. Therefore, all users require verification before they are able to transact.
How to verify a user.
1. Tap Verify User.
2. Ask them the following: “Will you be using a physical card, a virtual card, or entering a card number?” Tap the Card icon for physical cards or enter the card number manually. Tap the QR icon for virtual cards.
3. For cards or card numbers, prompt the customer to: Tap their physical card on the reader. Or type in their card number. If the QR code was scanned, the card number will be pre-populated and no further action is required from the customer. Tap Submit to load the customer’s profile. If the User is Not Registered you’ll see a User Not Registered screen. Politely inform the customer and refer them to EFRC management.
4. Confirm their identity with a photo check. If a user profile loads, confirm their Name, Surname, and Photo (if uploaded). Does the photo match the customer? If so, Tap Yes to proceed to the transaction screen. If not, Tap No and inform the customer to contact EFRC management.
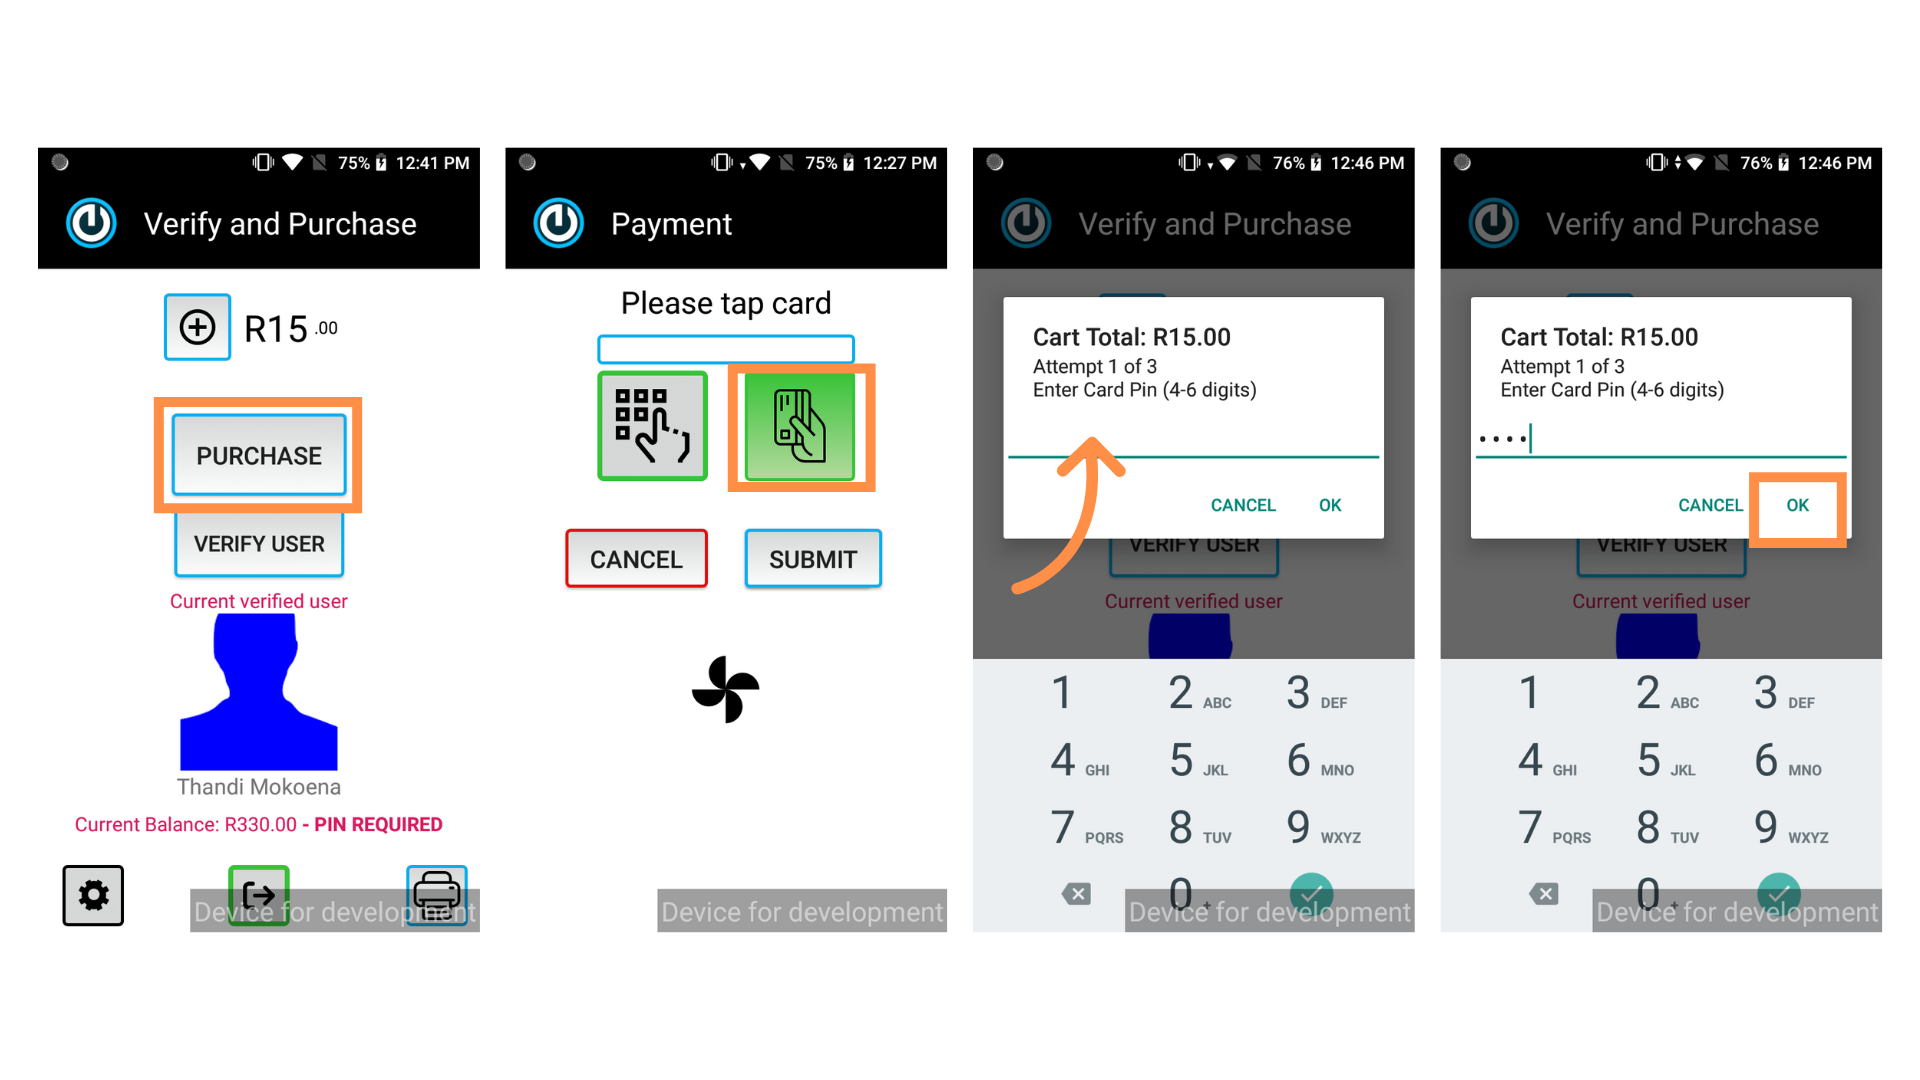
3. How To Process A Transaction
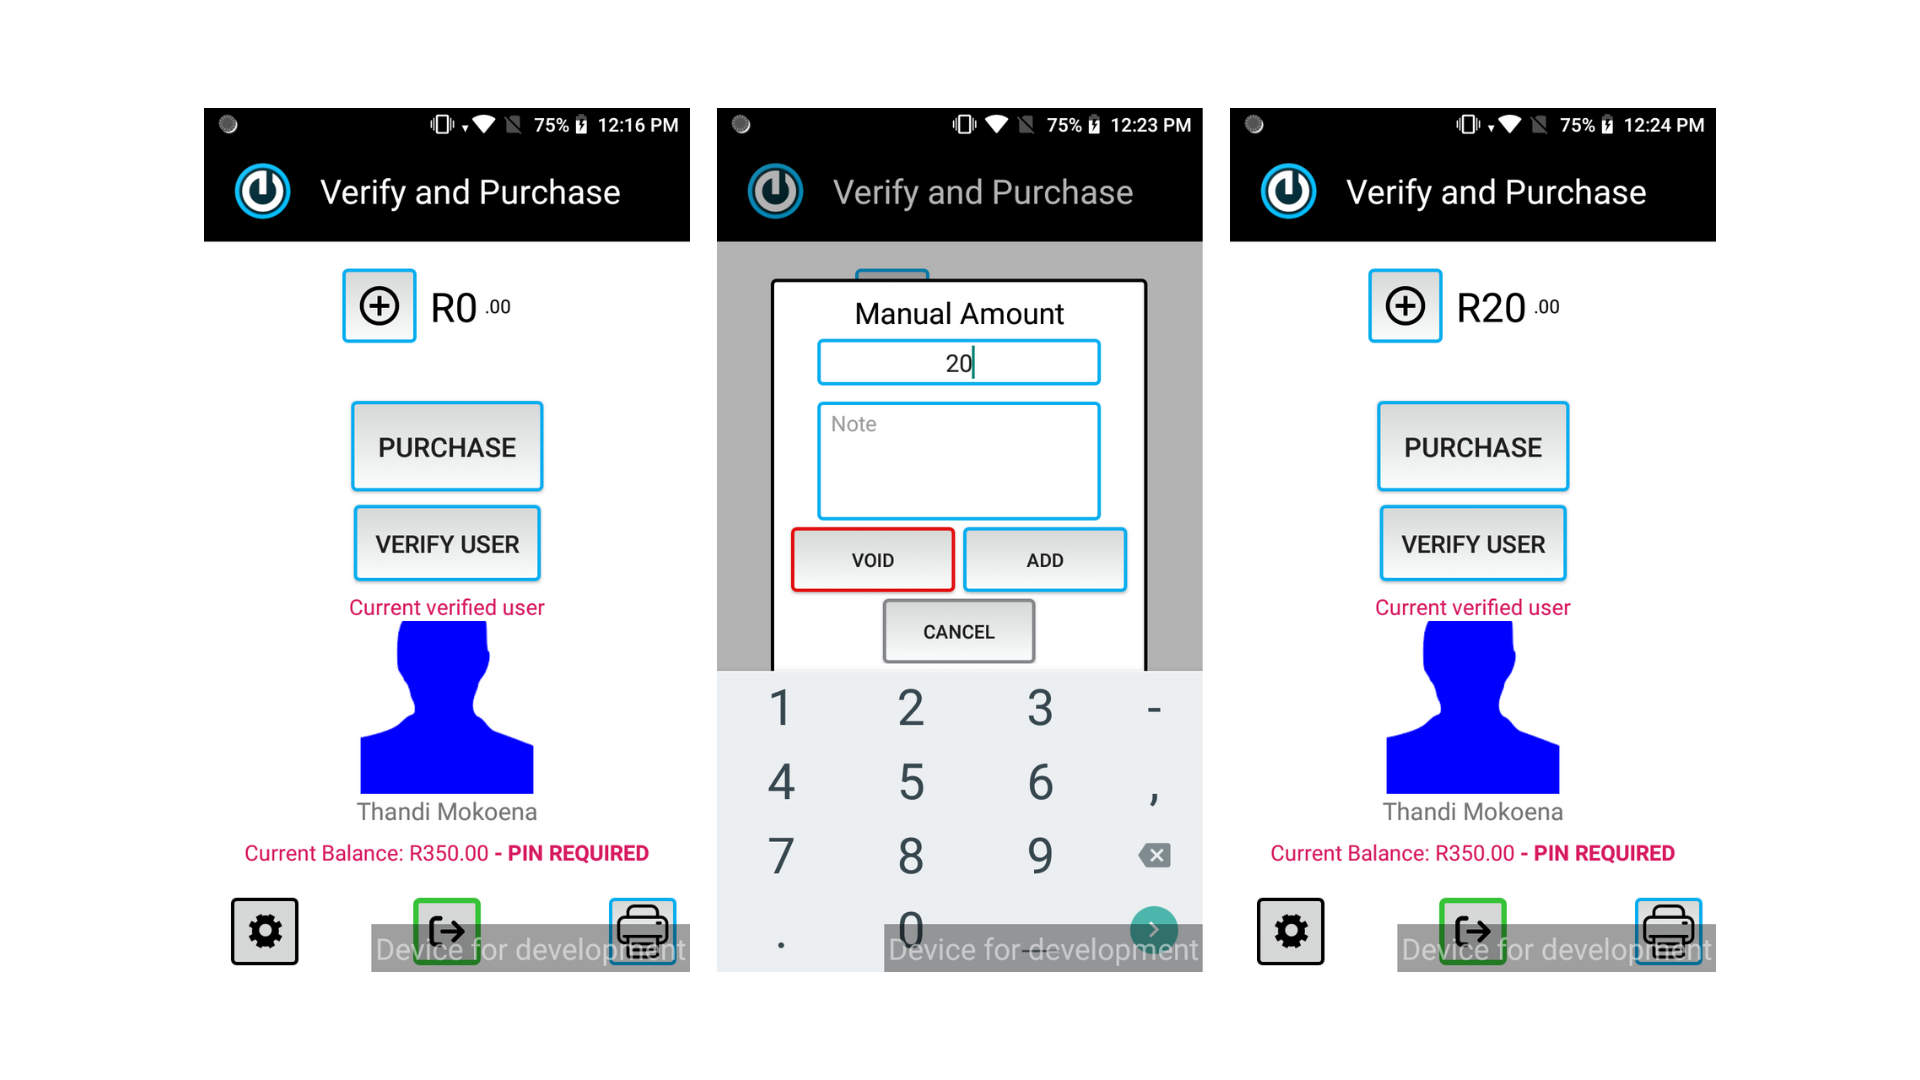
4. Completing the Transaction
How to Complete a Transaction.
1. Tap Purchase.
2. Ask the customer to tap or scan their card, or provide their card number again.
3. The Pin screen appears.
4. Hand the device to the customer to enter their Pin, then tap OK.

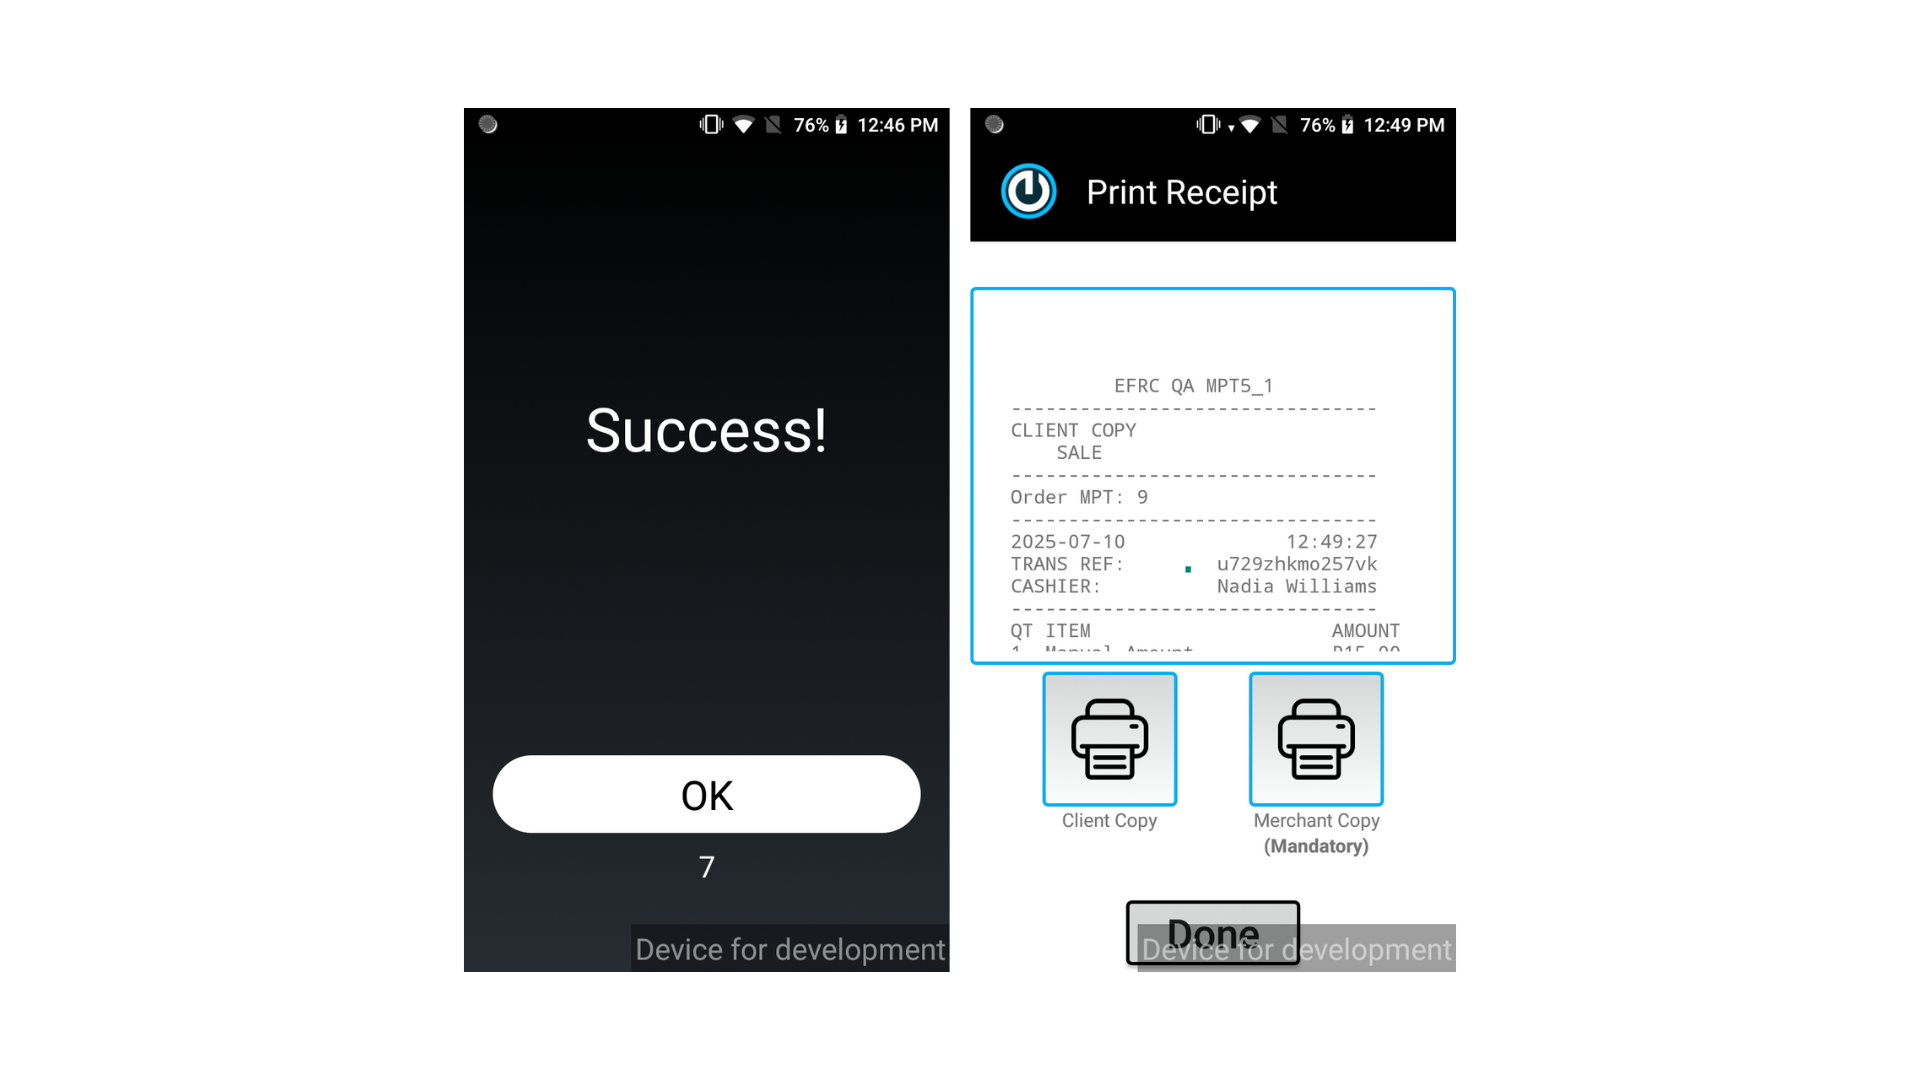
5. Transaction Success

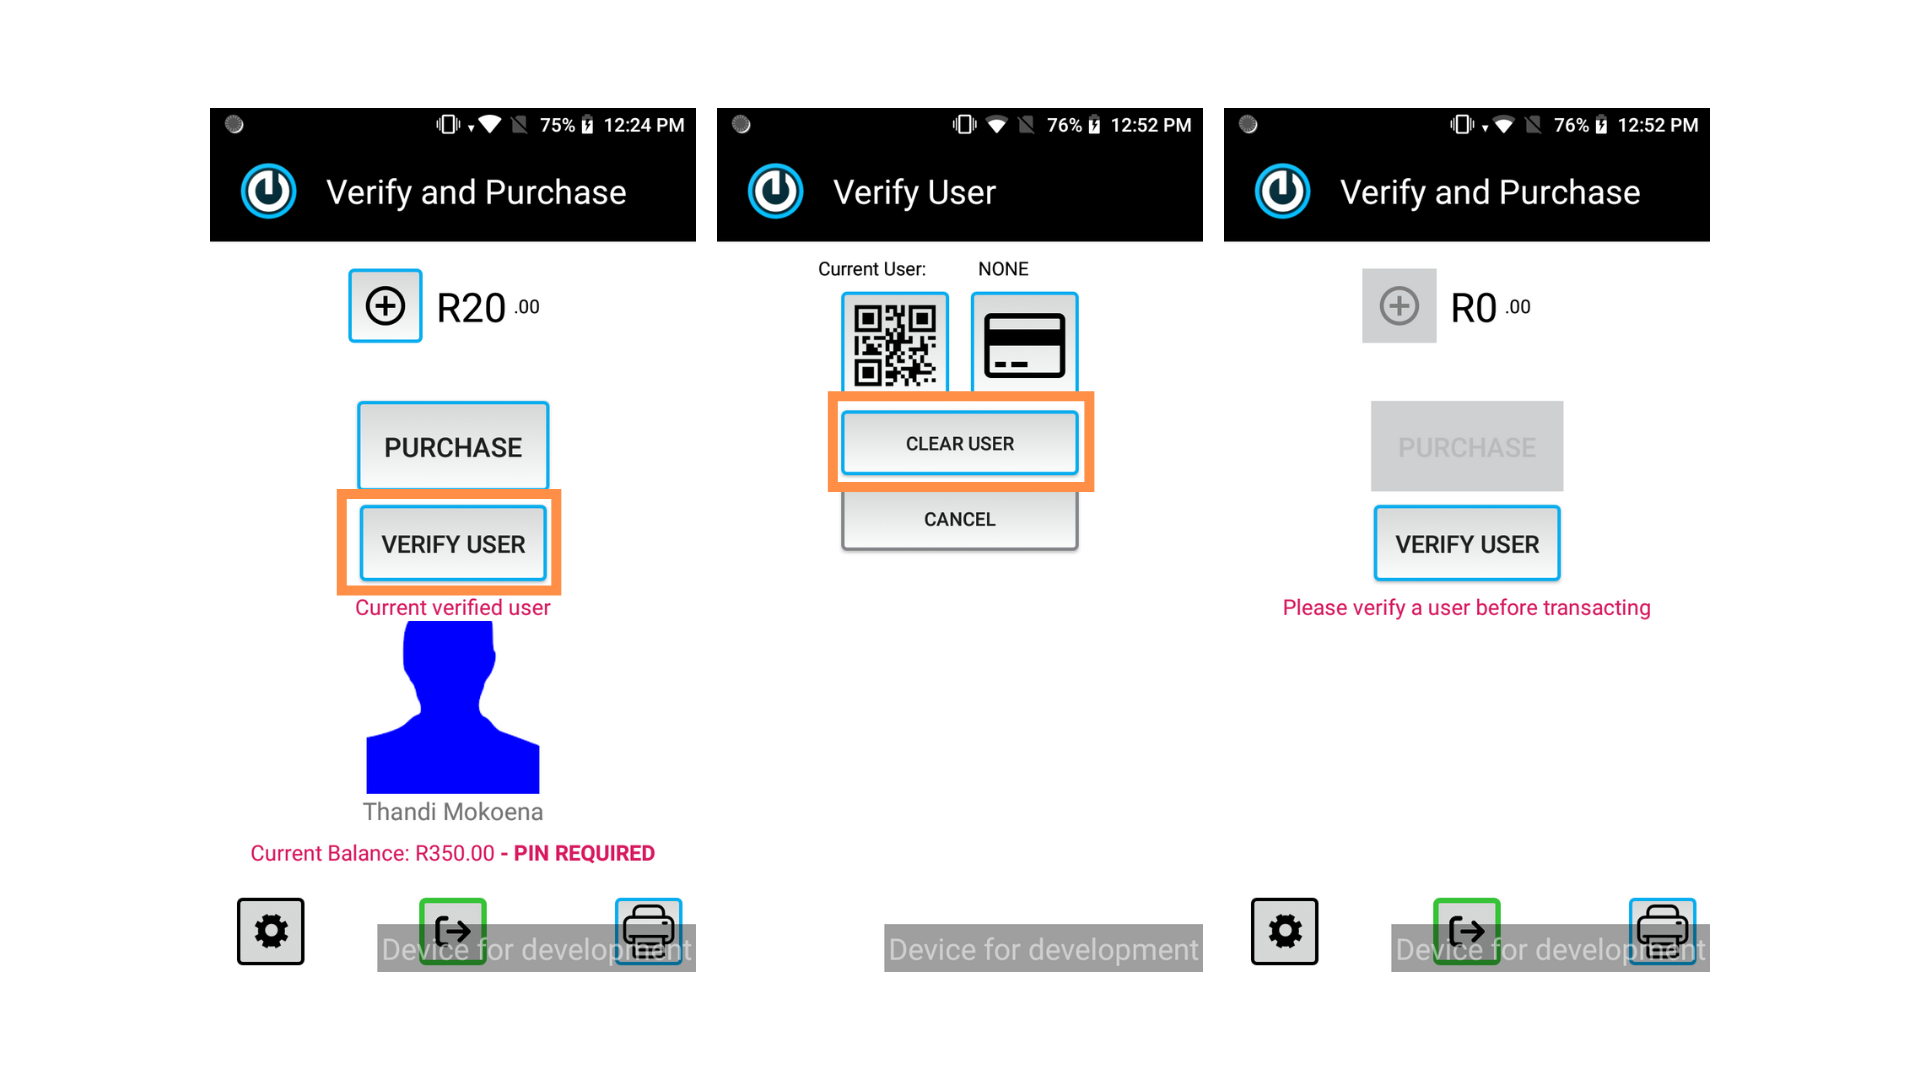
6. How to Cancel a Transaction Mid-Way
If the customer changes their mind before completing a purchase:
1. Tap Verify User.
2. Tap Clear User to remove their data and reset the screen.
3. This allows you to start fresh with the next customer. Tapping Cancel simply takes you back to the previous screen.
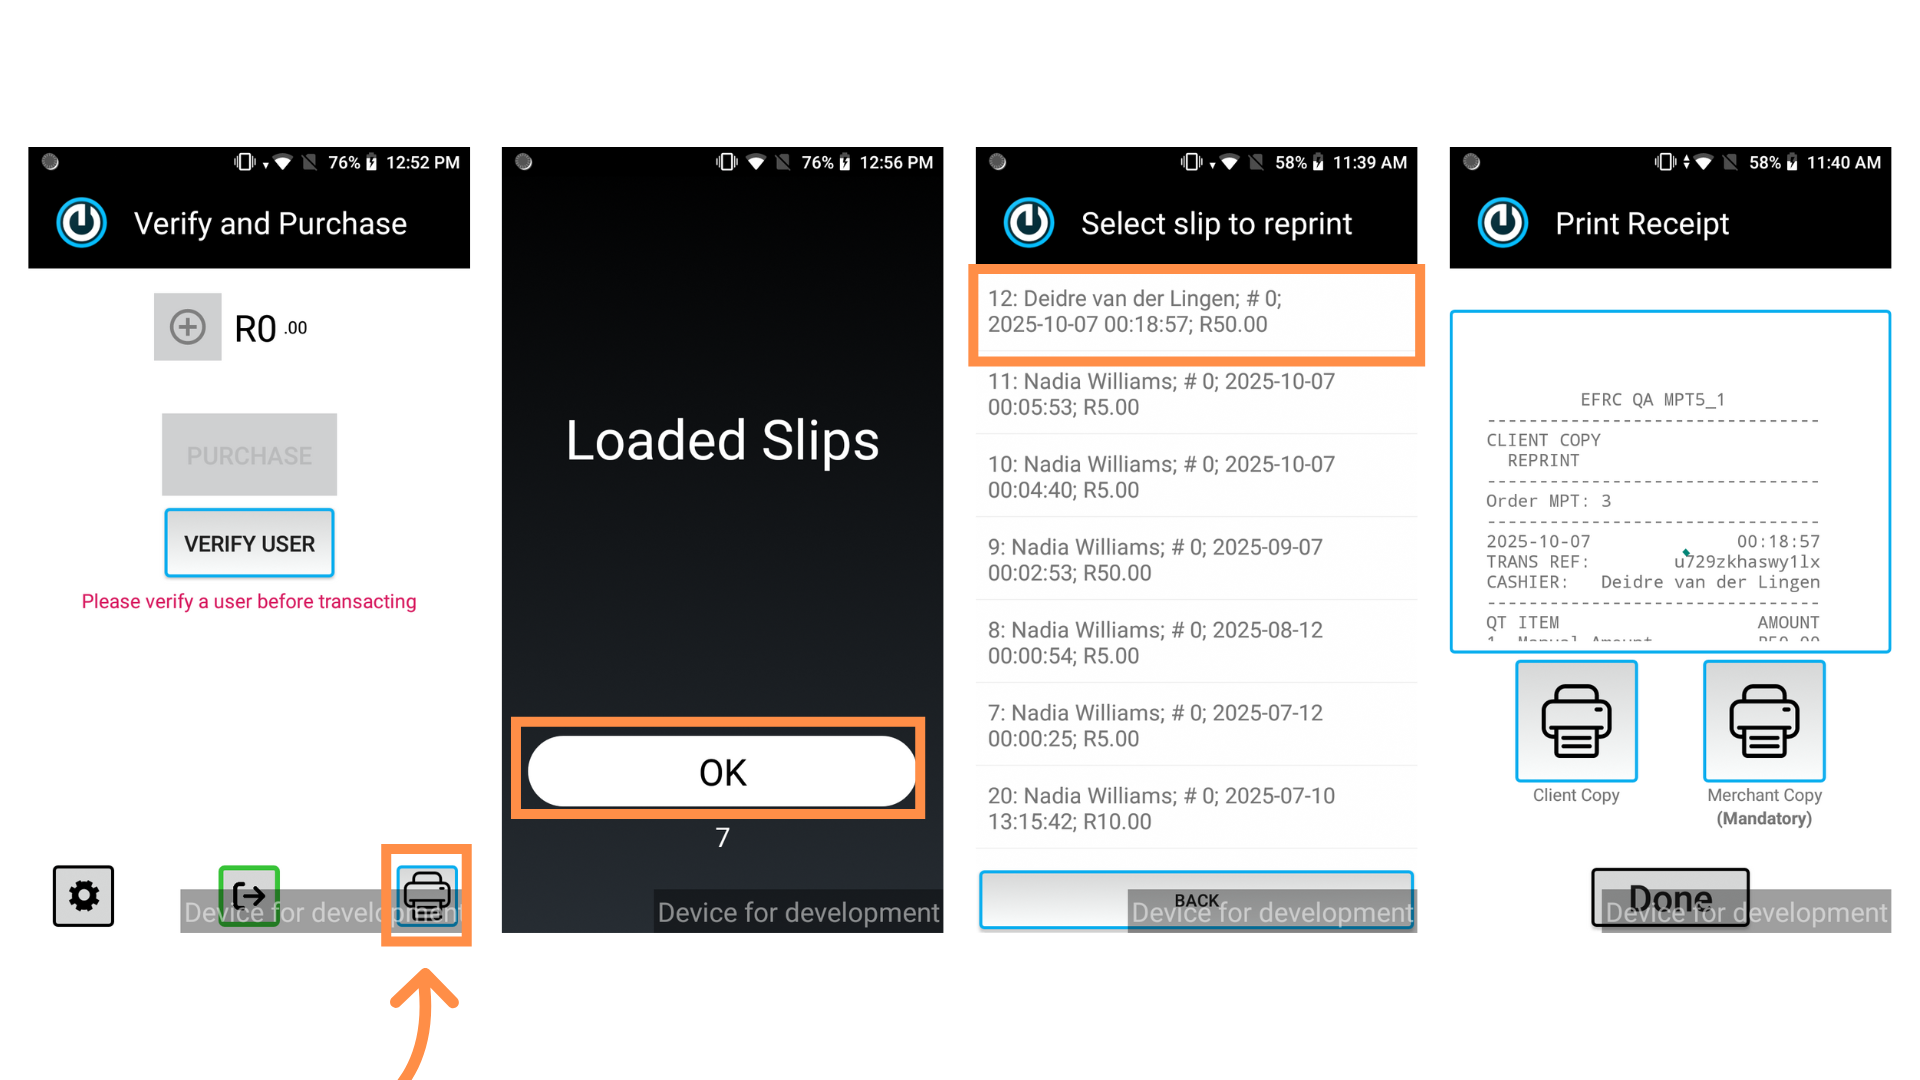
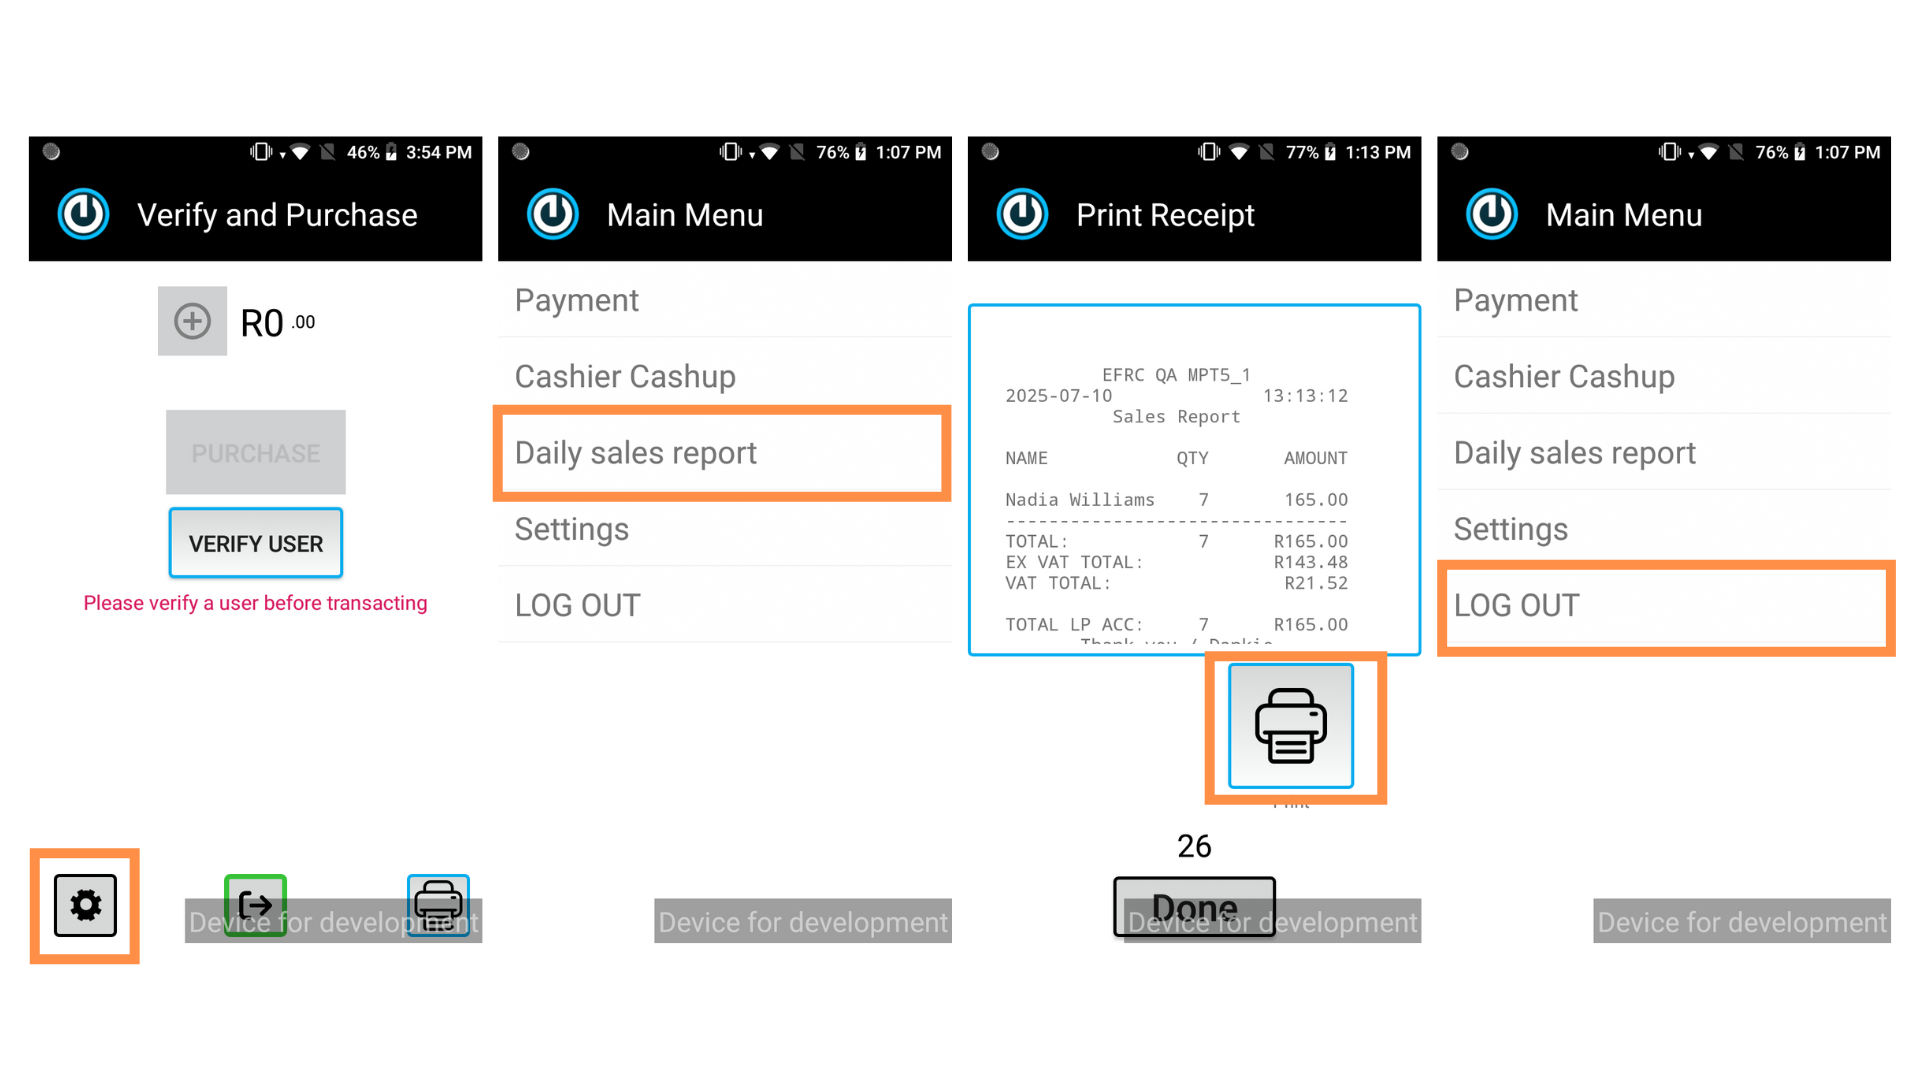
7. How to Reprint a Transaction Slip
How to Reprint a Transaction Slip
1. Tap the Printer icon (bottom right).
2. Tap OK to see the loaded slips.
3. Tap on the slip you would like to print.
4. The slip will be shown on the screen. For a Merchant Copy select the button on the right (if the slip does not print automatically). For a customer copy, tap Client Copy.

Thank you for taking the time to view this Elgin Free Range Chickens User Guide. If you have any questions or need further assistance, our support team is here to help.
Simply reach out via email at support@ezeepay.com. At eezeepay, we’re committed to making your experience simple, fast, and easy.
EFRC – MPT5 – Supervisor Guide
1. How to Log in to the Application
How to log in.
1. Click on the Login button to proceed with the login process.
2. Enter your user code and password in the fields provided and click on Sign In.
3. You will be directed to the main screen, titled Verify and Purchase.
2. How to verify a user for a transaction
The security of each person’s account is paramount. Therefore, all users require verification before they are able to transact.
How to verify a user.
1. Tap Verify User.
2. Ask them the following: “Will you be using a physical card, a virtual card, or entering a card number?” Tap the Card icon for physical cards or enter the card number manually. Tap the QR icon for virtual cards.
3. For cards or card numbers, prompt the customer to: Tap their physical card on the reader. Or type in their card number. If the QR code was scanned, the card number will be pre-populated and no further action is required from the customer. Tap Submit to load the customer’s profile. If the User is Not Registered you’ll see a User Not Registered screen. Politely inform the customer and refer them to EFRC management.
4. Confirm their identity with a photo check. If a user profile loads, confirm their Name, Surname, and Photo (if uploaded). Does the photo match the customer? If so, Tap Yes to proceed to the transaction screen. If not, Tap No and inform the customer to contact EFRC management.

3. How To Process A Transaction

4. Completing the Transaction
How to Complete a Transaction.
1. Tap Purchase.
2. Ask the customer to tap or scan their card, or provide their card number again.
3. The Pin screen appears.
4. Hand the device to the customer to enter their Pin, then tap OK.
5. Transaction Success
6. How to Cancel a Transaction Mid-Way
If the customer changes their mind before completing a purchase:
1. Tap Verify User.
2. Tap Clear User to remove their data and reset the screen.
3. This allows you to start fresh with the next customer. Tapping Cancel simply takes you back to the previous screen.

7. How to Reprint a Transaction Slip
How to Reprint a Transaction Slip
1. Tap the Printer icon (bottom right).
2. Tap OK to see the loaded slips.
3. Tap on the slip you would like to print.
4. The slip will be shown on the screen. For a Merchant Copy select the button on the right (if the slip does not print automatically). For a customer copy, tap Client Copy.
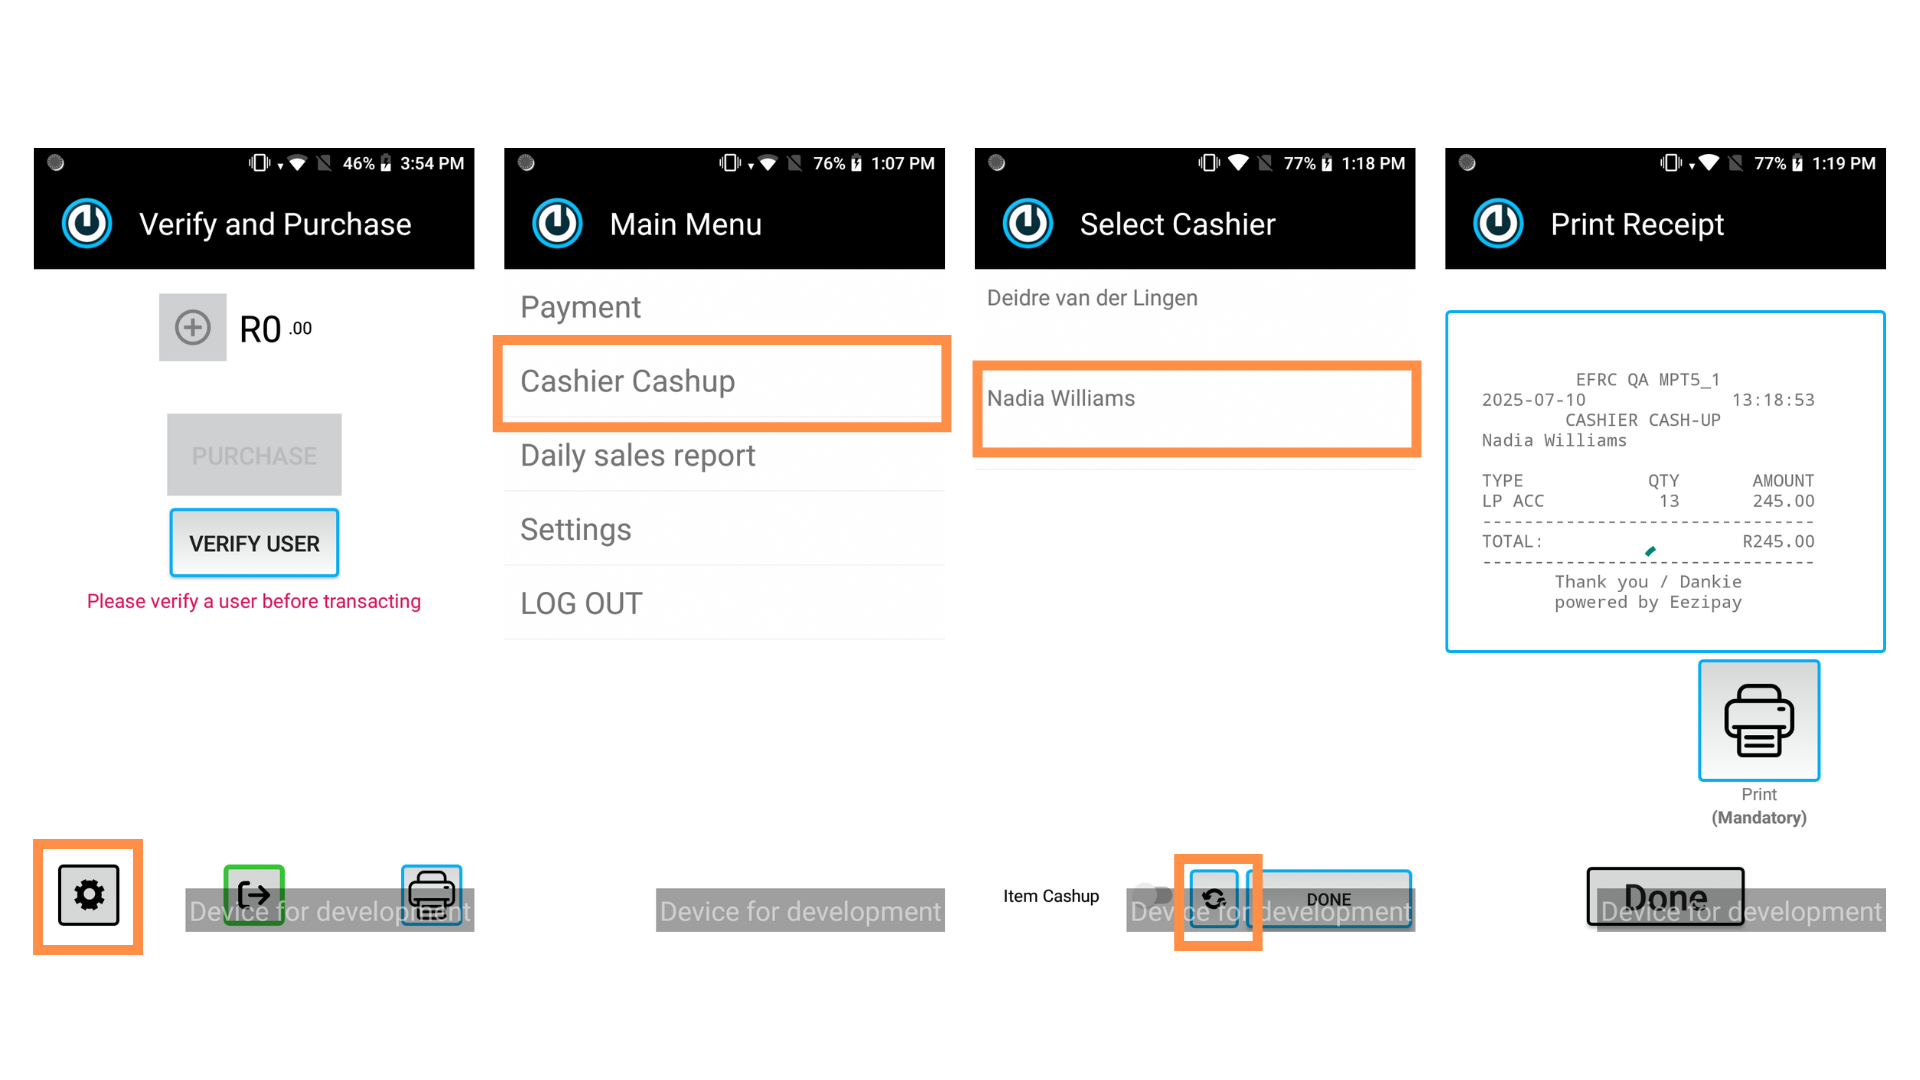
8. How to perform a Cashier cash-up
9. How to Draw a Daily Sales Report
EFRC – Launchpad – Store Reporter User Guide
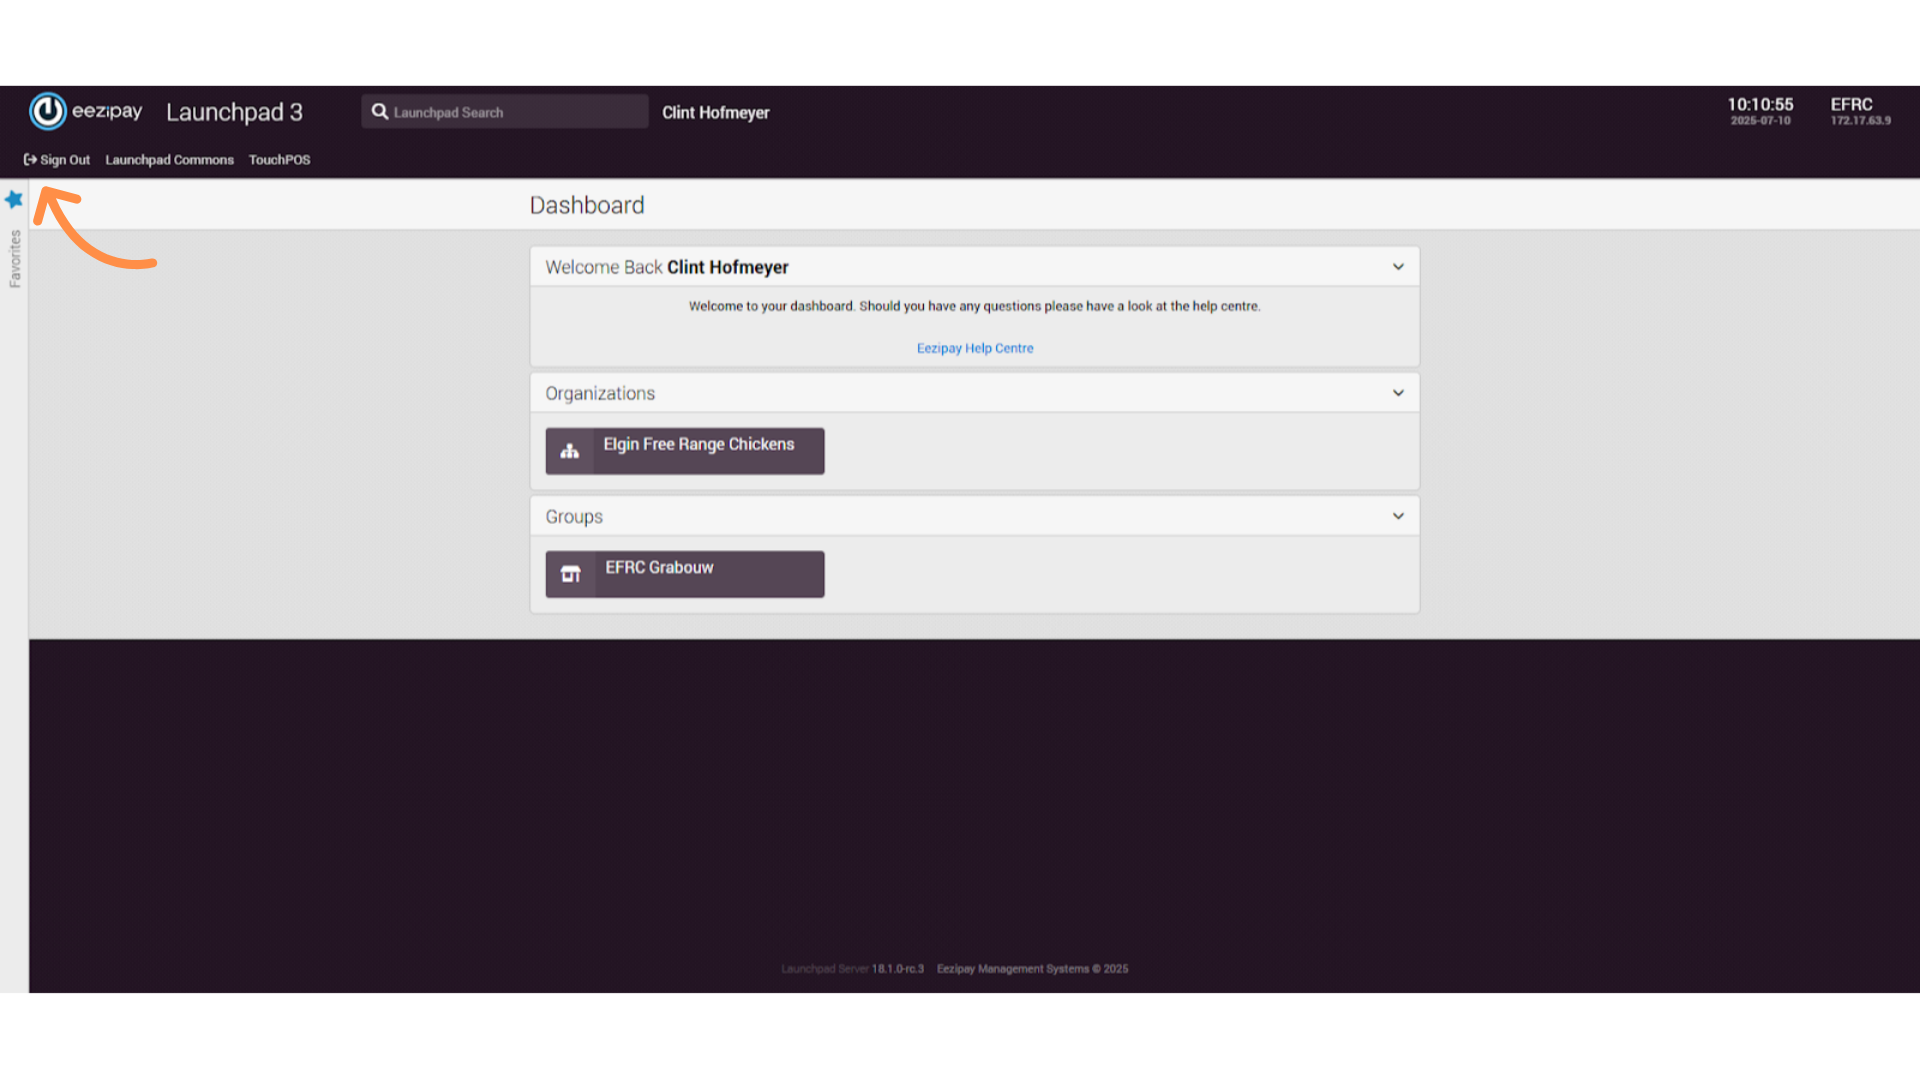
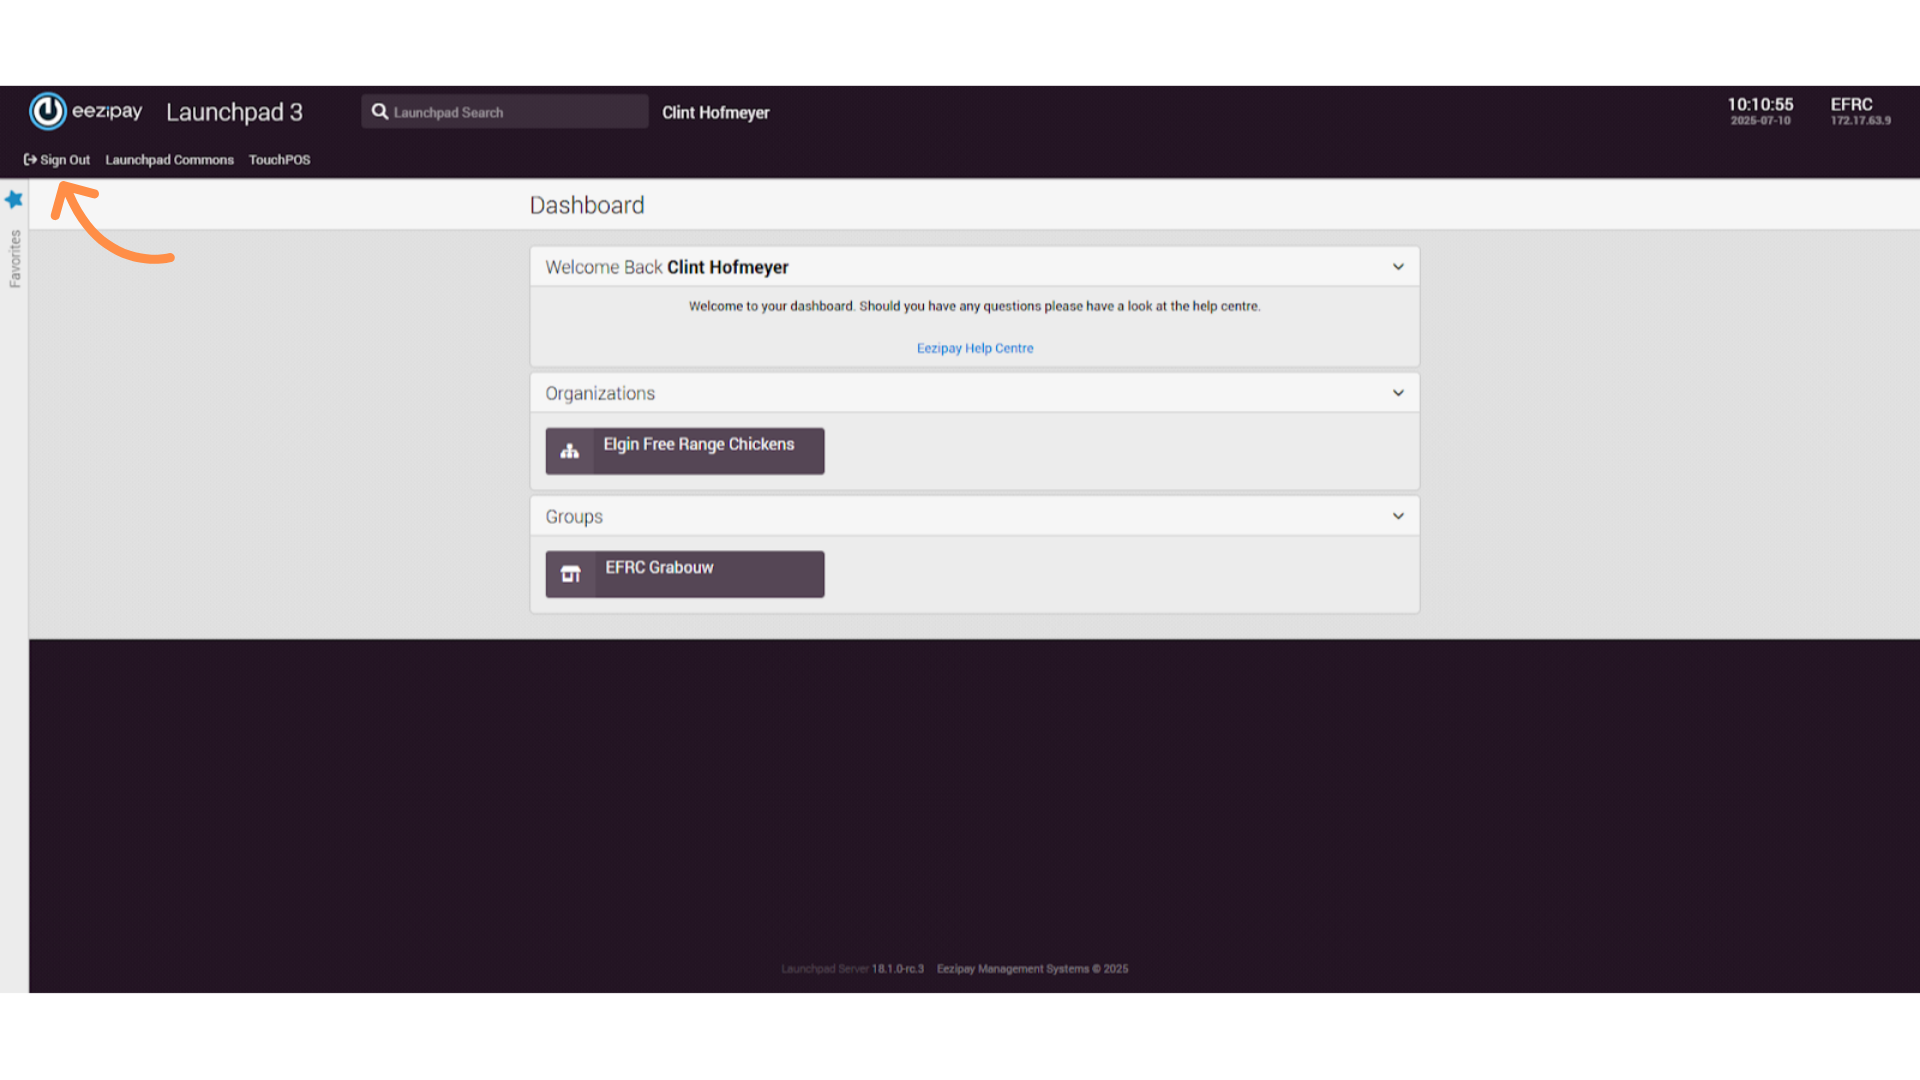
1. How to Log into Launchpad as a Store Reporter

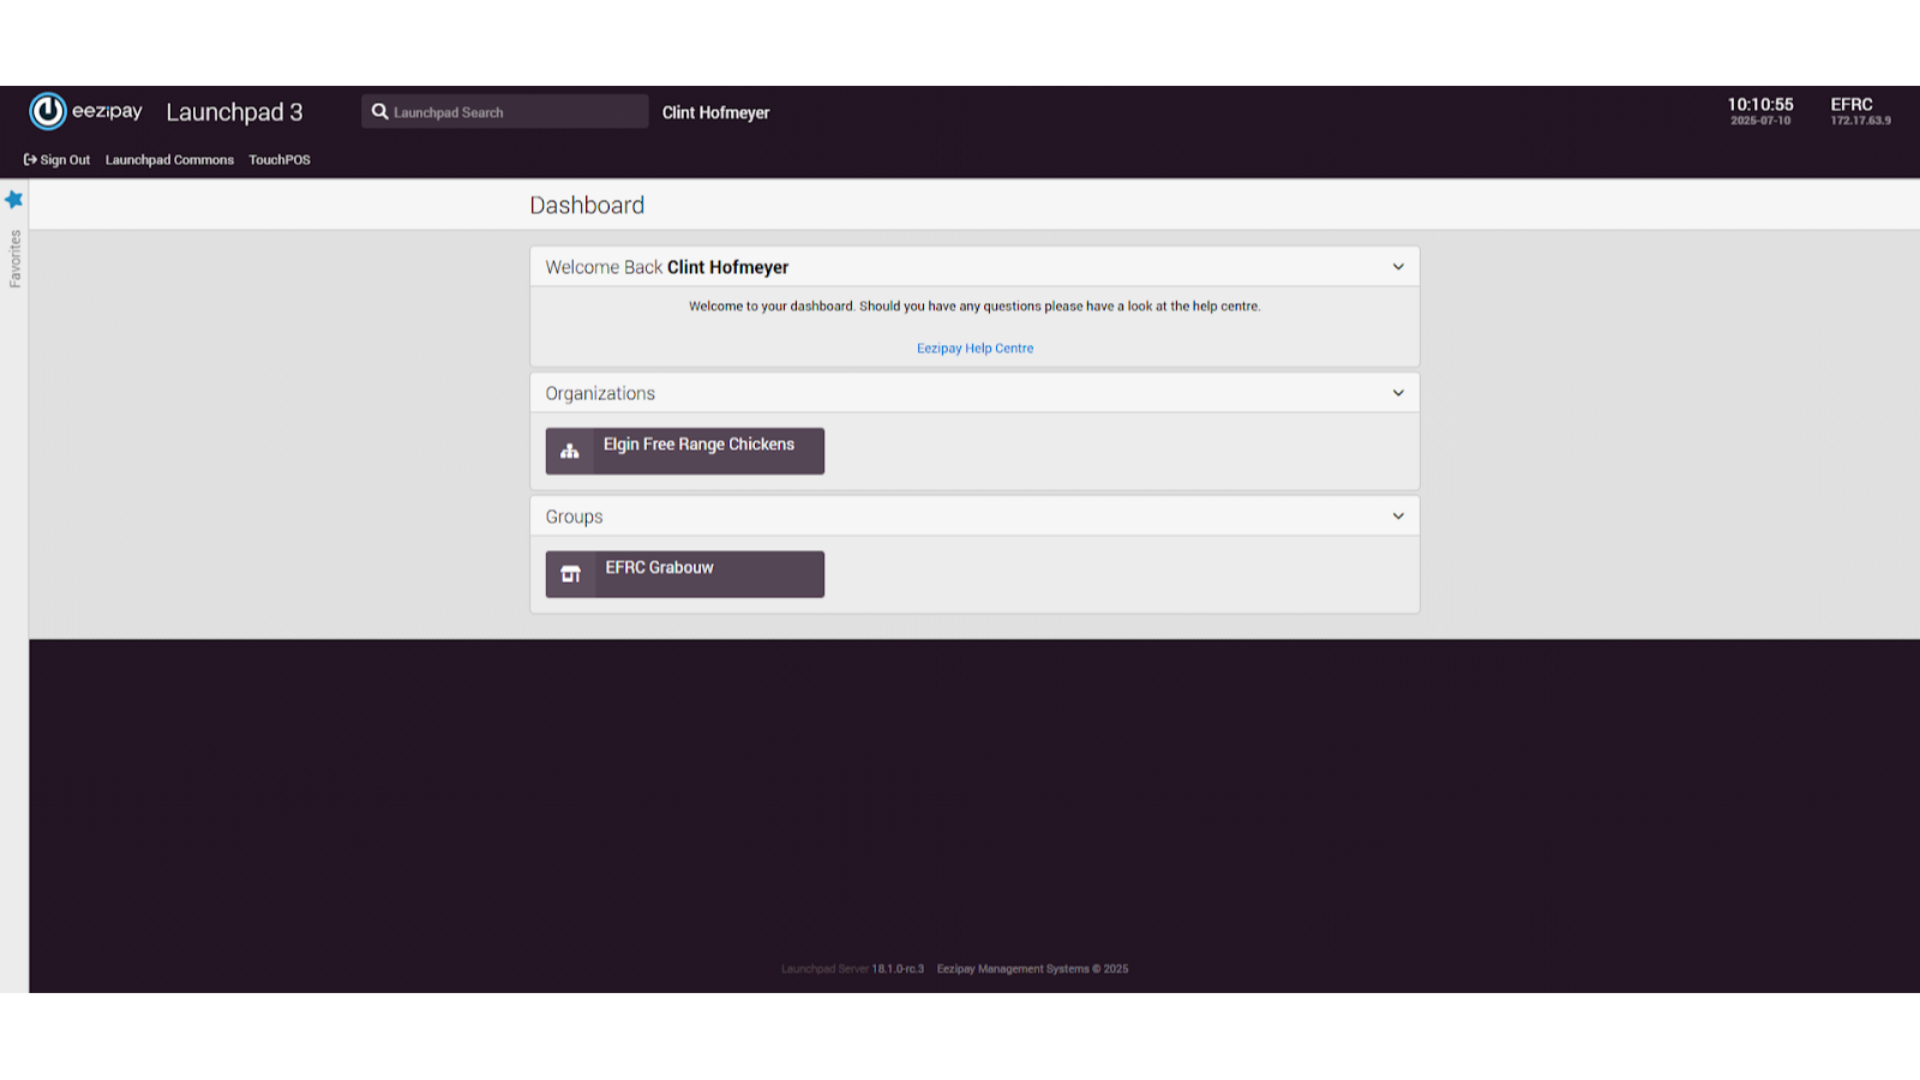
2. Launchpad Dashboard
3. Drawing a Report
4. Report Generation & Export

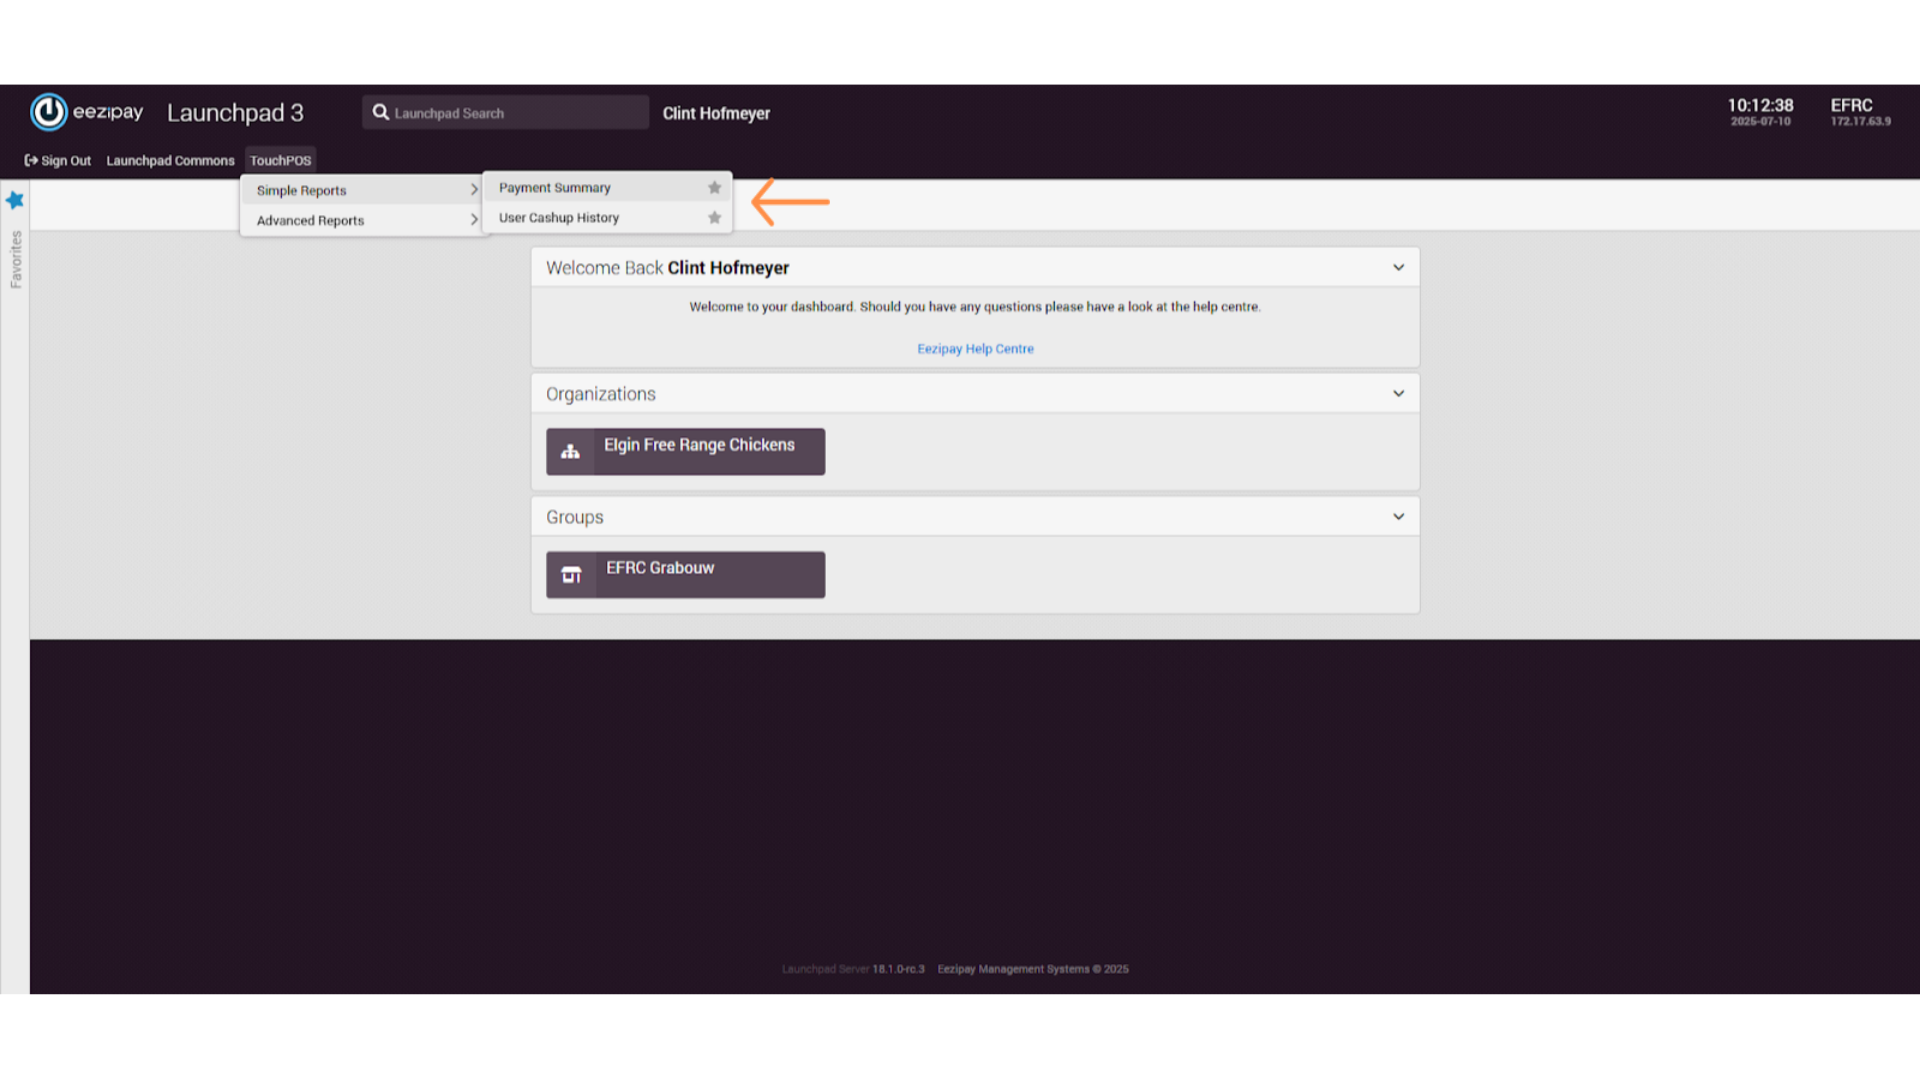
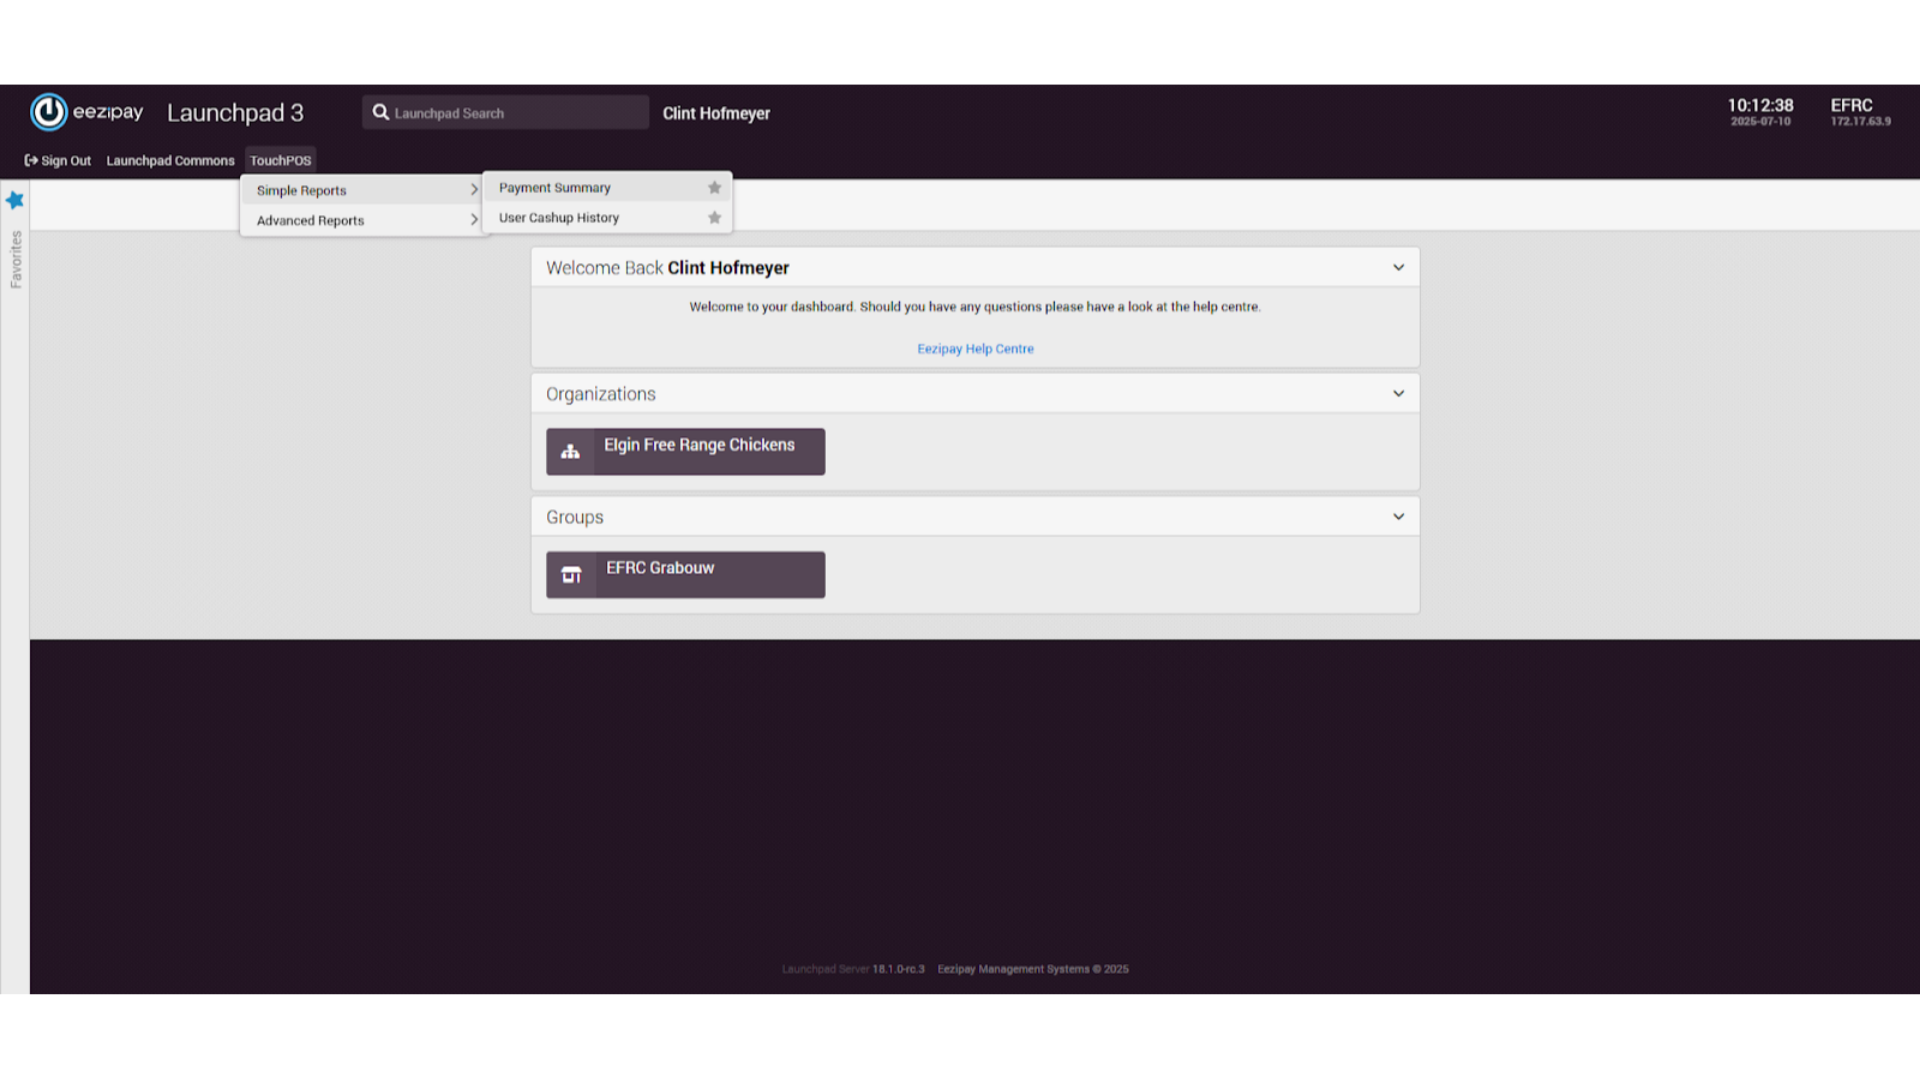
5. Launchpad Reports

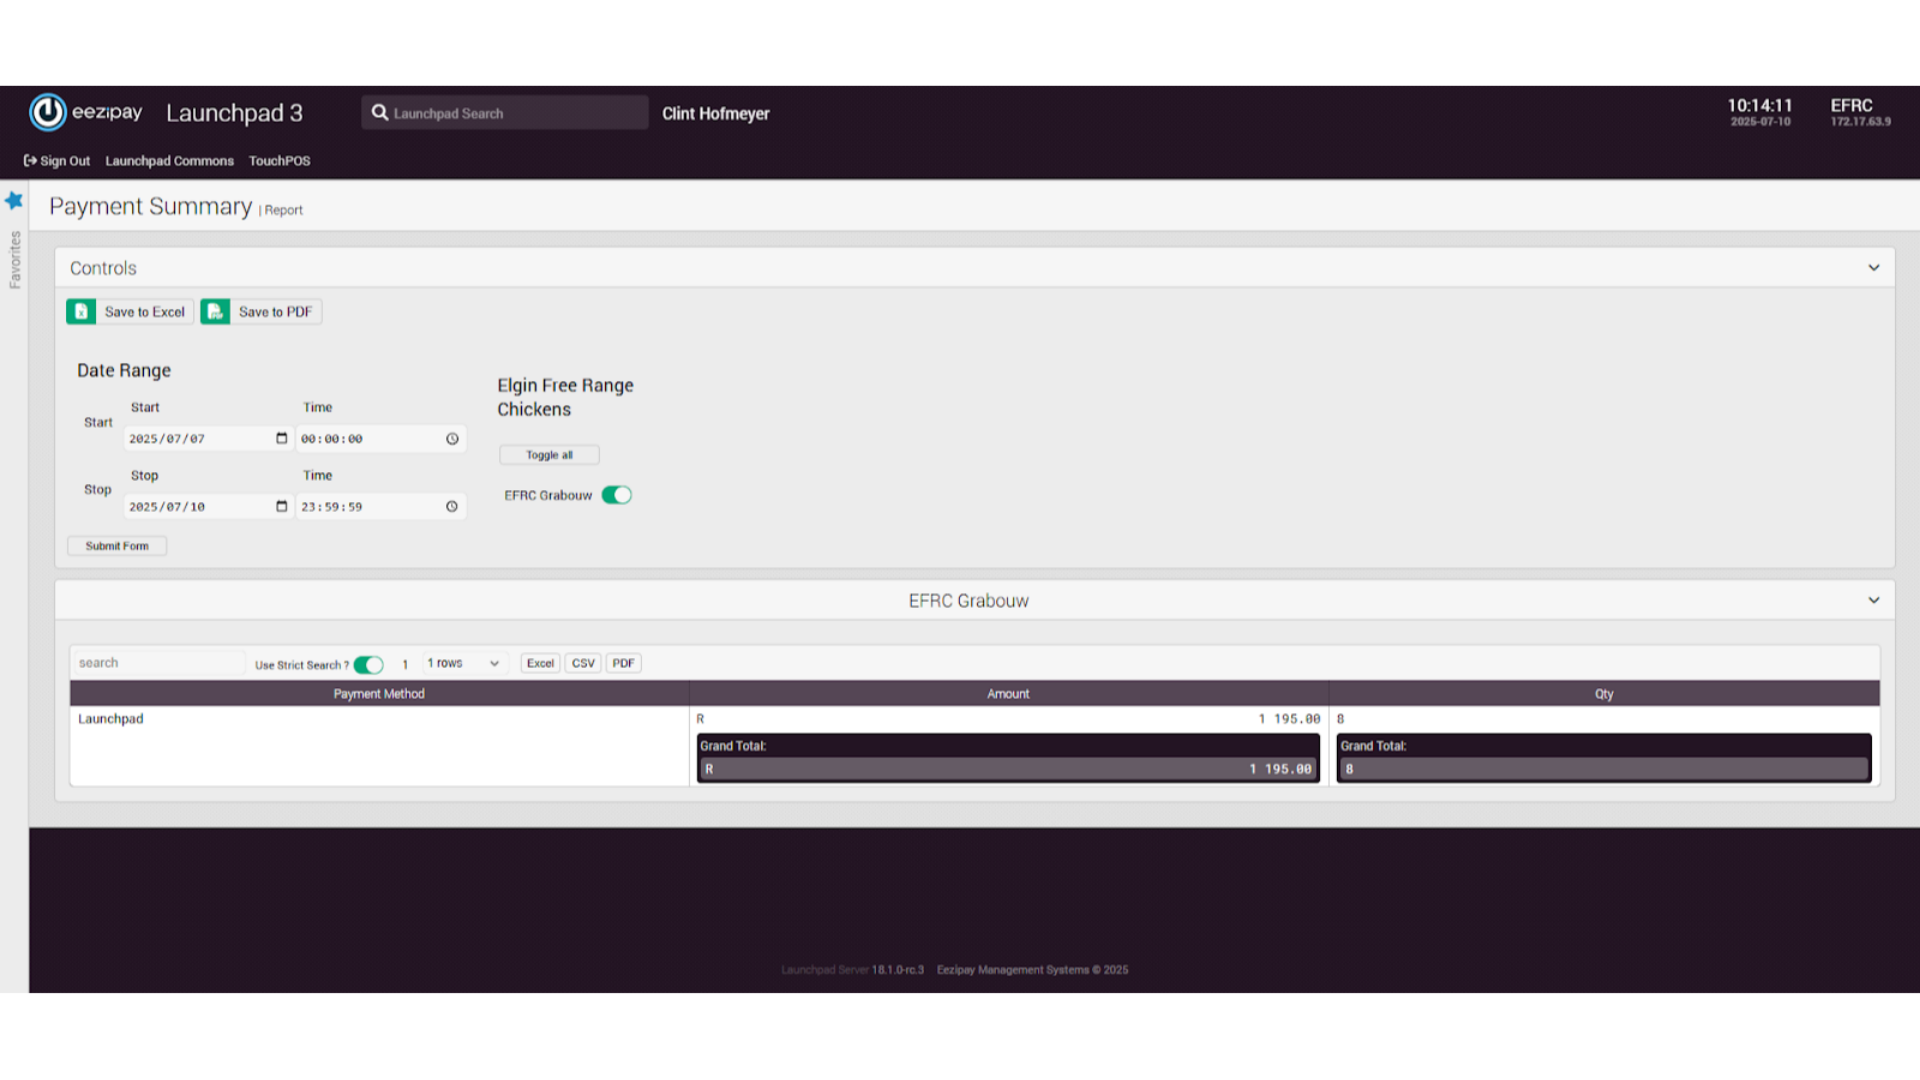
6. Payment Summary Report

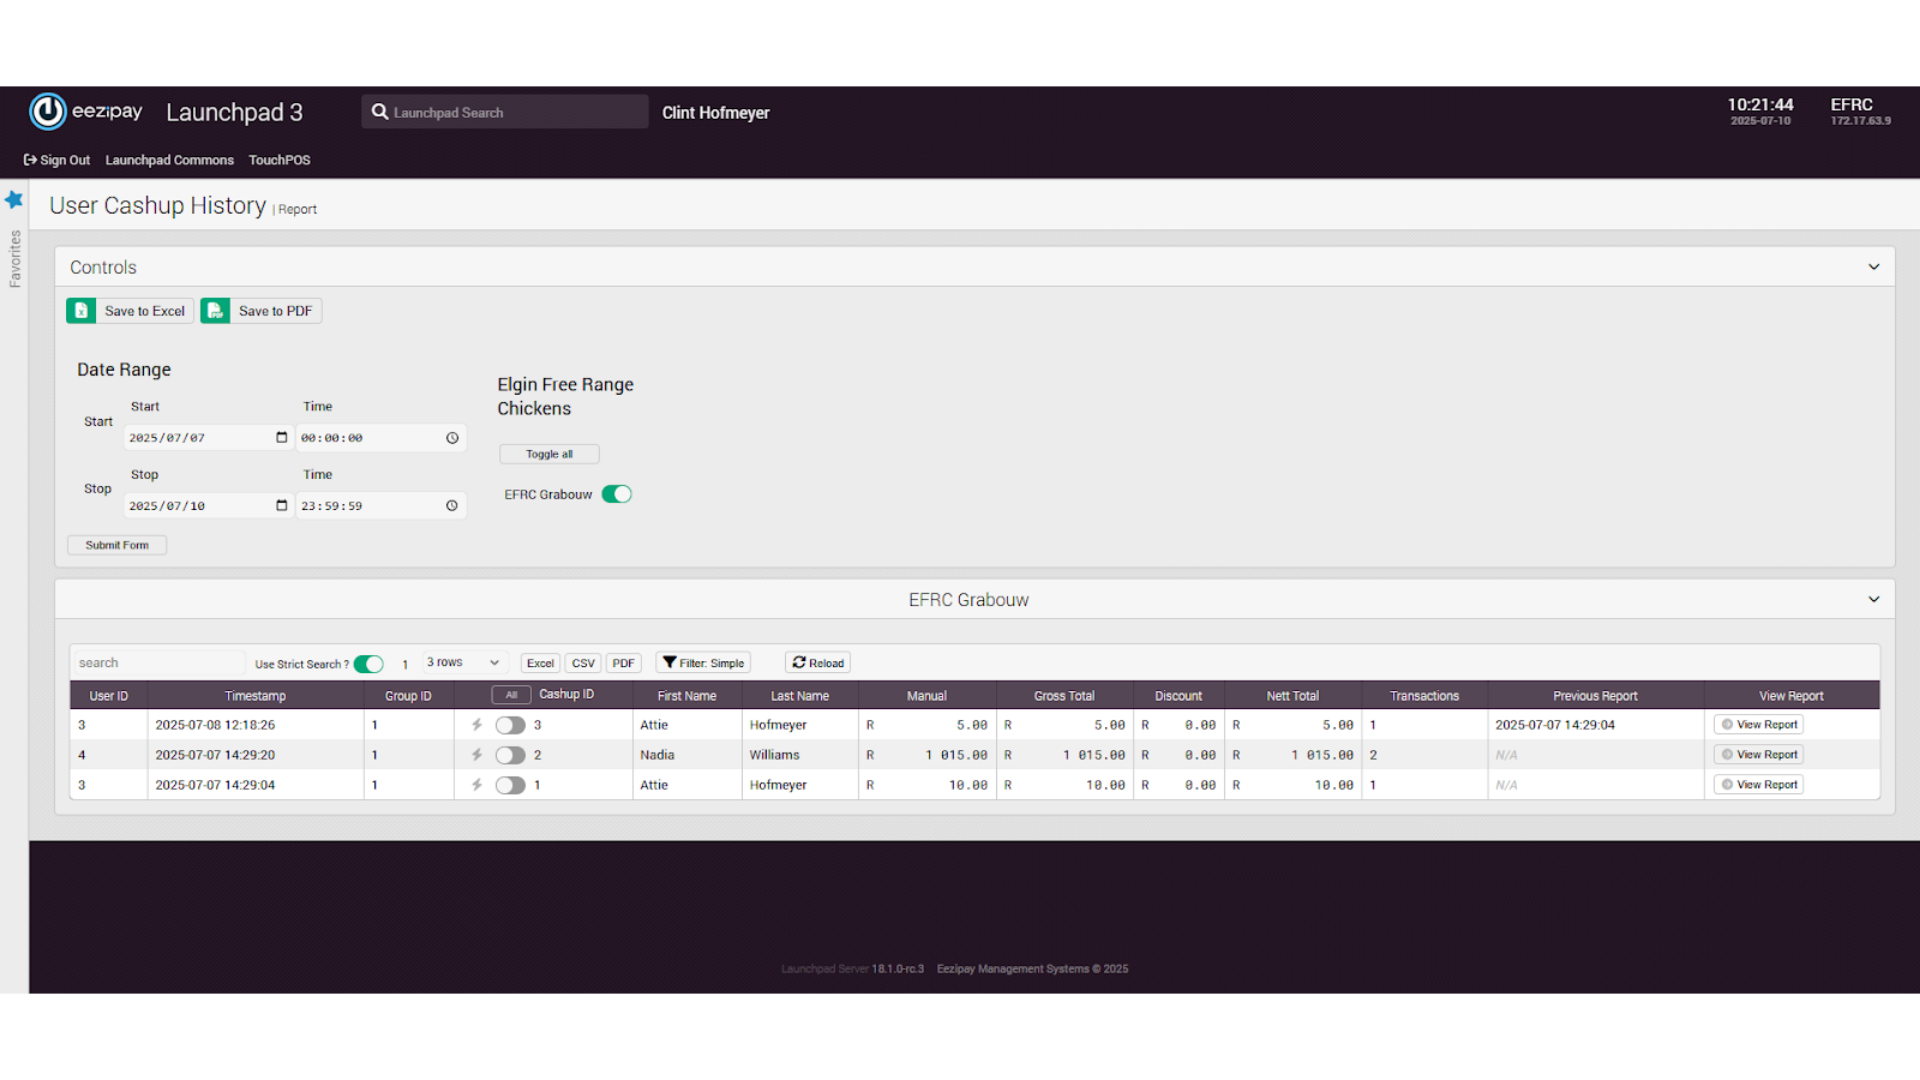
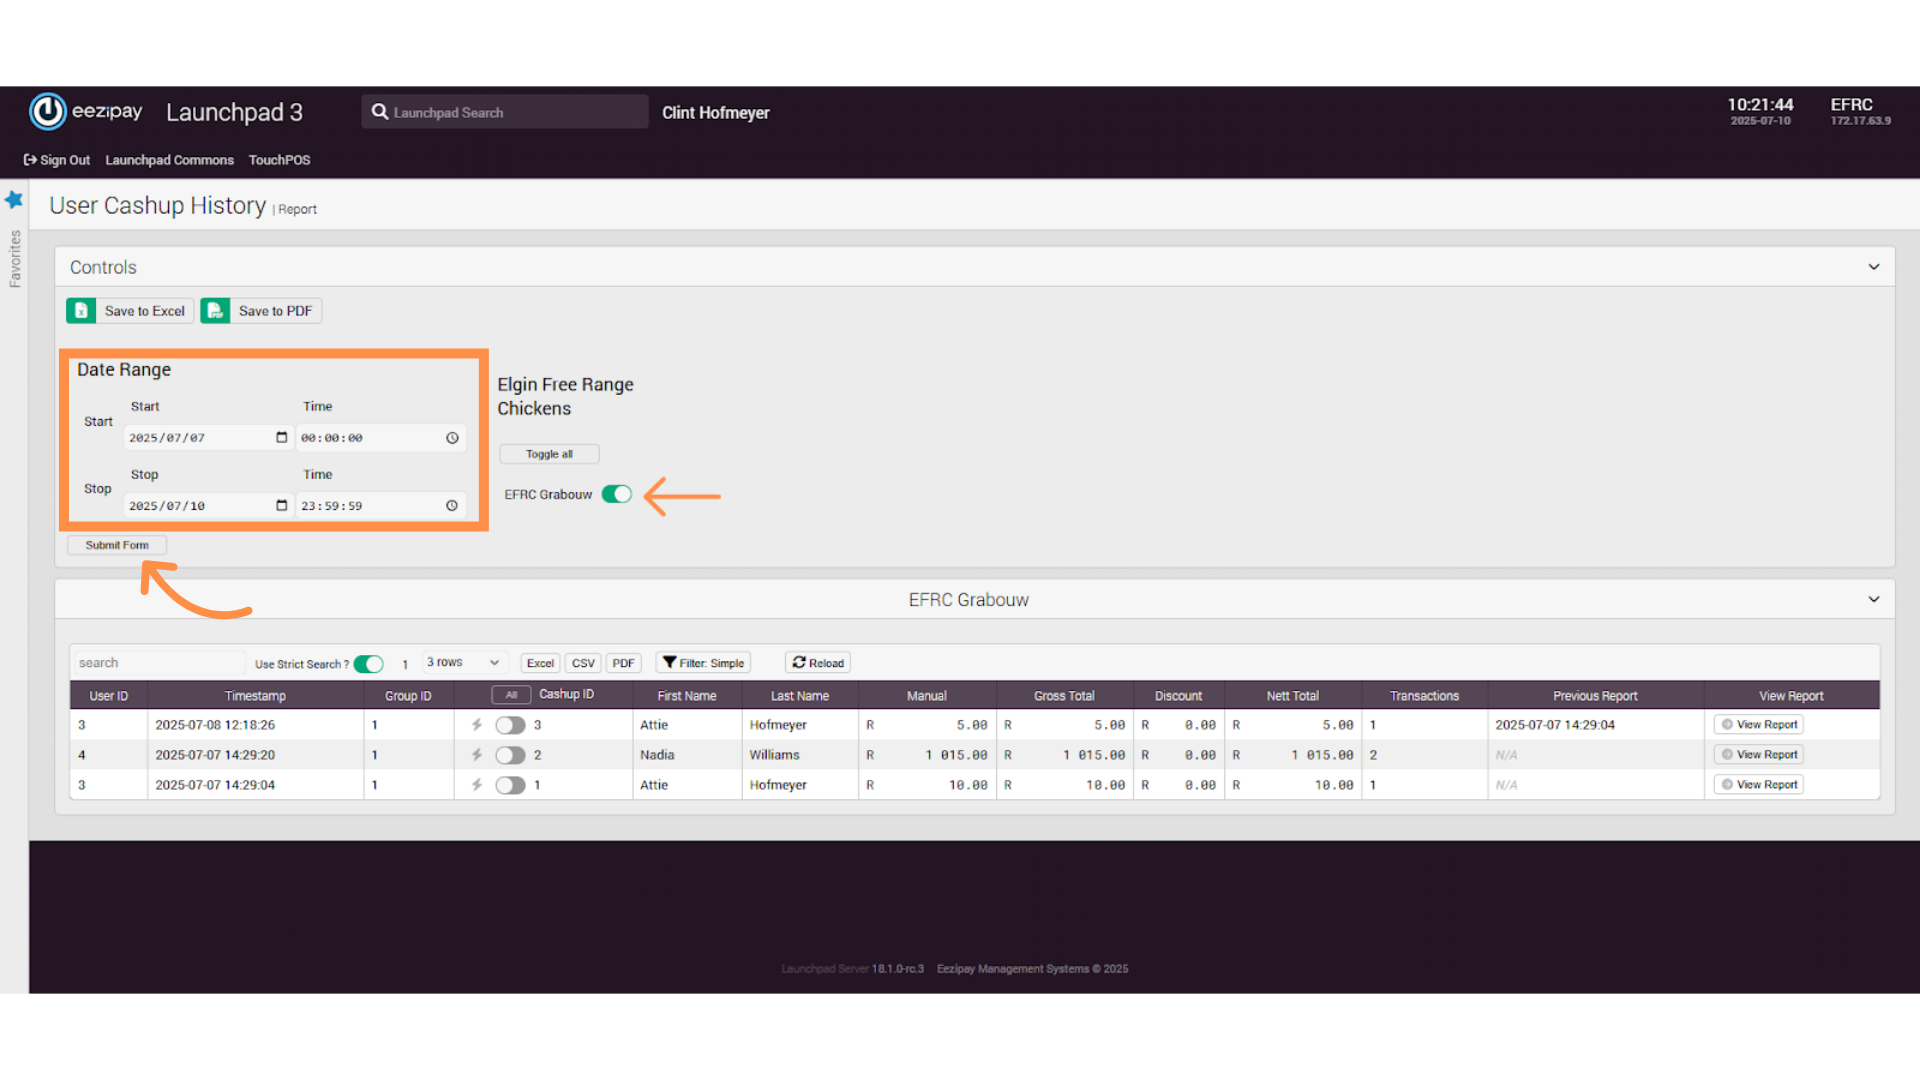
7. User Cash Up History Report
8. Drawing a Simple Report

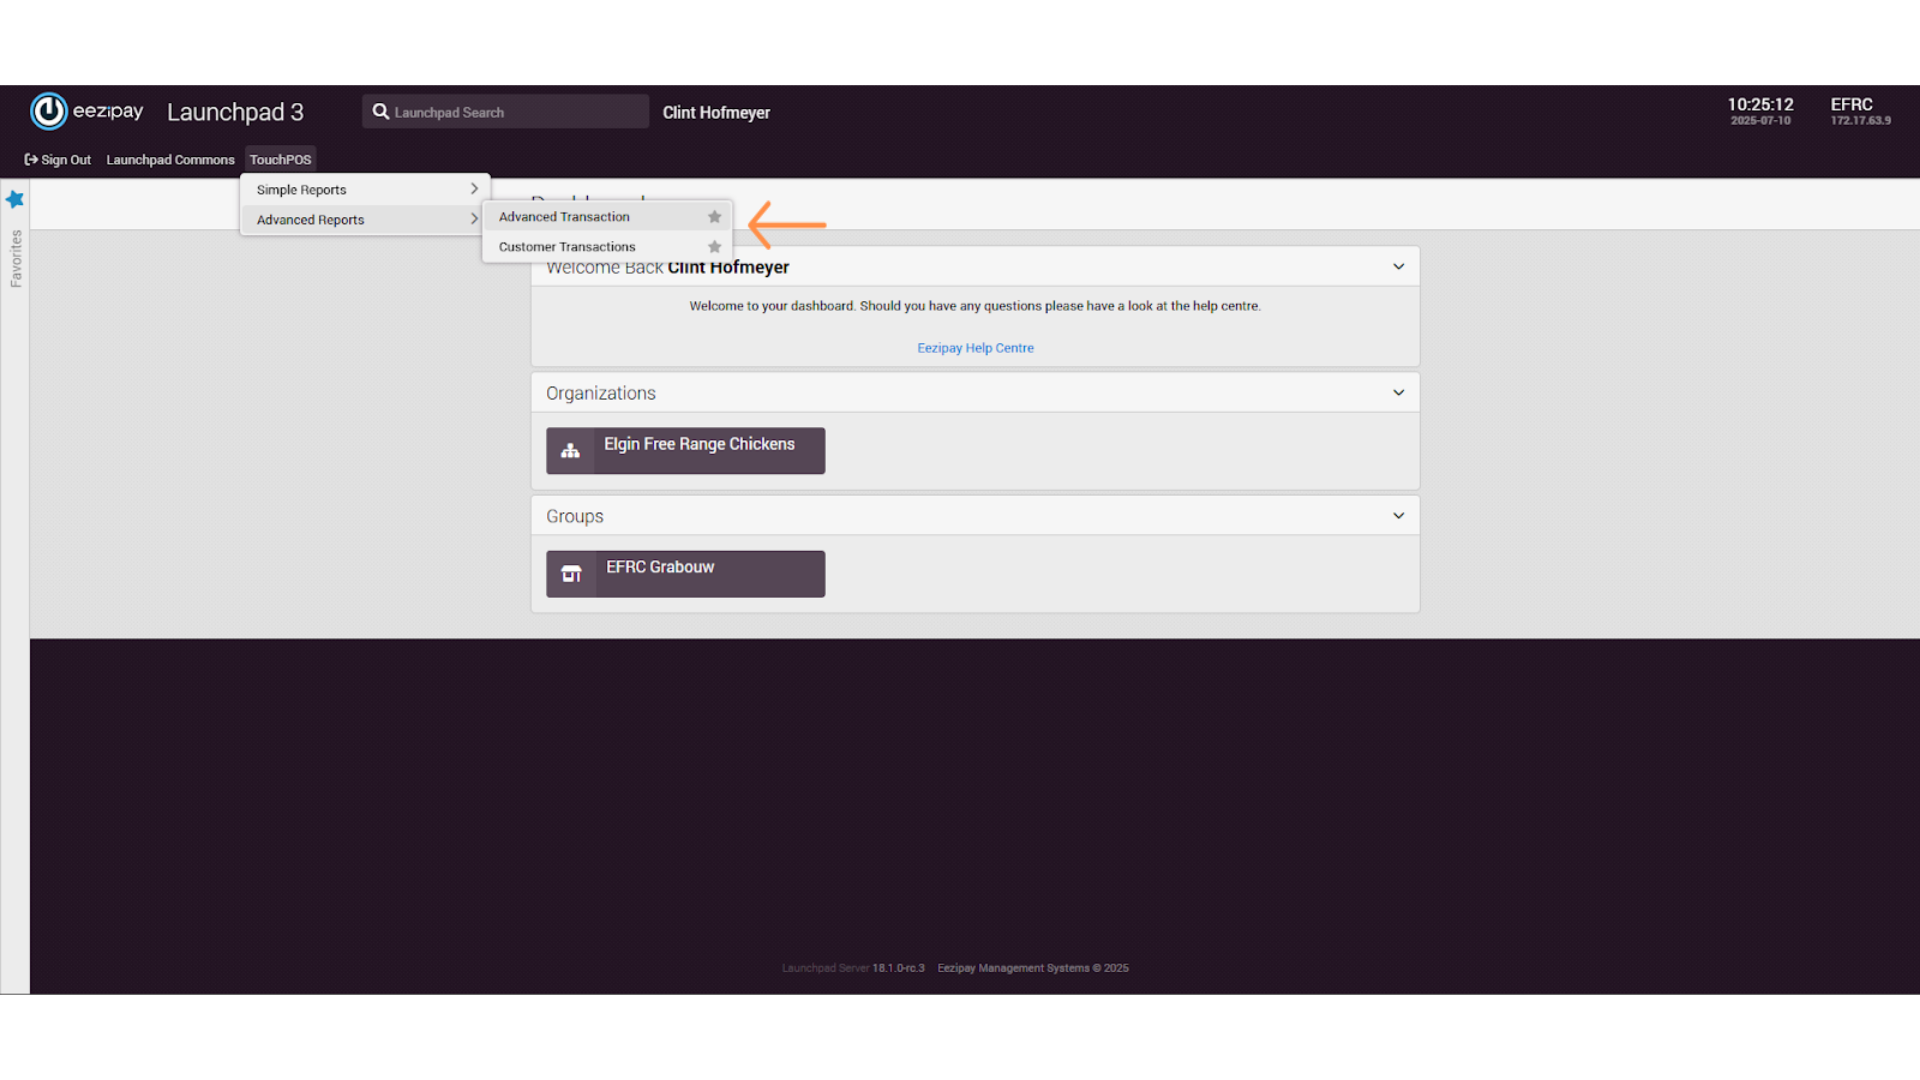
9. Advanced Reporting

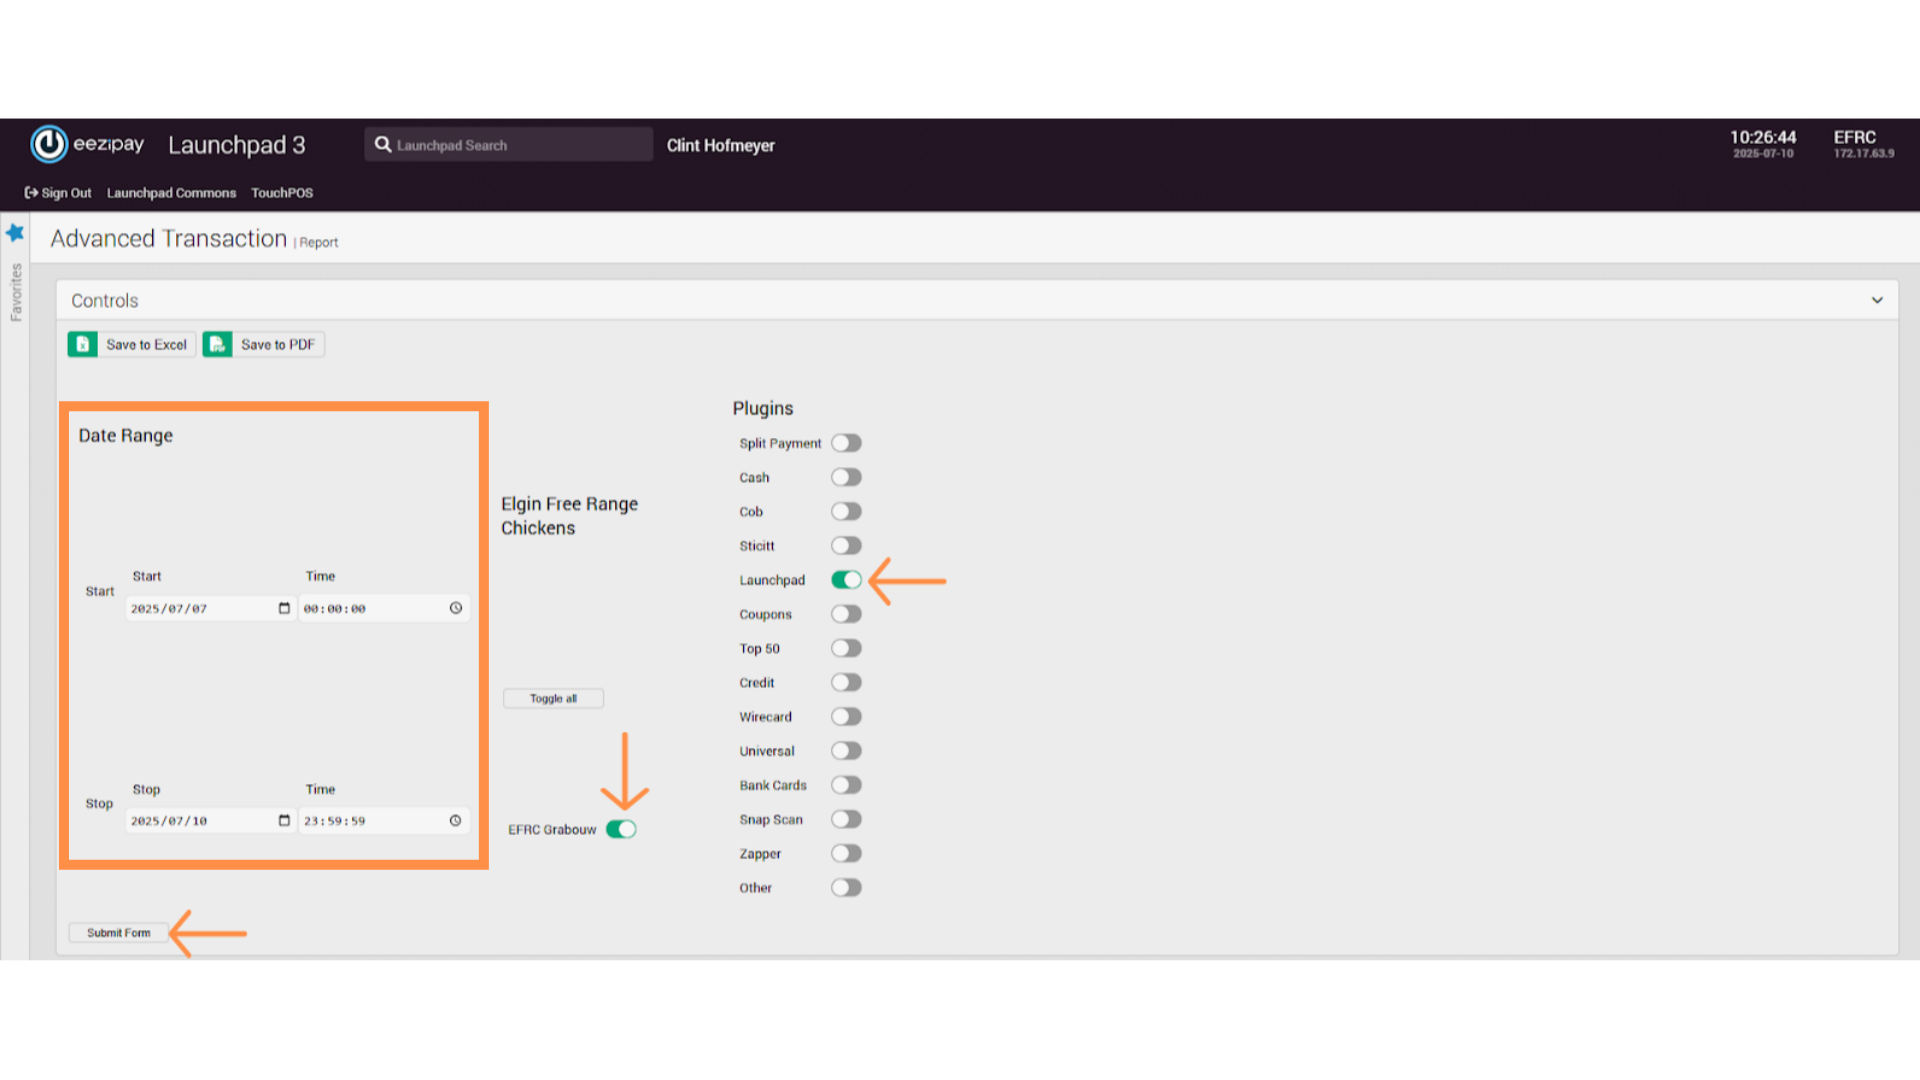
10. Advanced Transaction Report
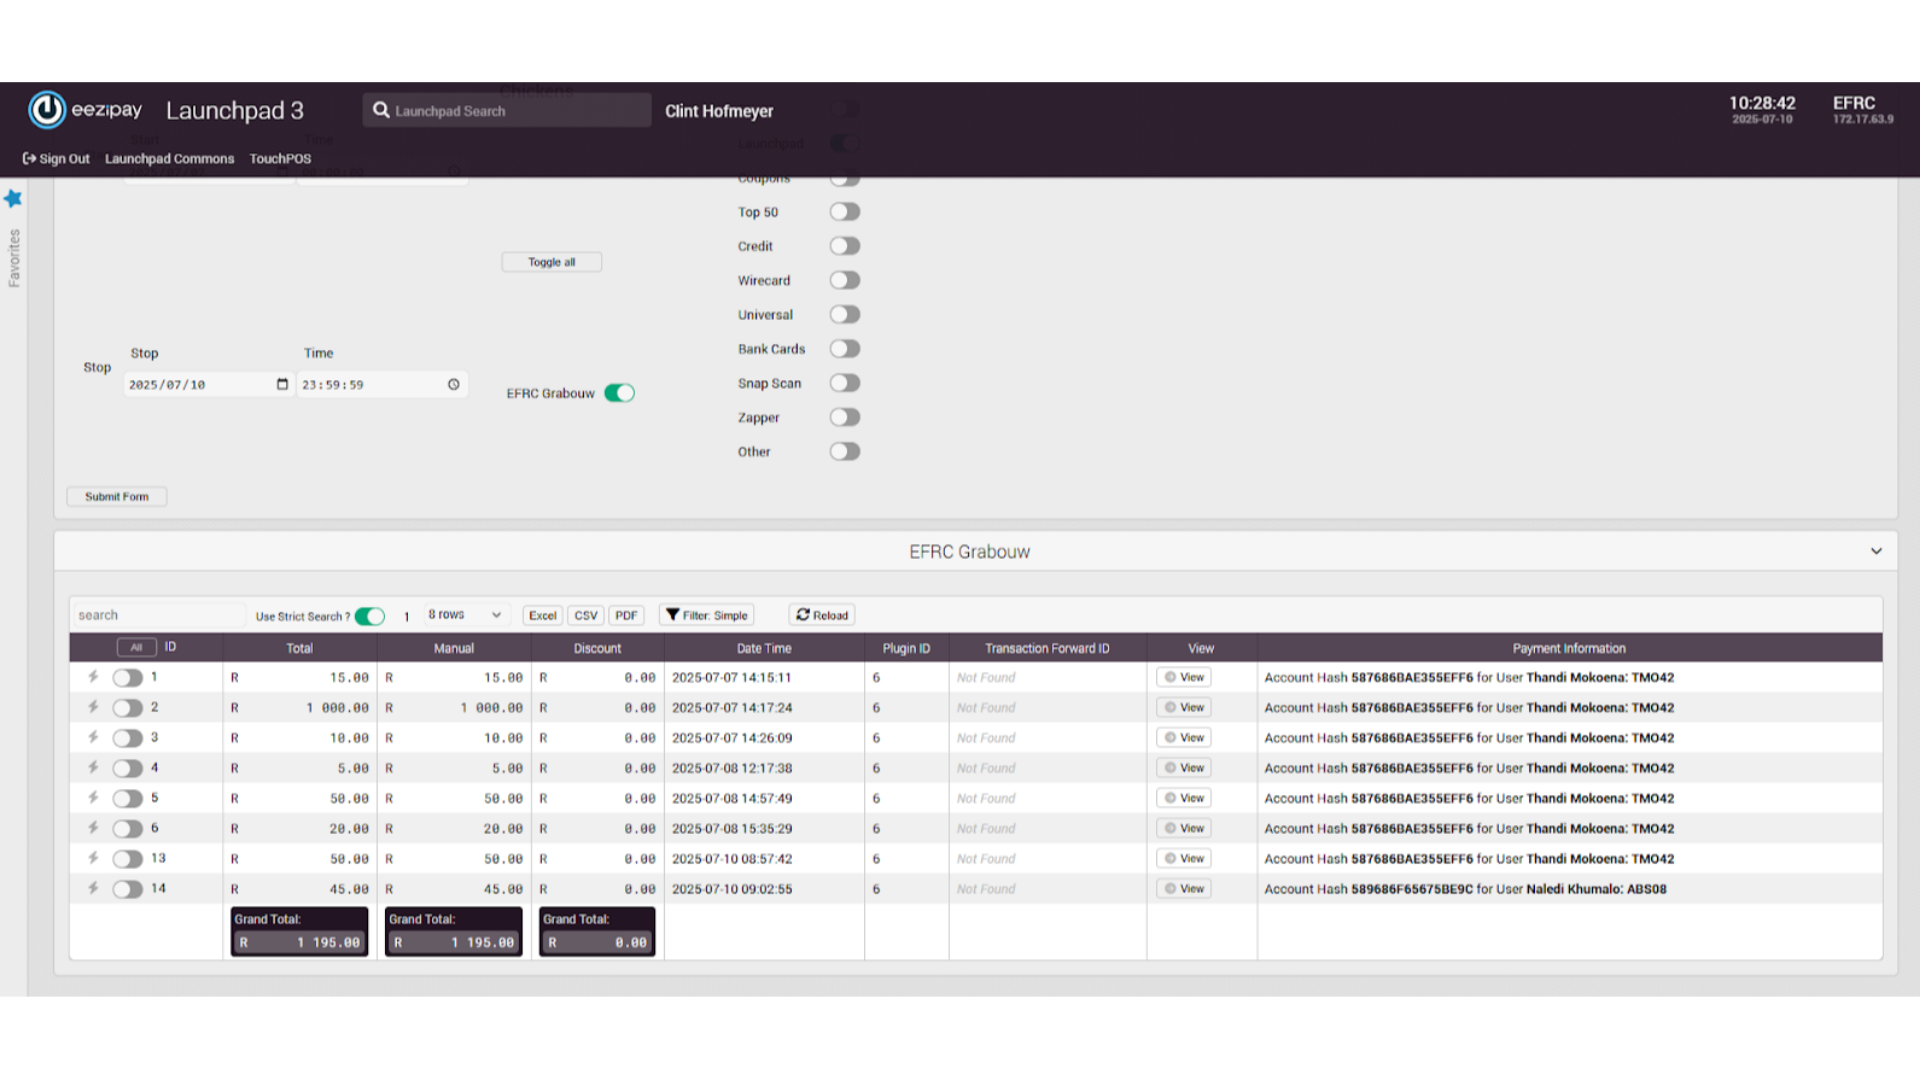
11. Drawing an Advanced Transaction Report

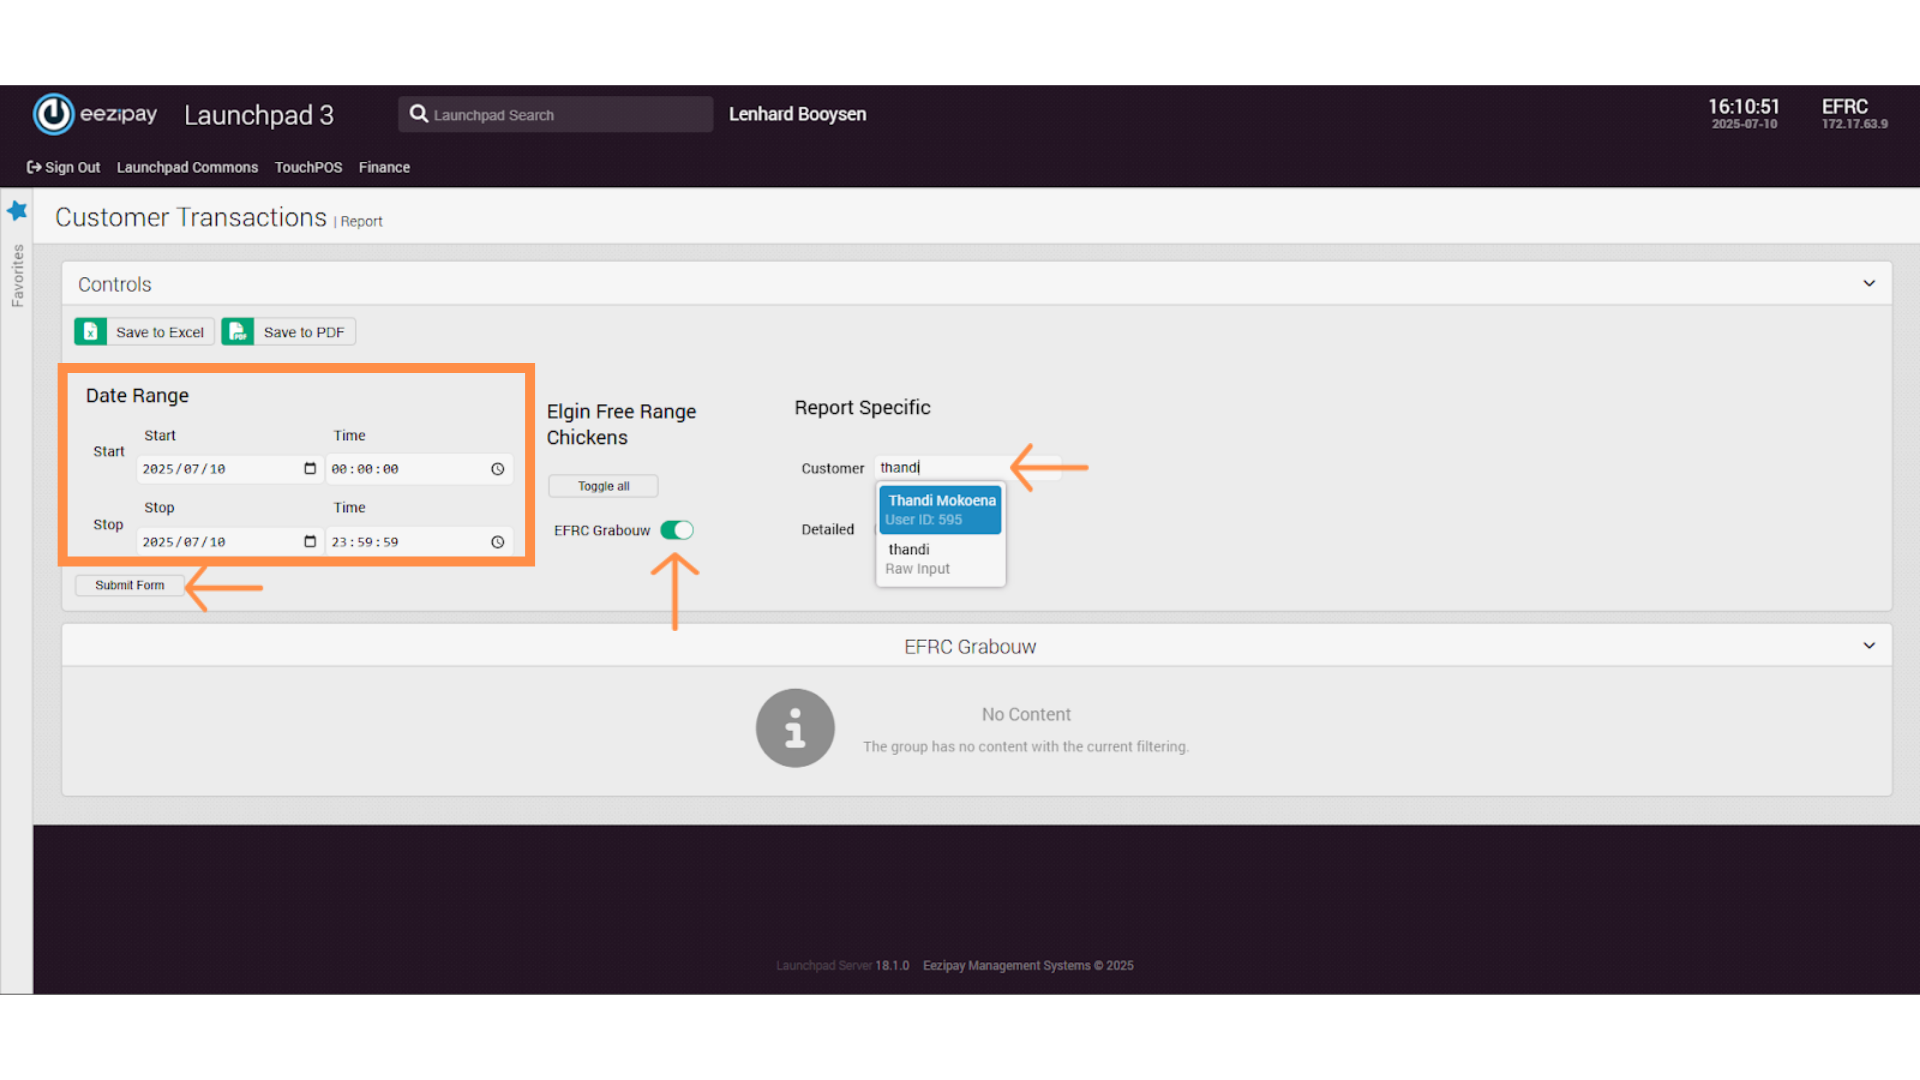
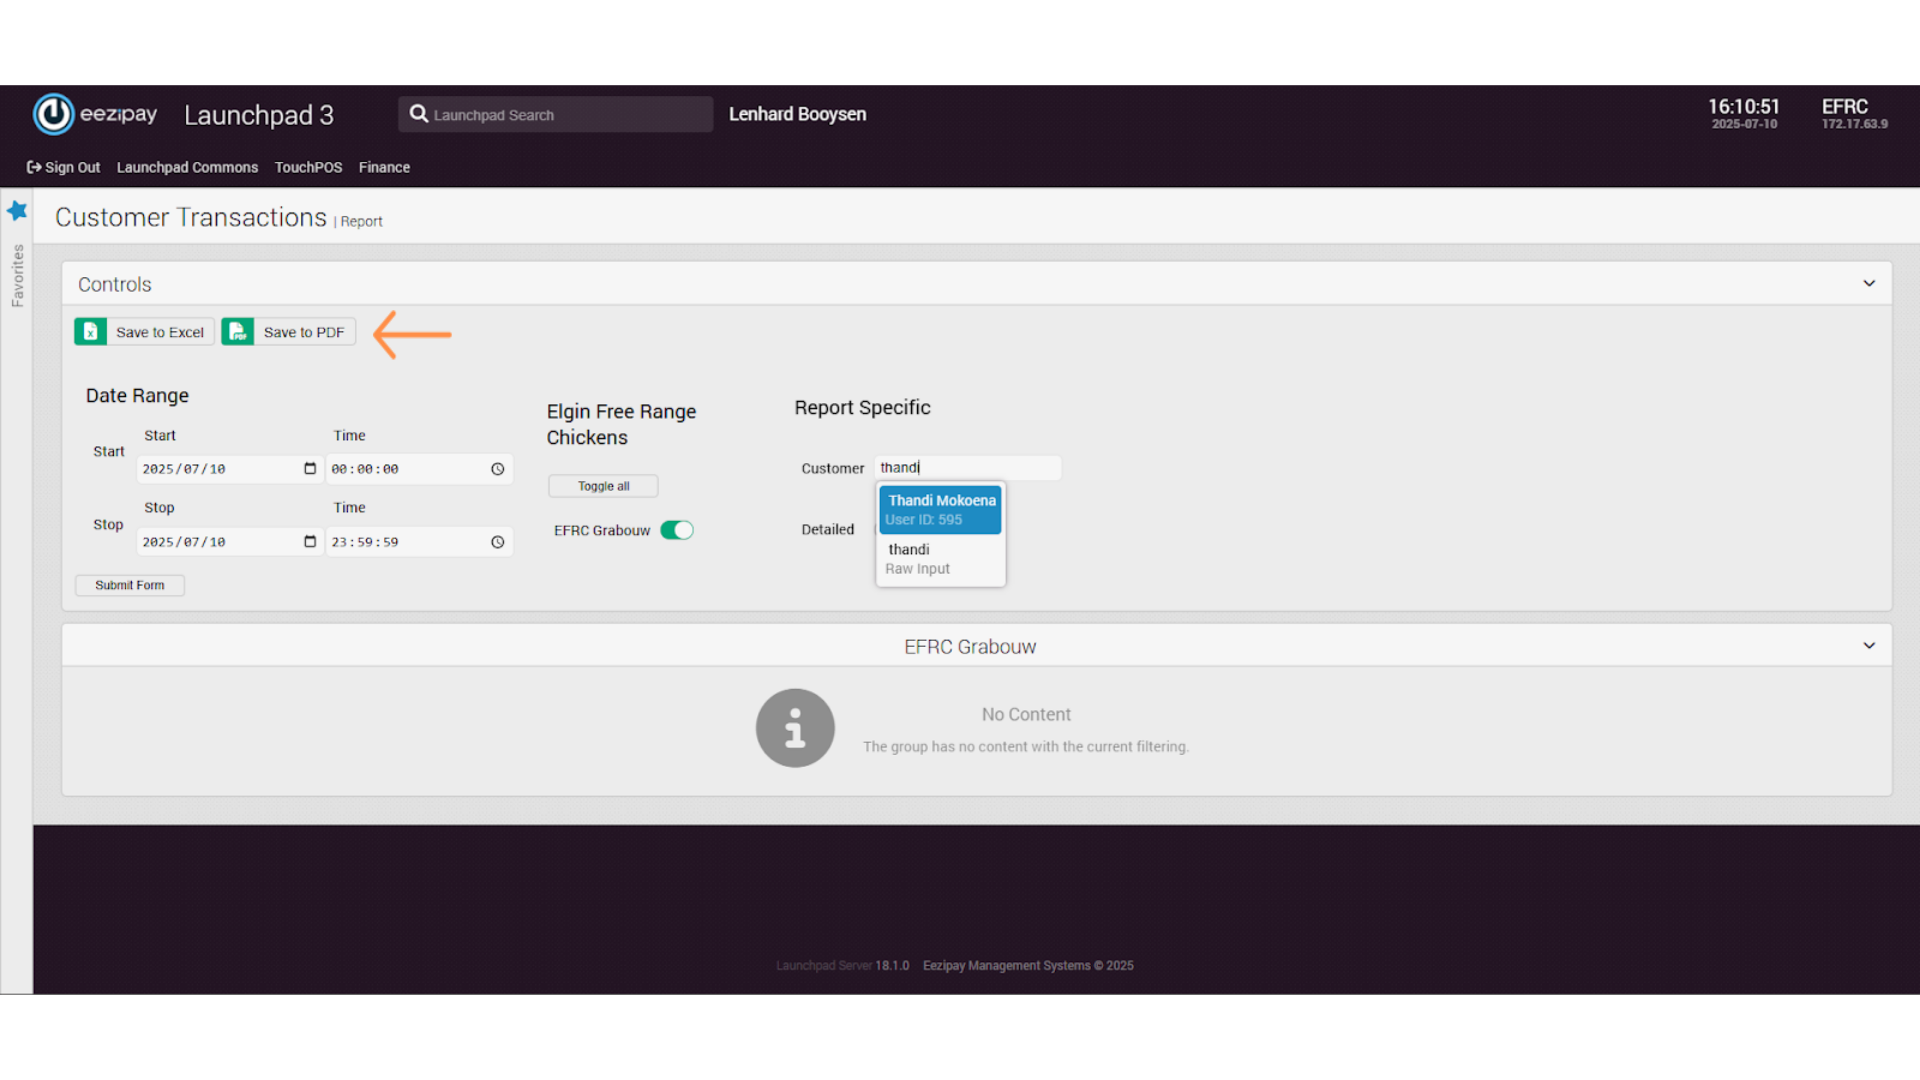
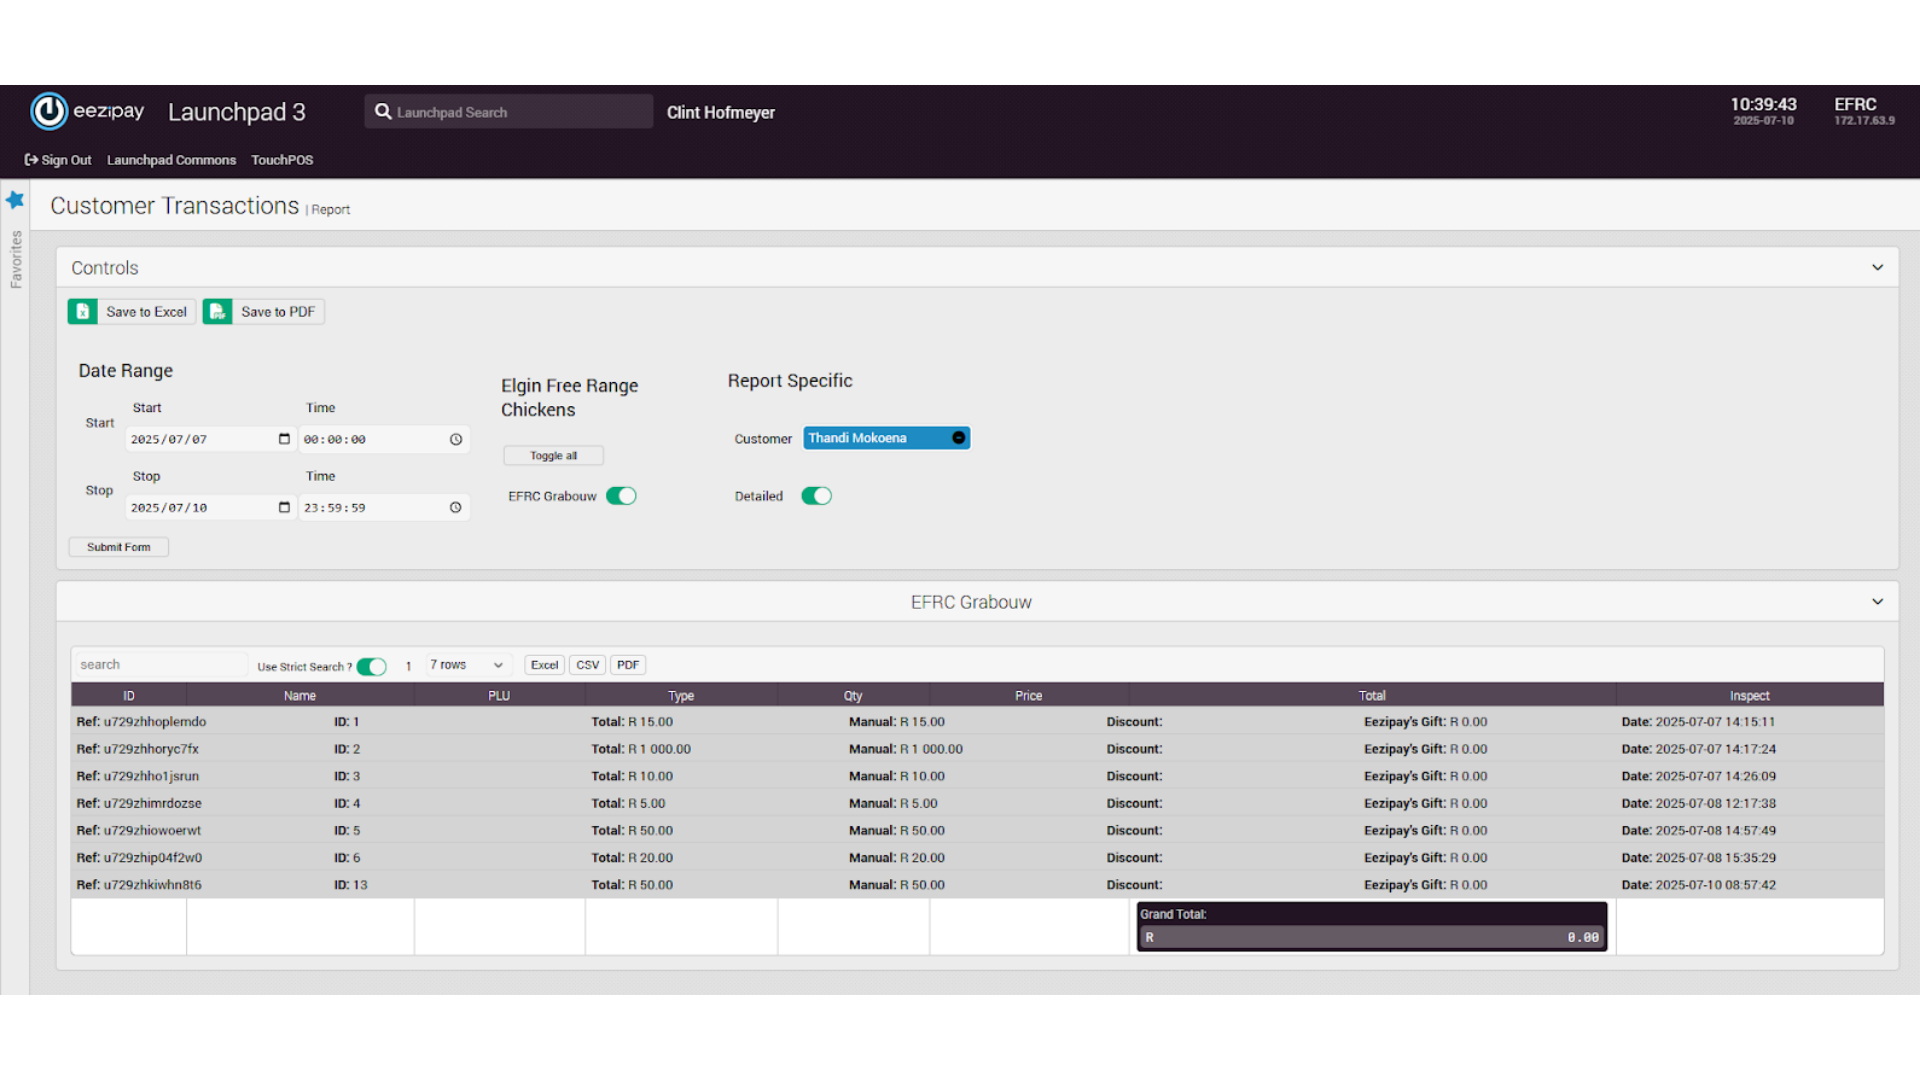
12. Customer Transaction Report

13. Drawing the Customer Transaction Report

14. How to Sign Out of the System
15. System Logged Out

EFRC – Launchpad – HR User Guide
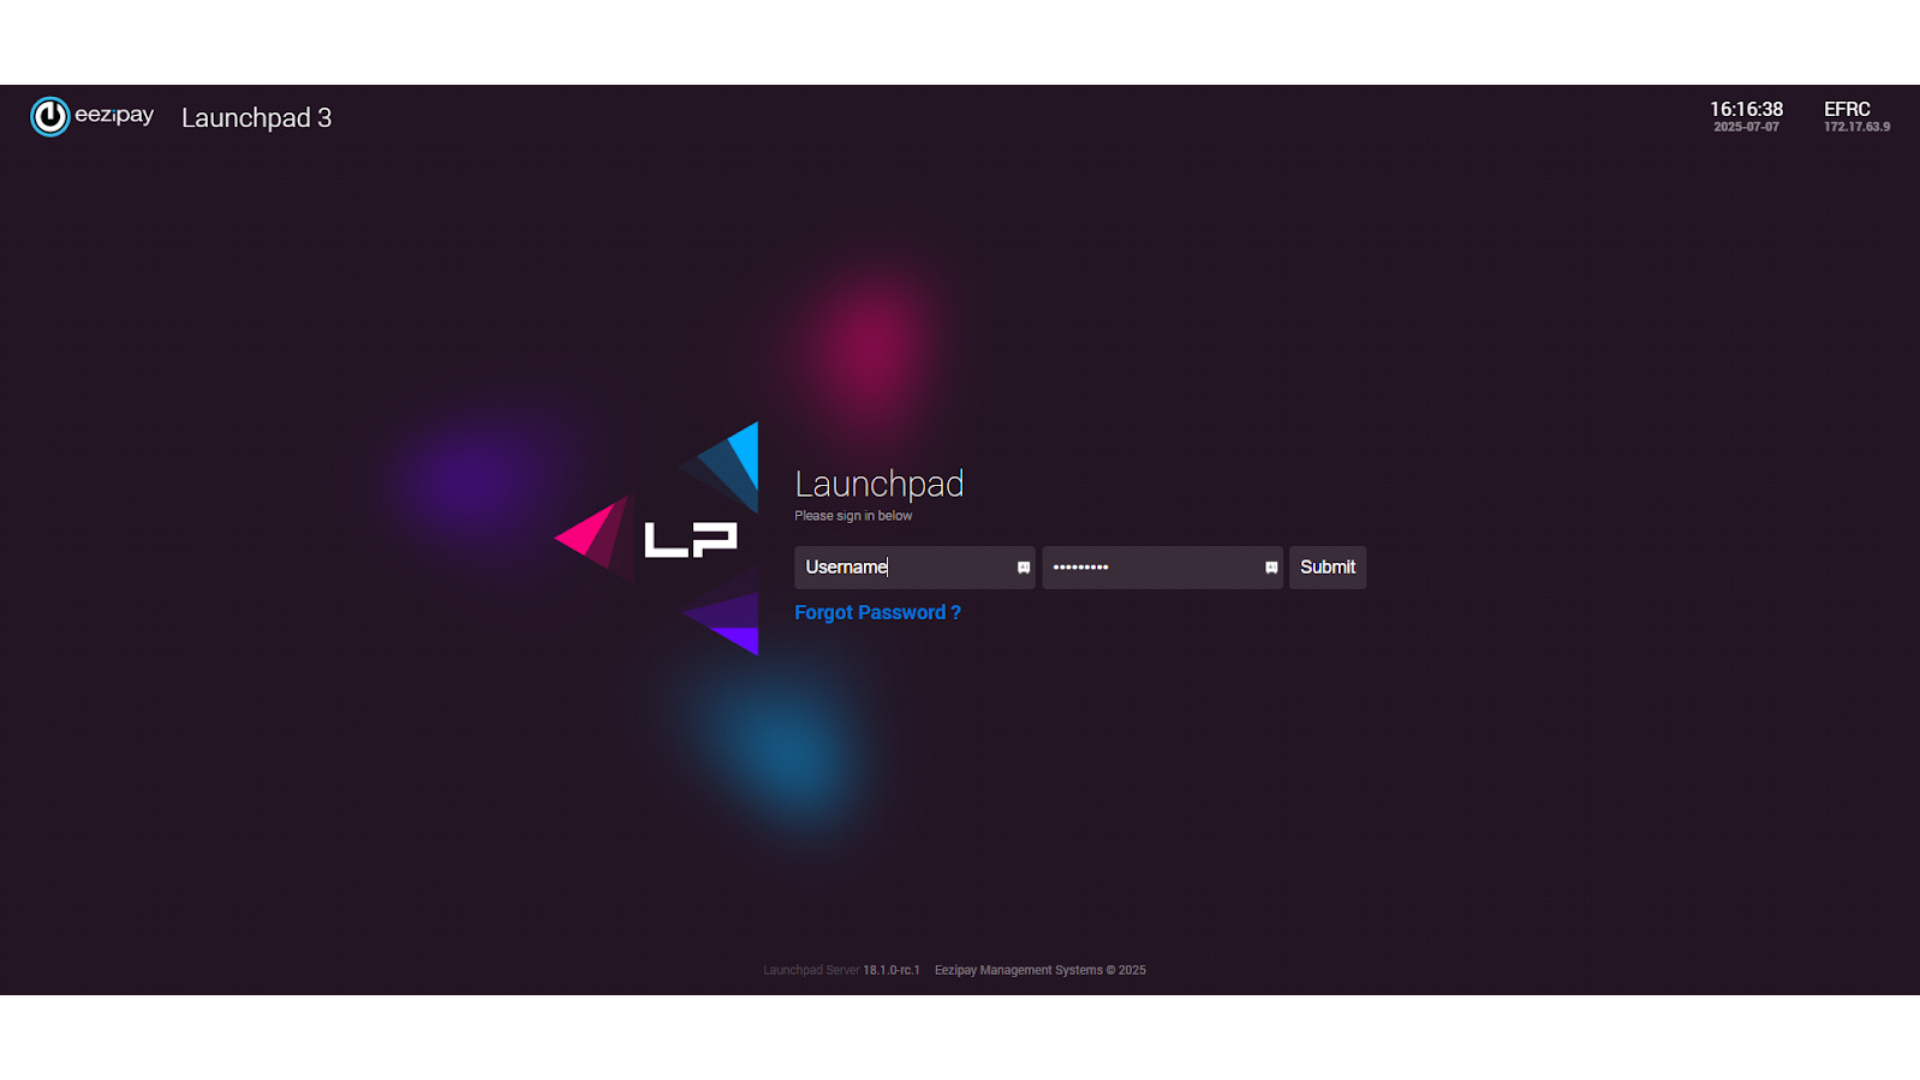
1. How to Log into Launchpad as a HR/ Administrator

2. How to Manage Organisation Users

3. Organisation View
4. Confirmation Page
5. Success Message
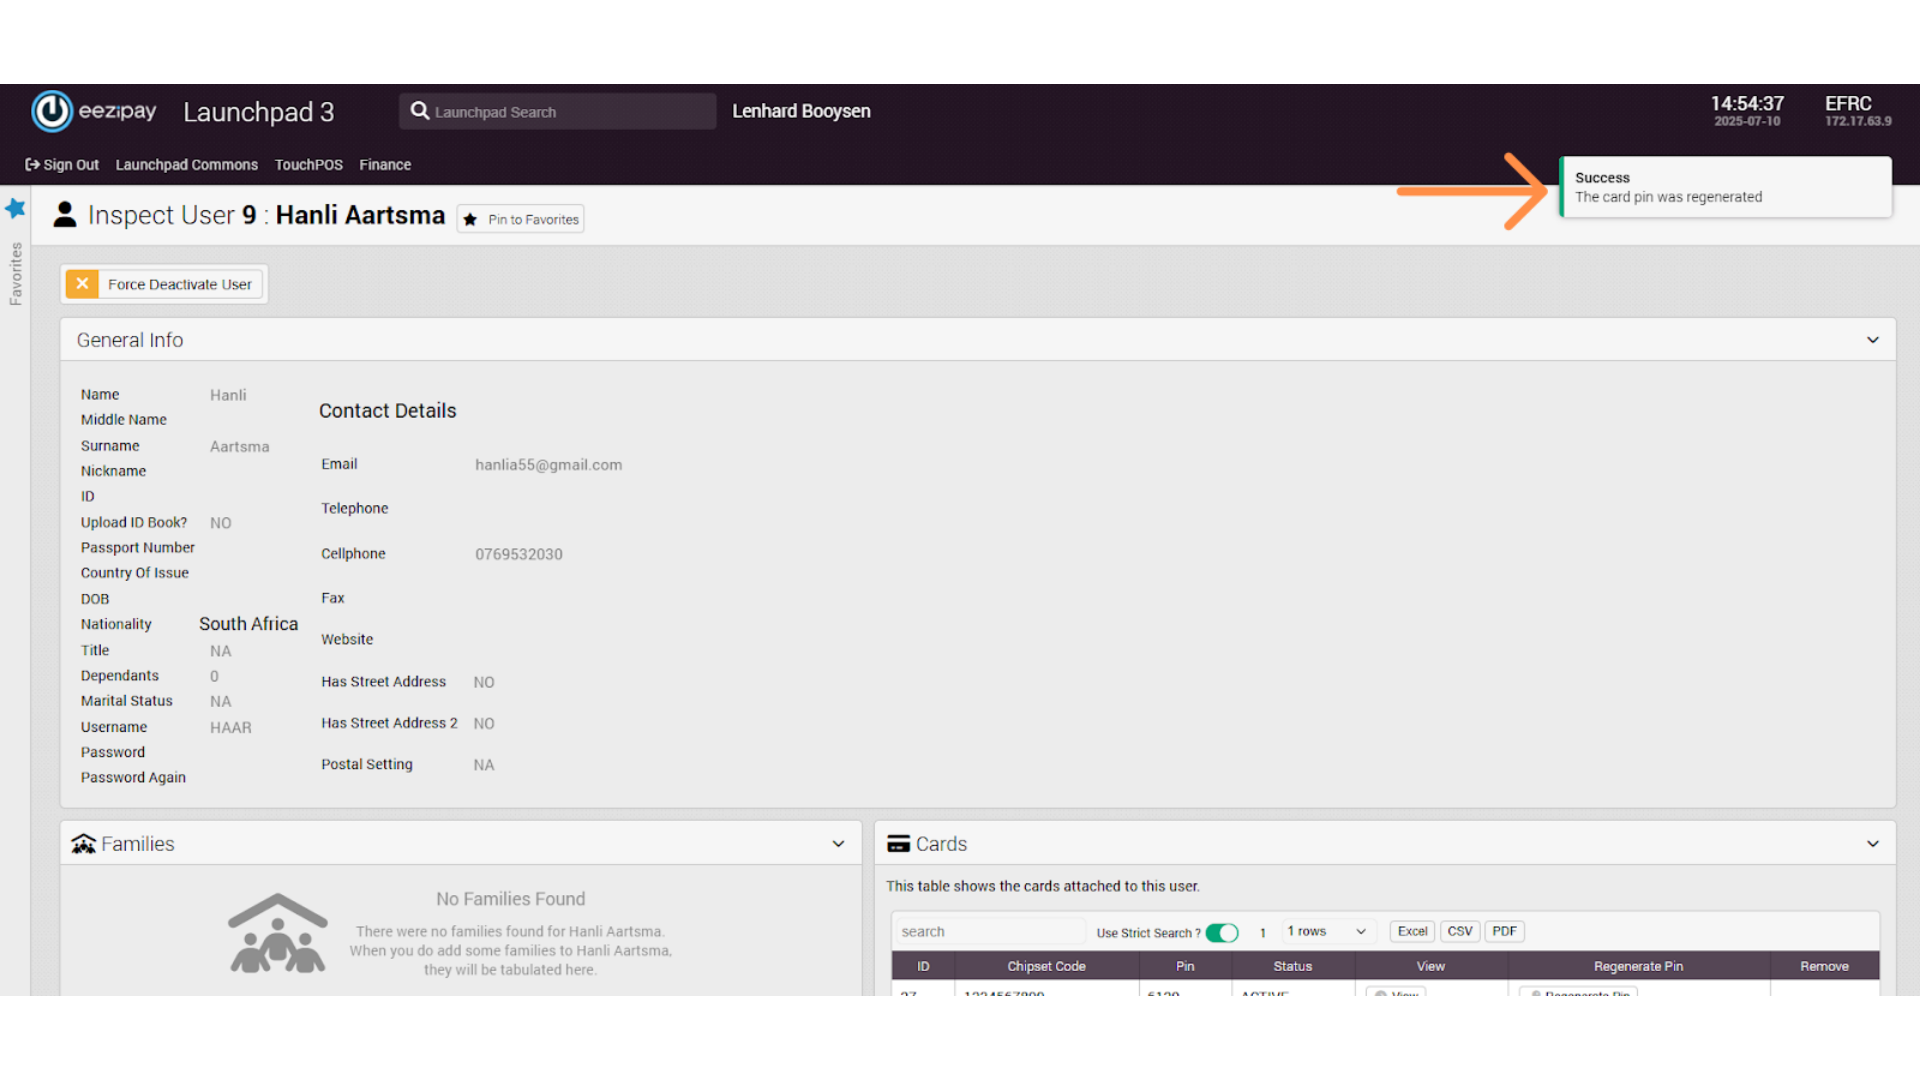
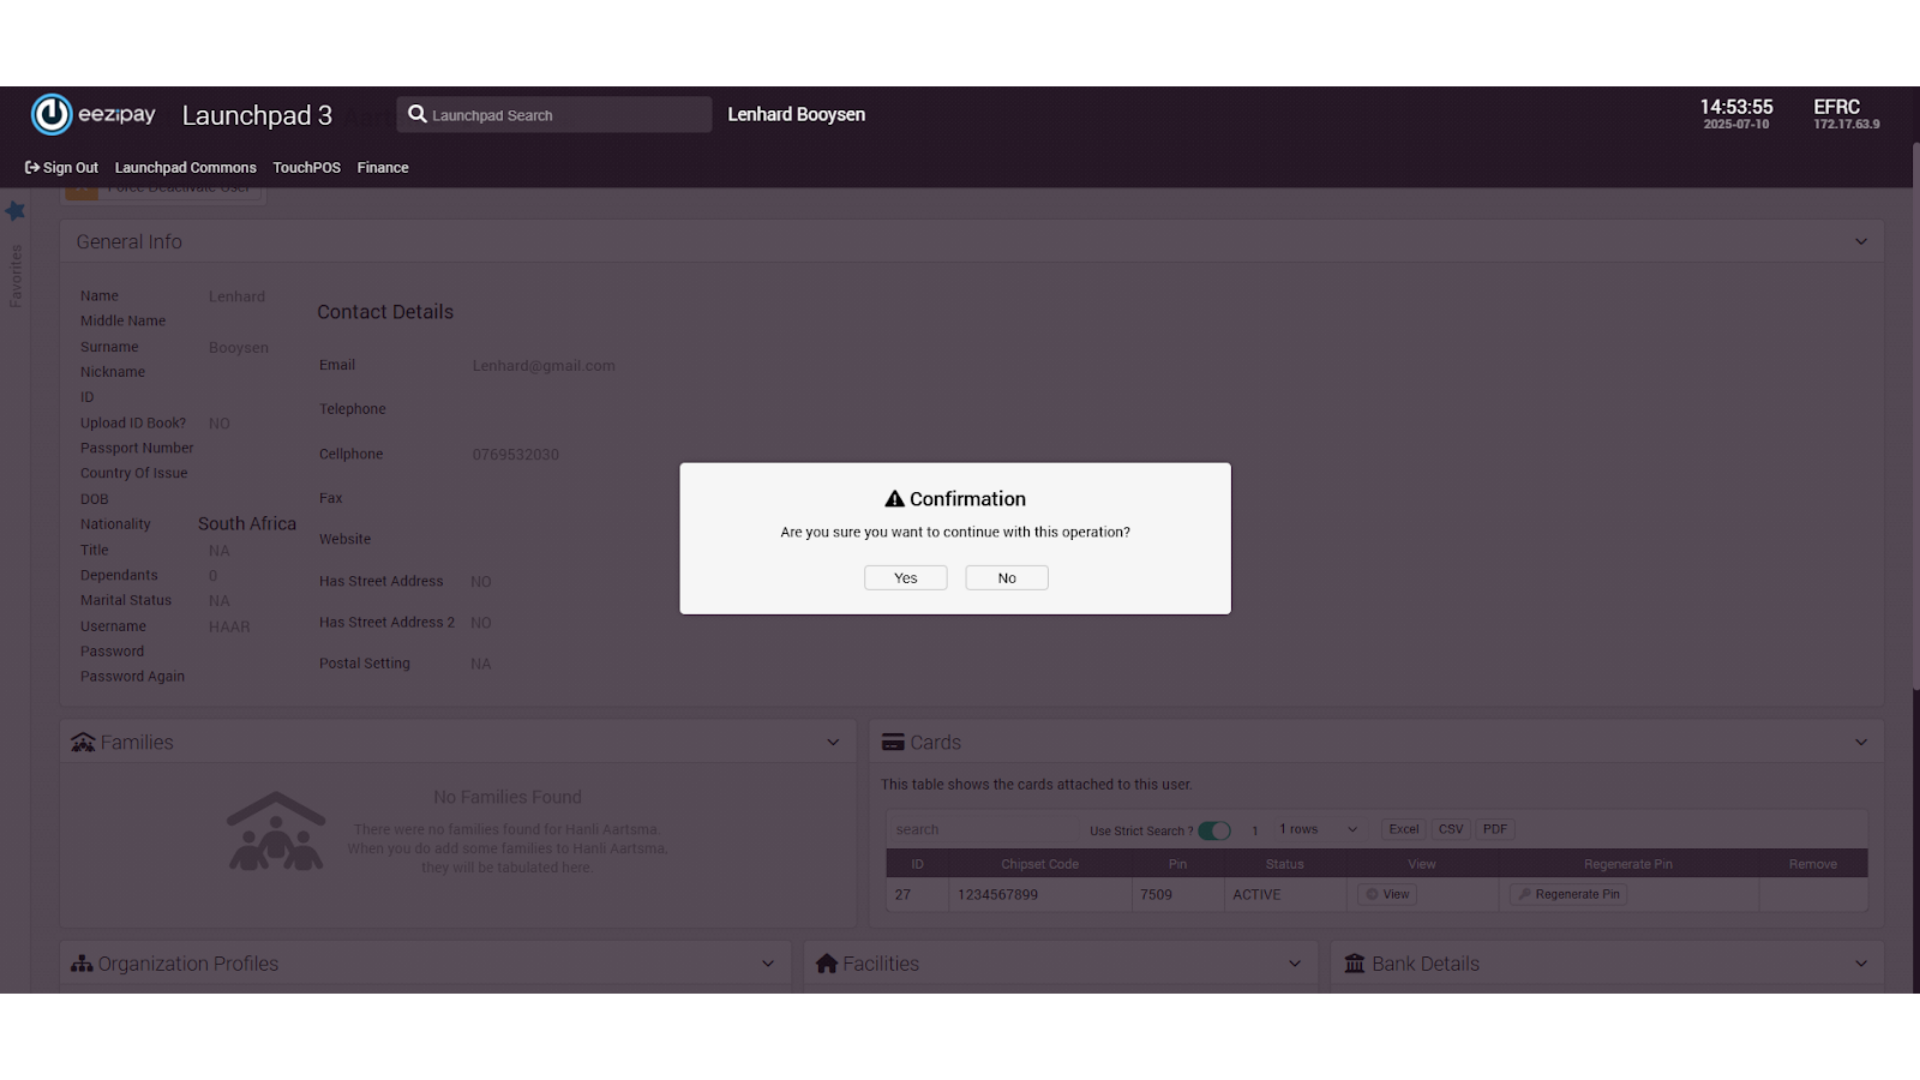
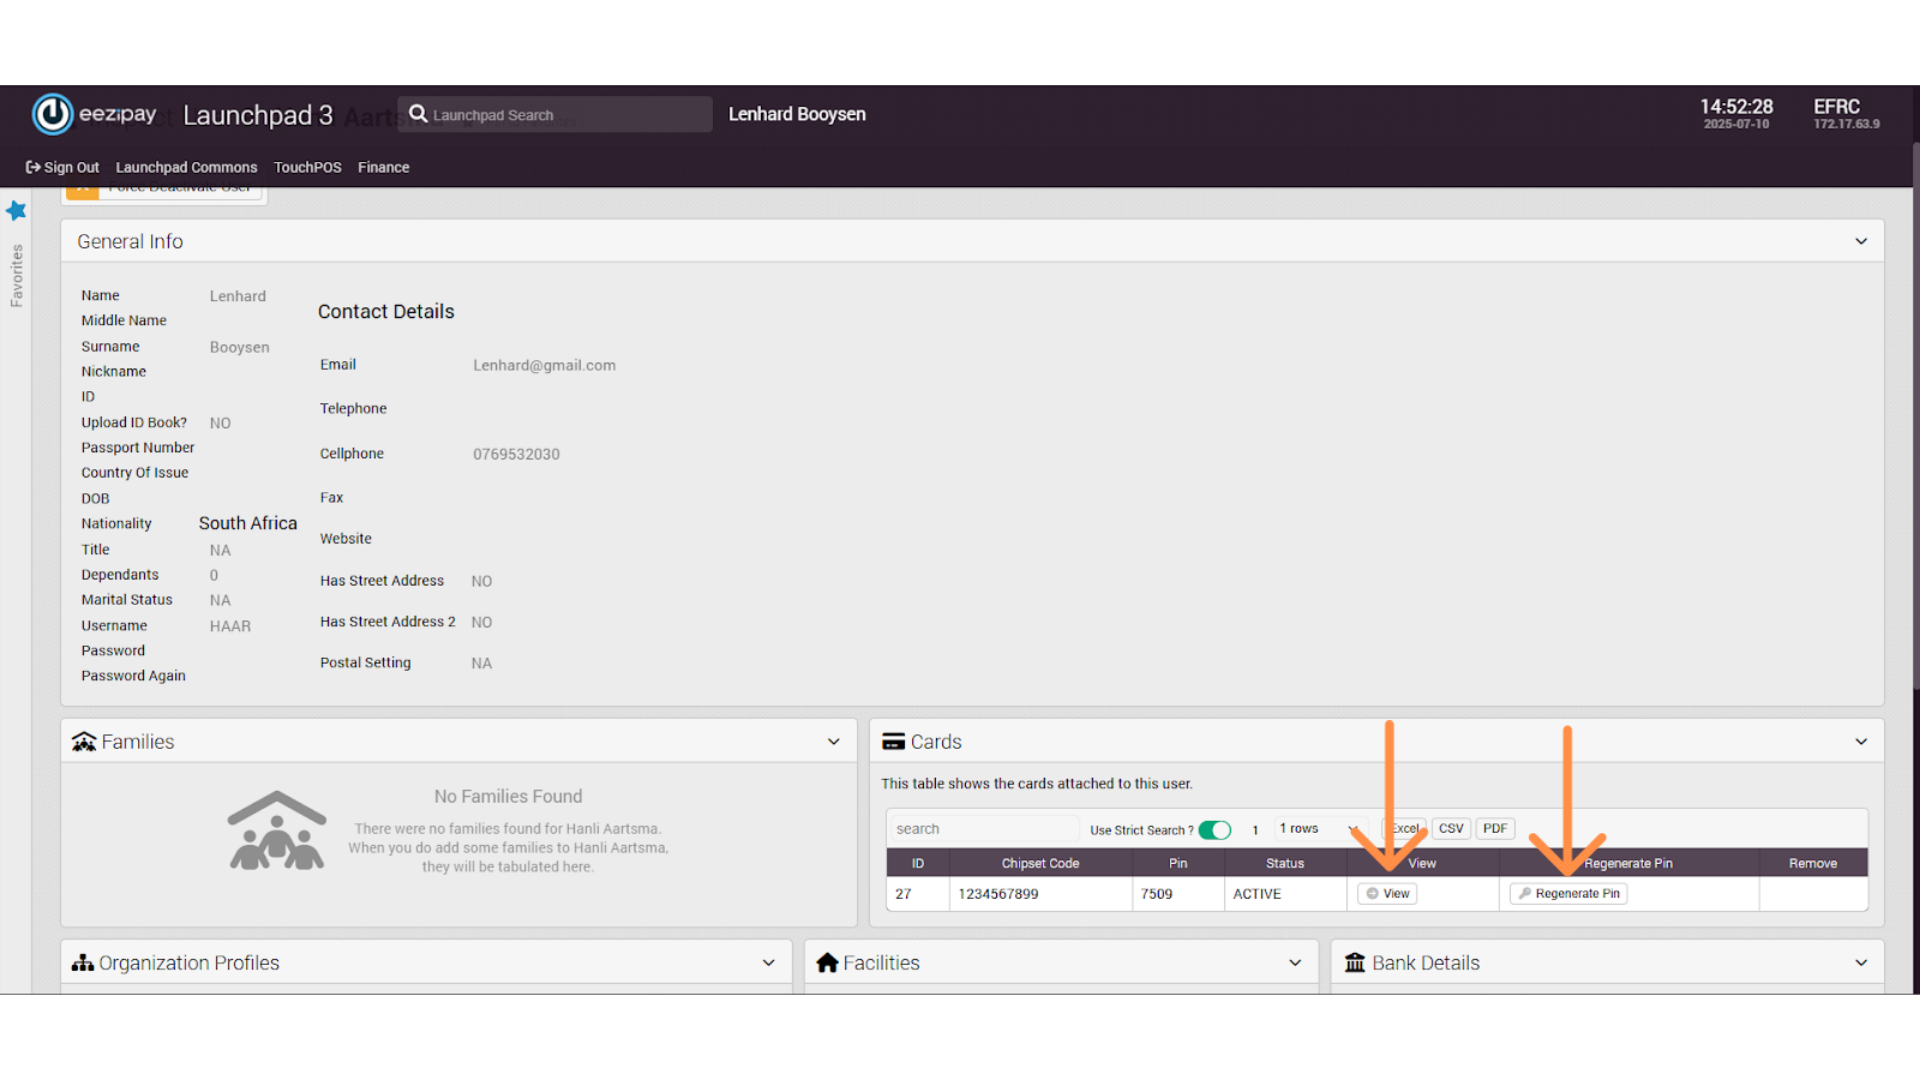
6. How to View & Regenerate Pins
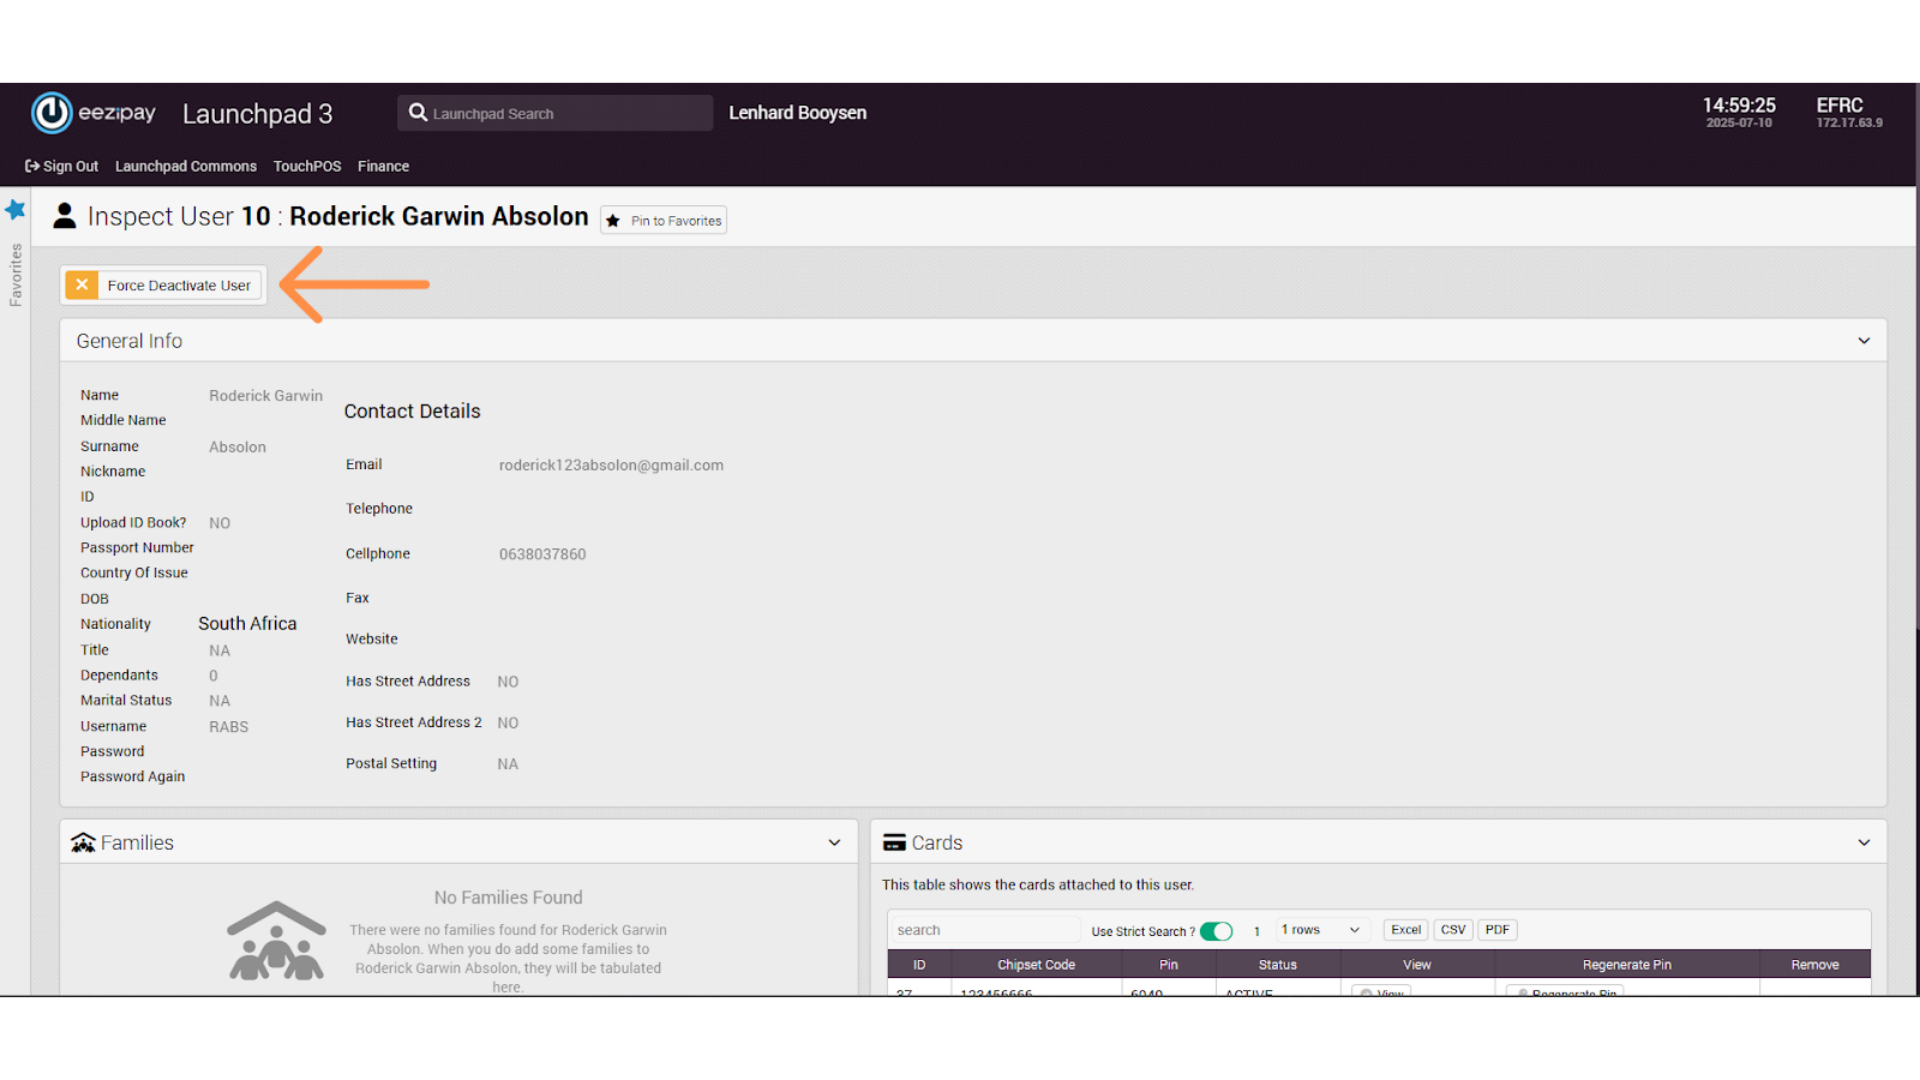
7. User Deactivation
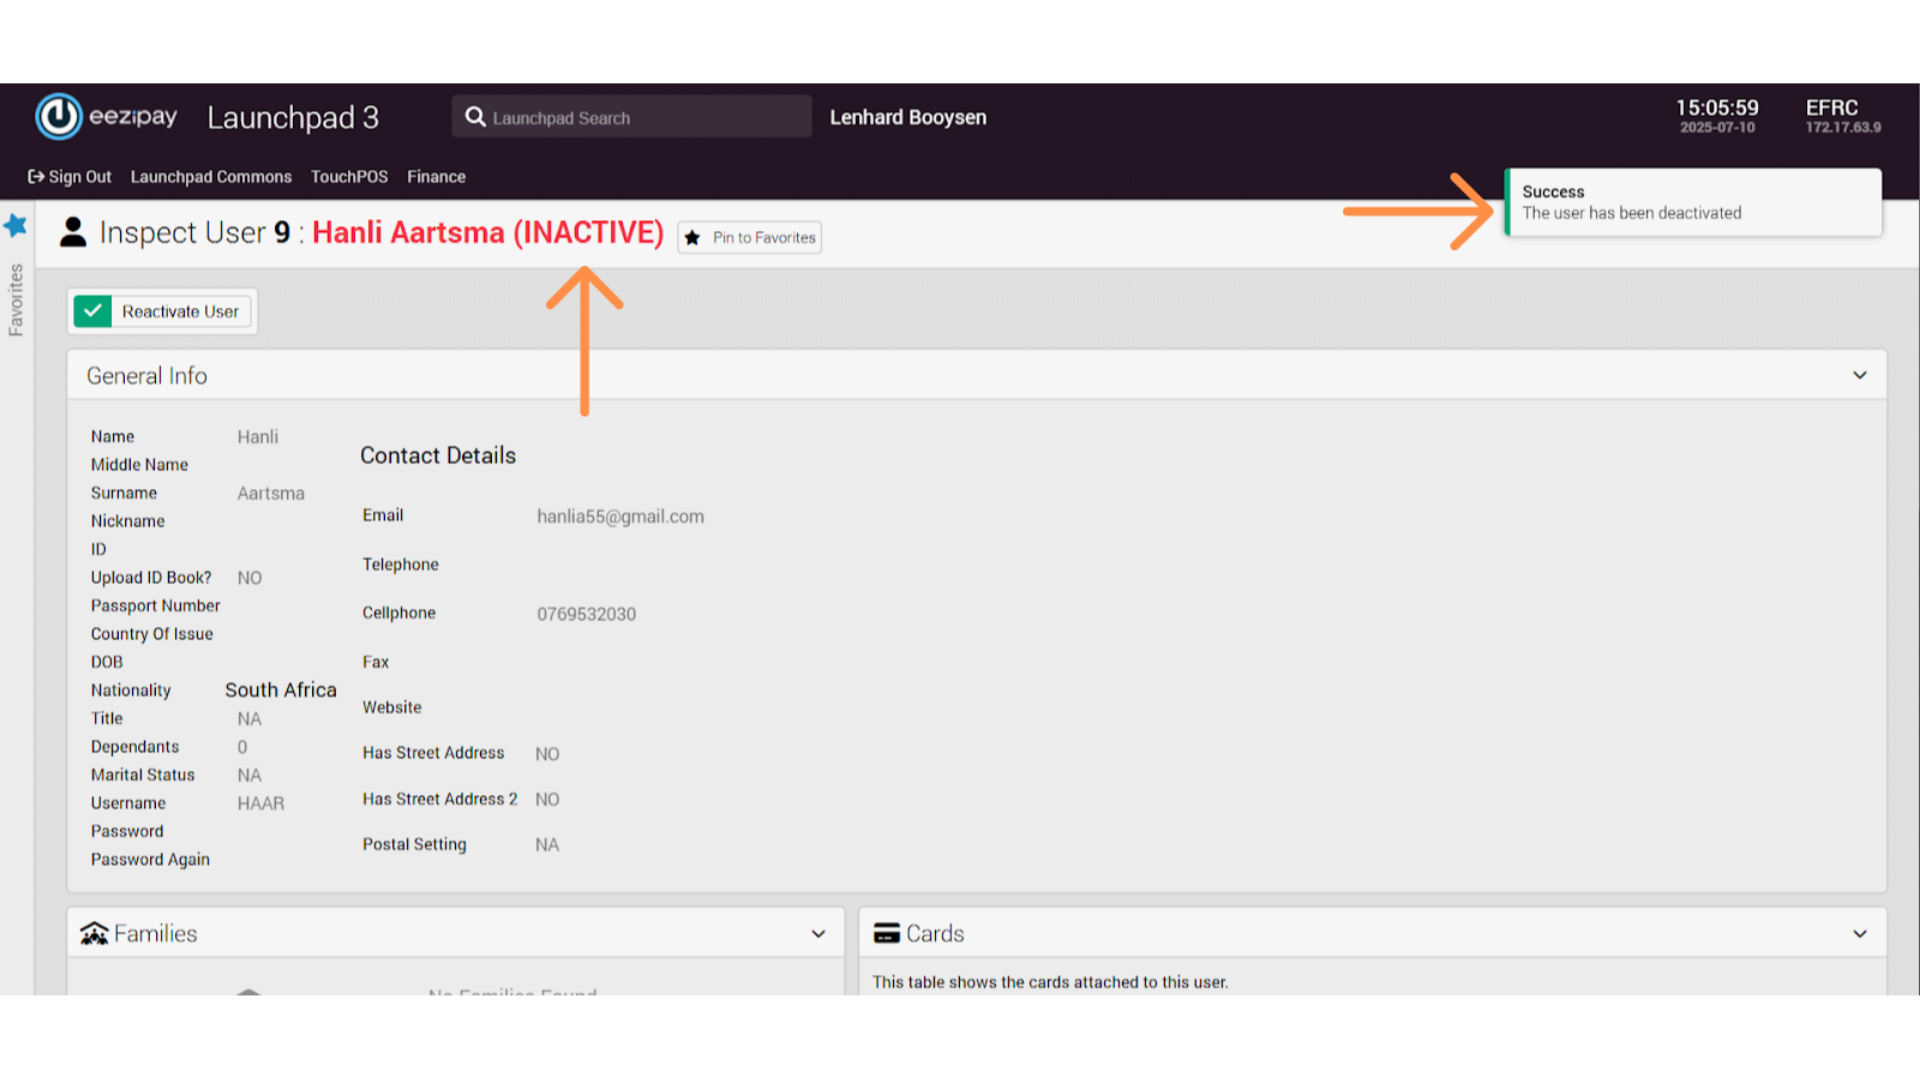
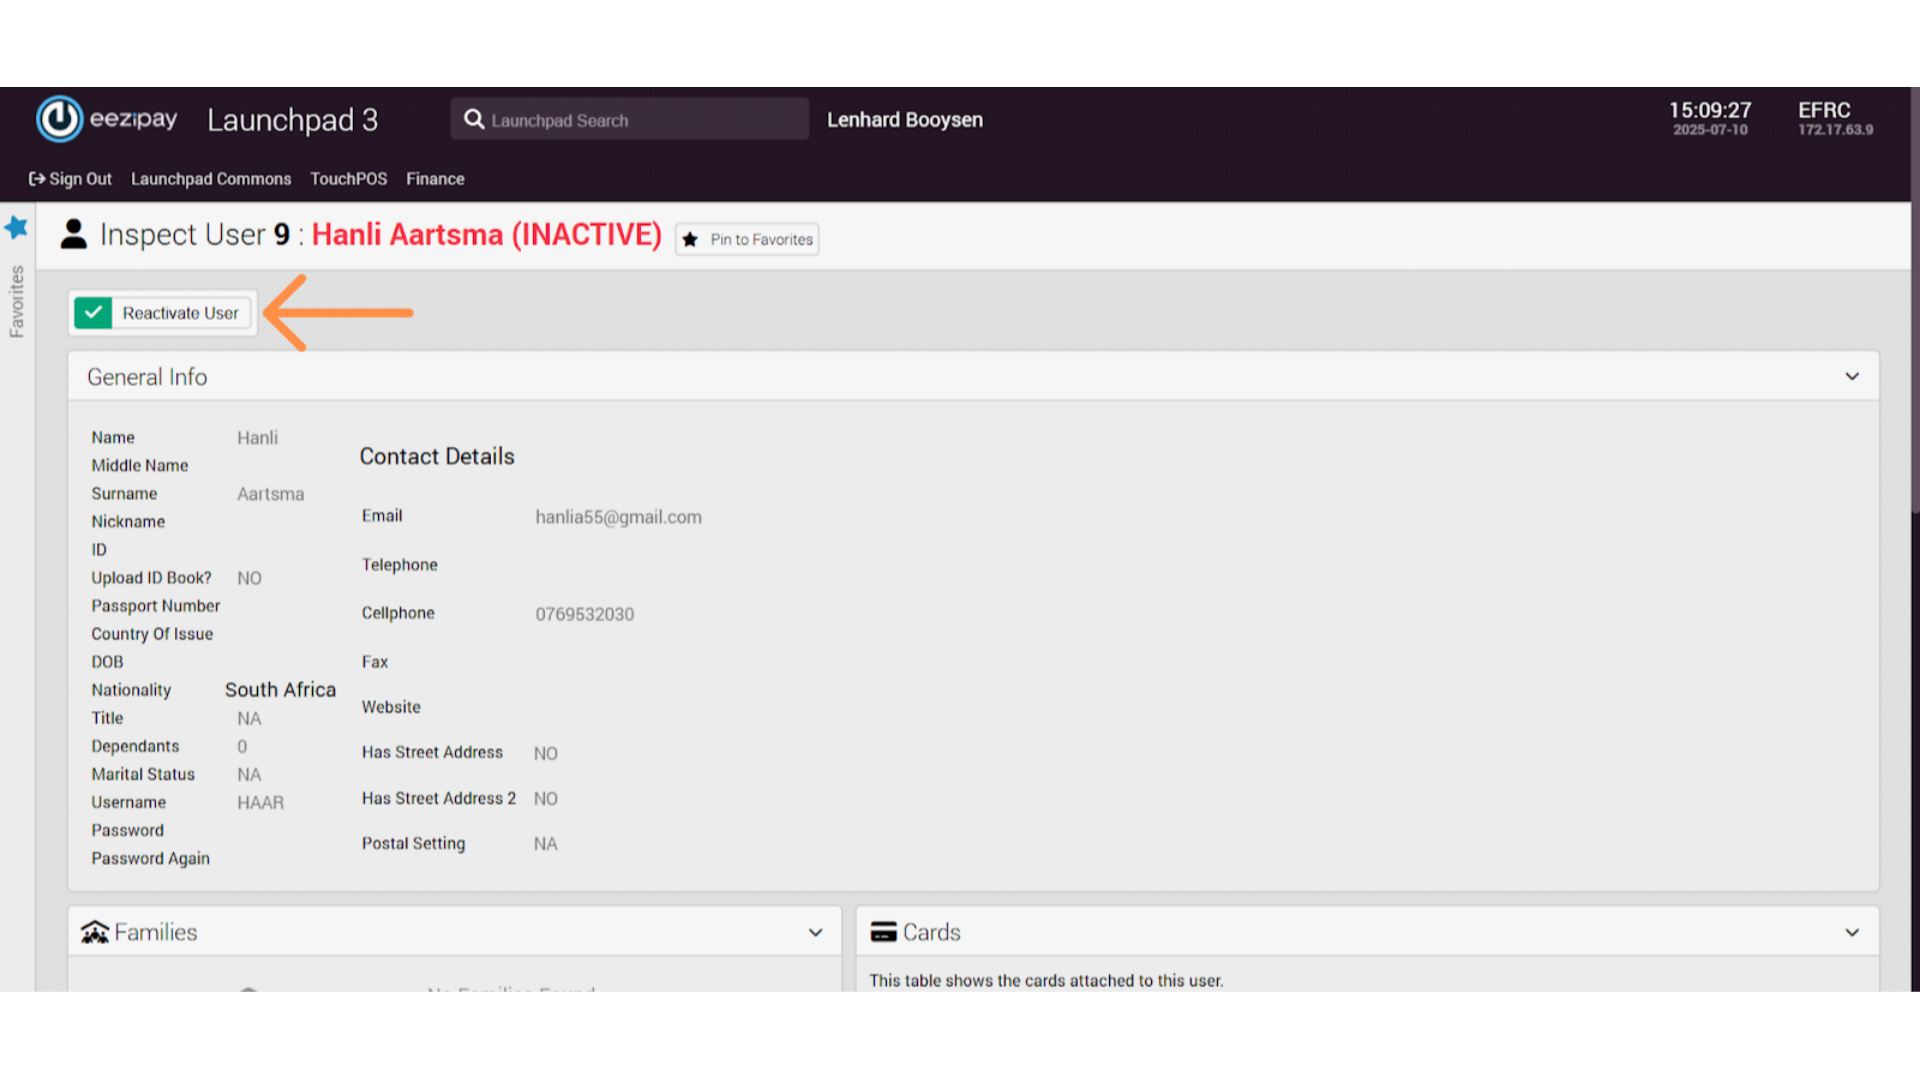
8. Inactive User
9. Reactivate User
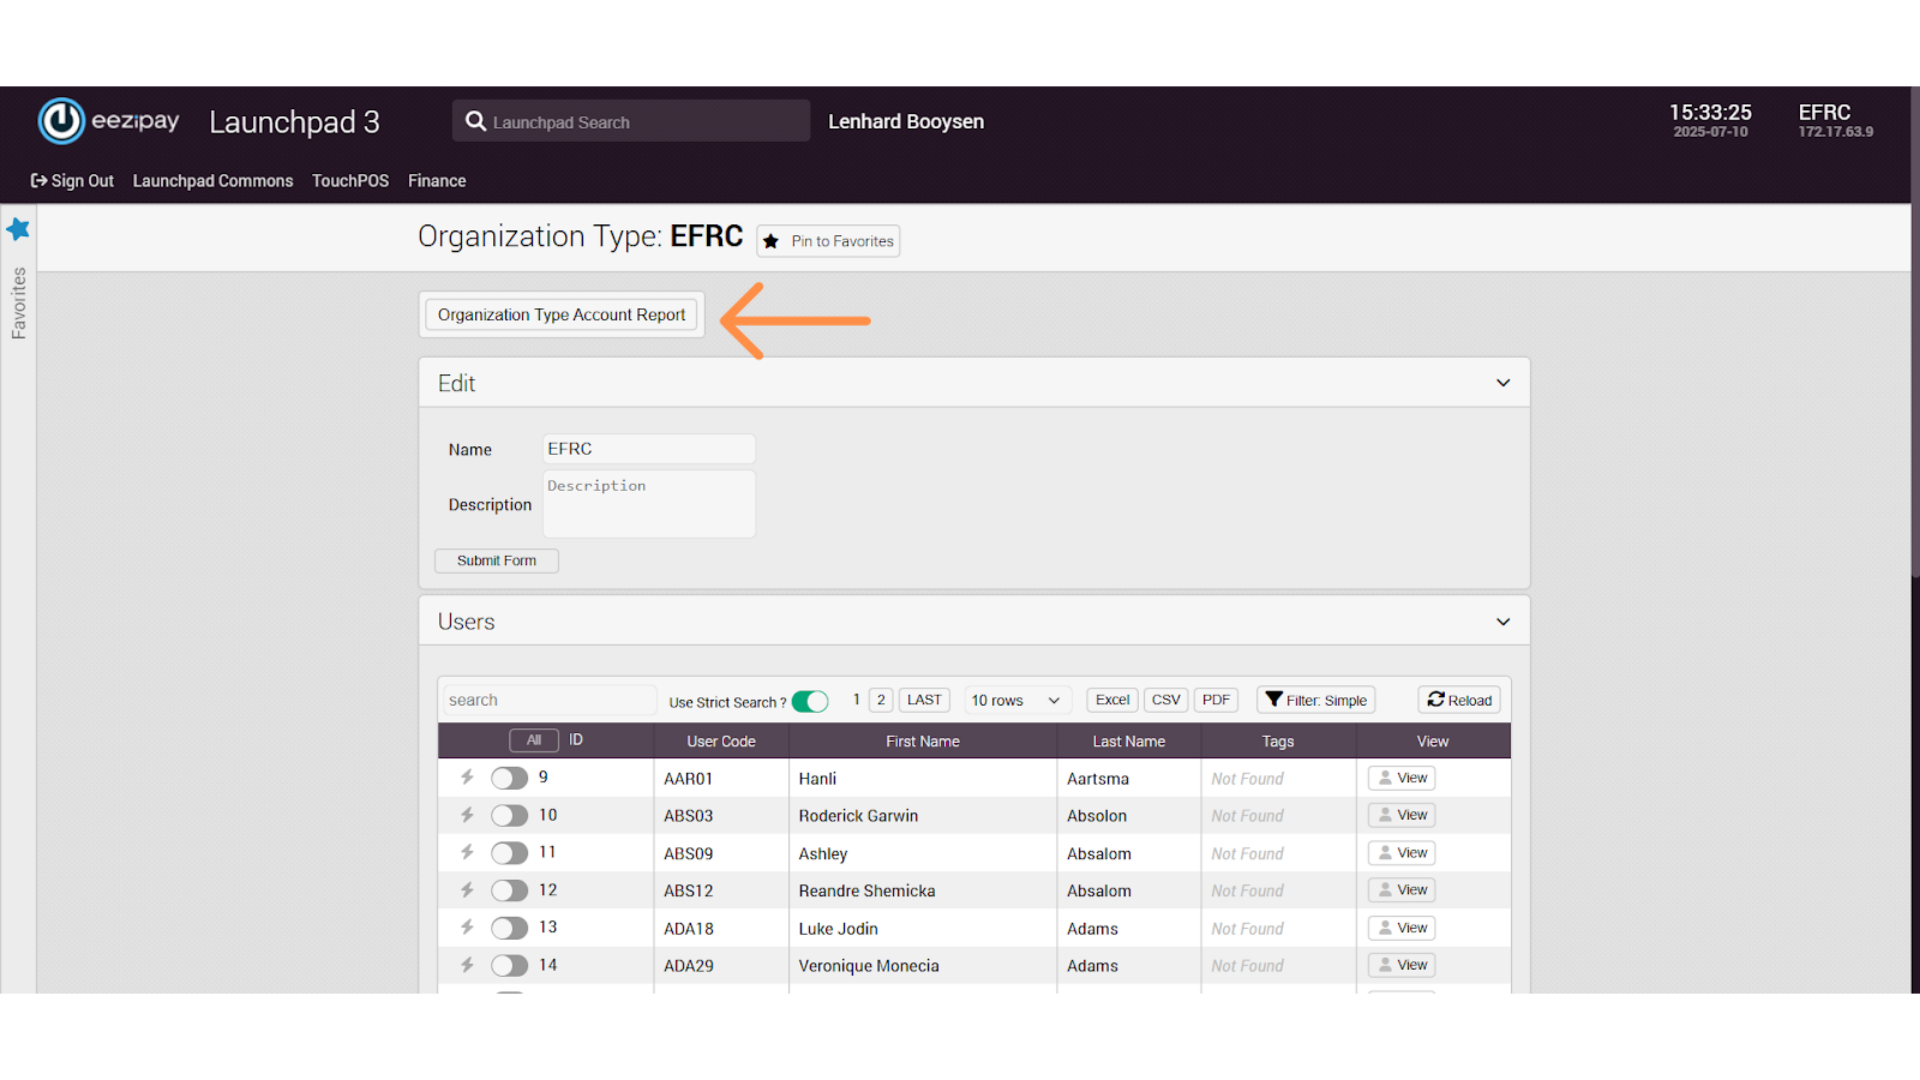
10. Organization Type Account Report & Sage Export

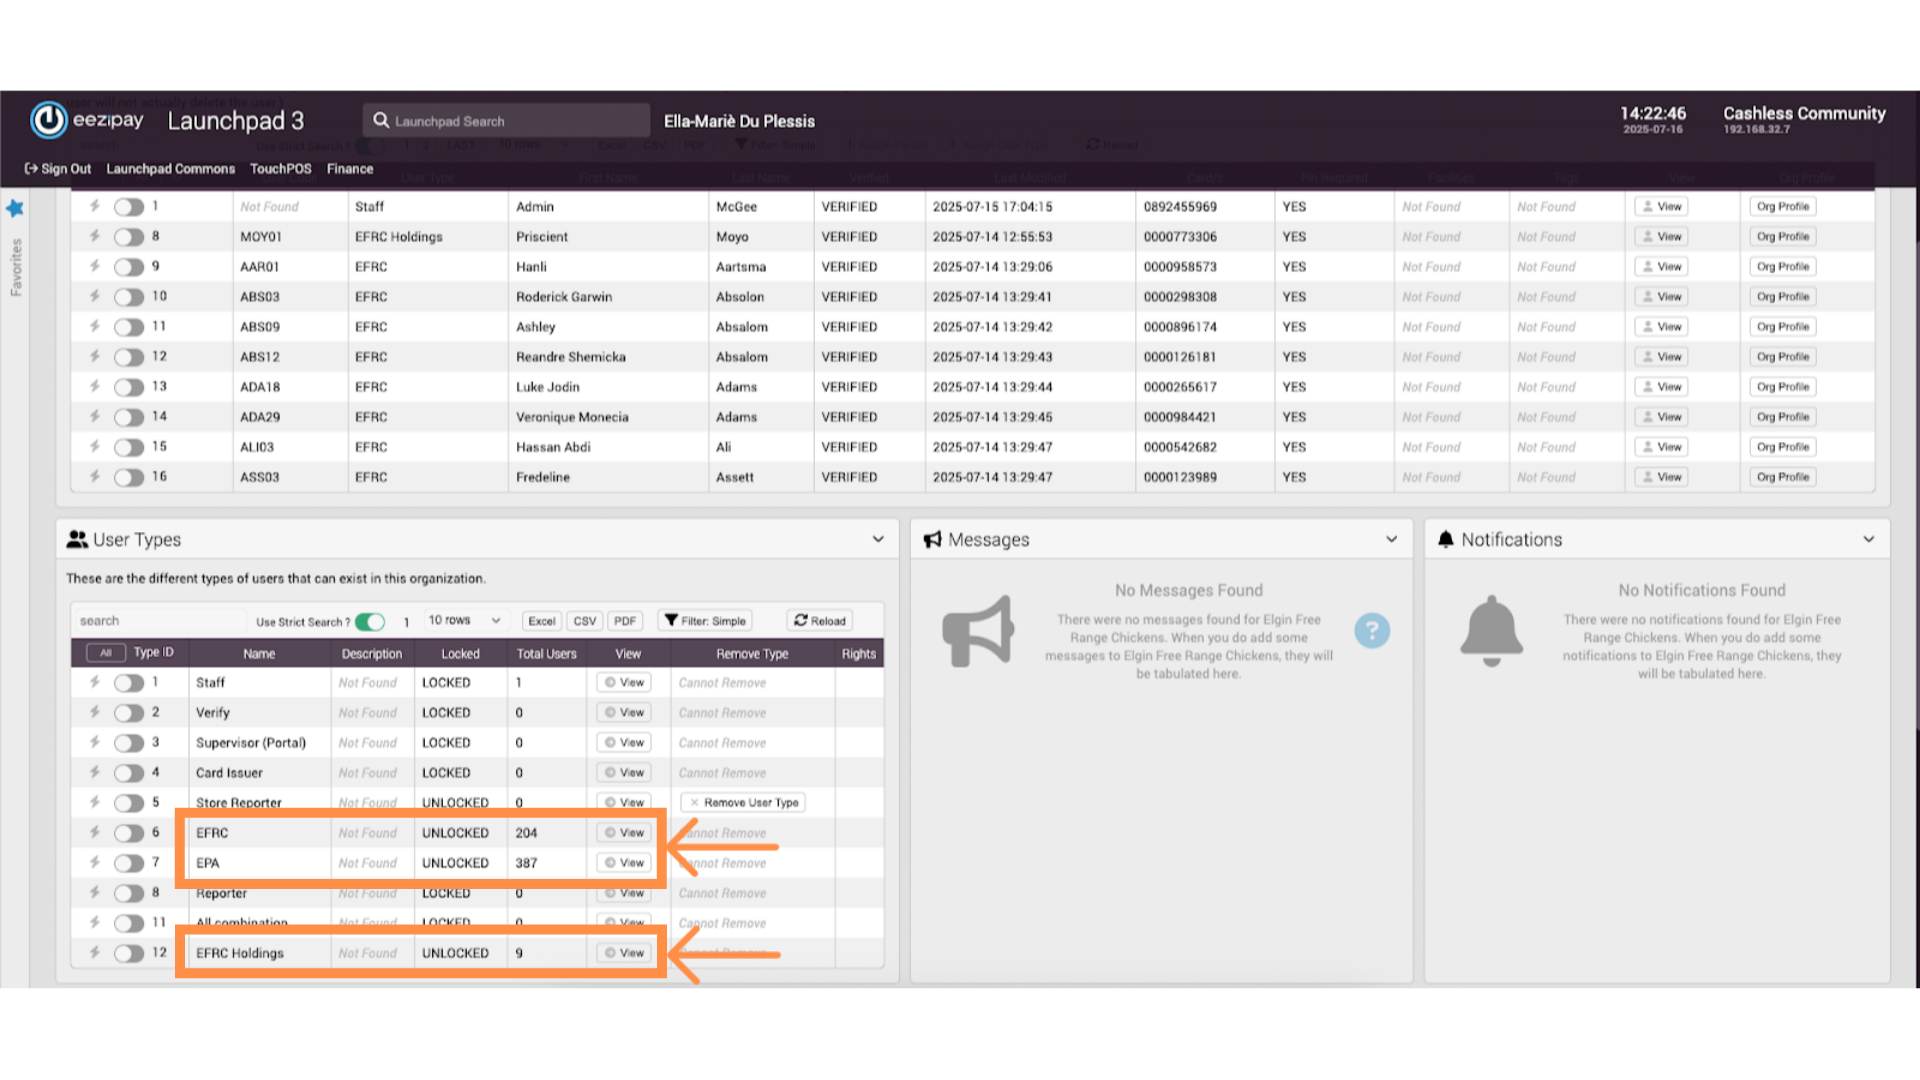
11. User Types Section

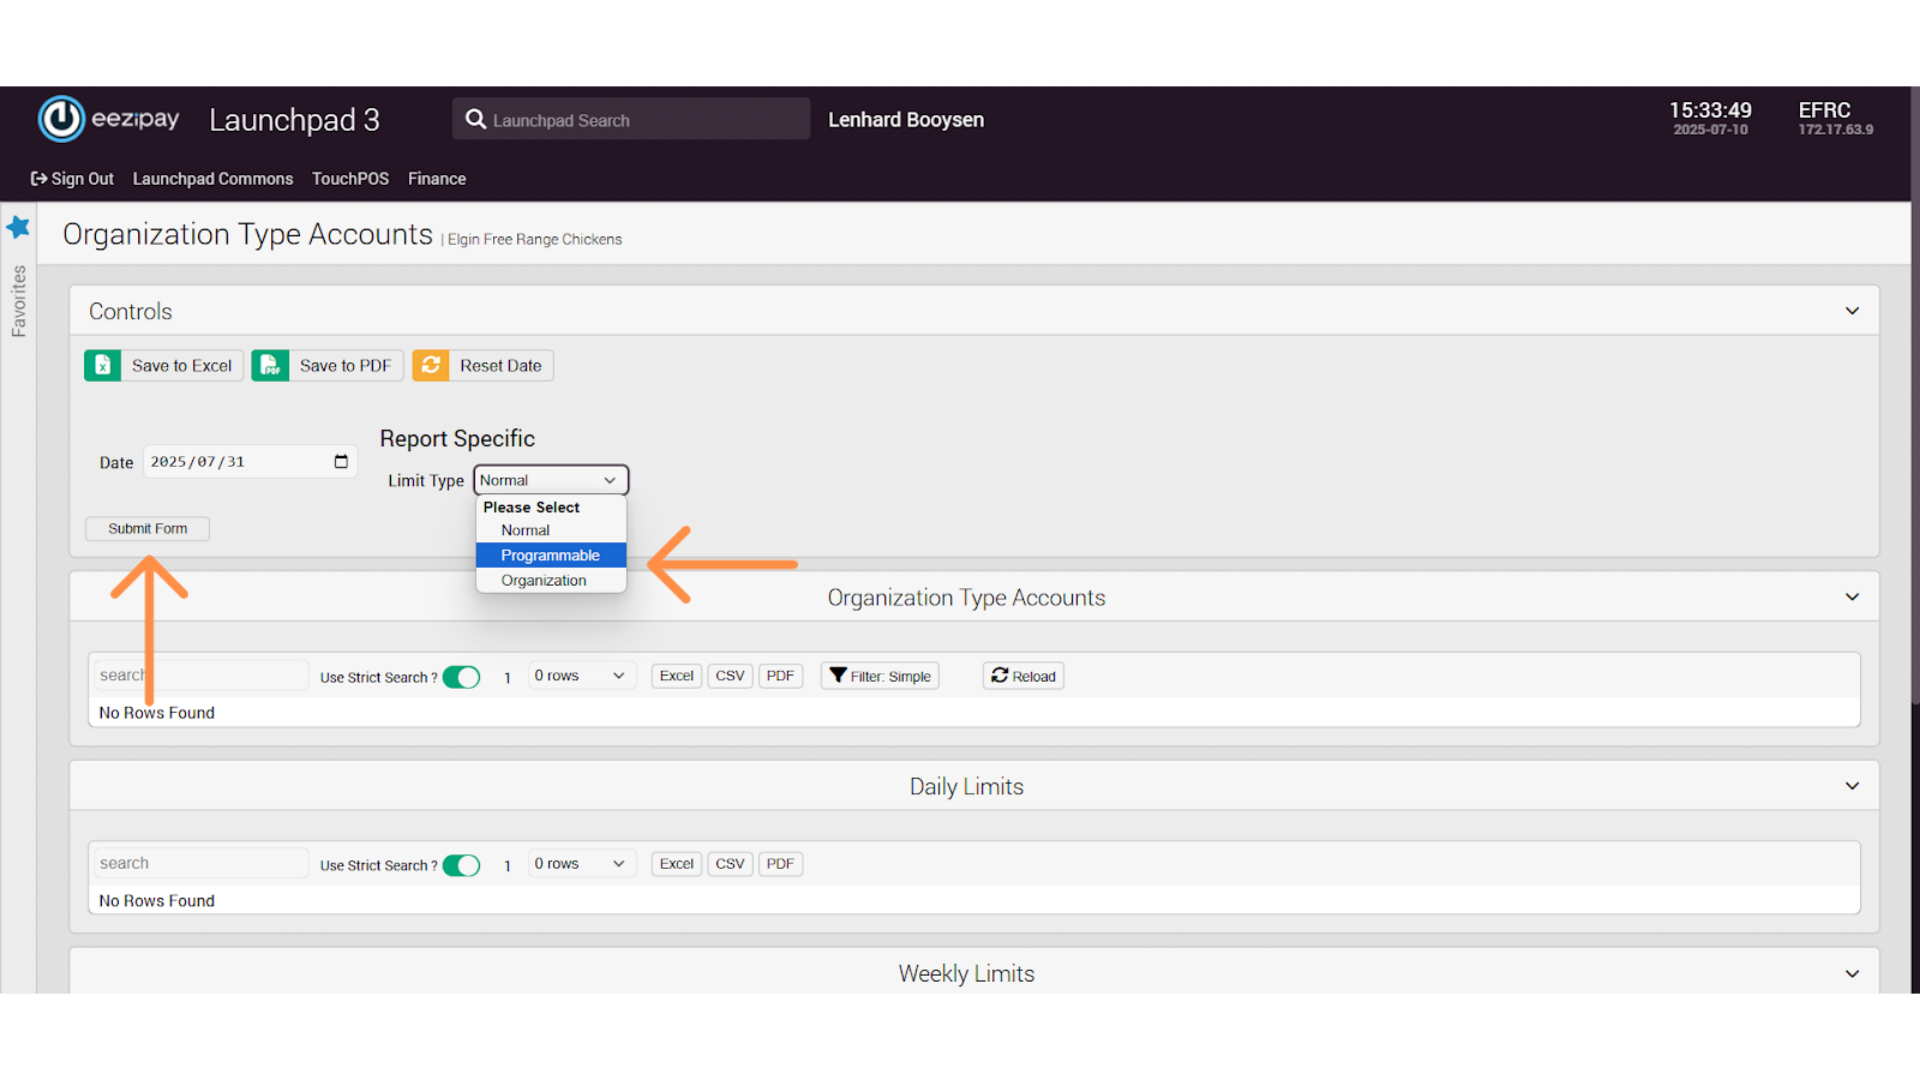
12. Organisation Type Account Report
13. Selecting Programmable Limit Type
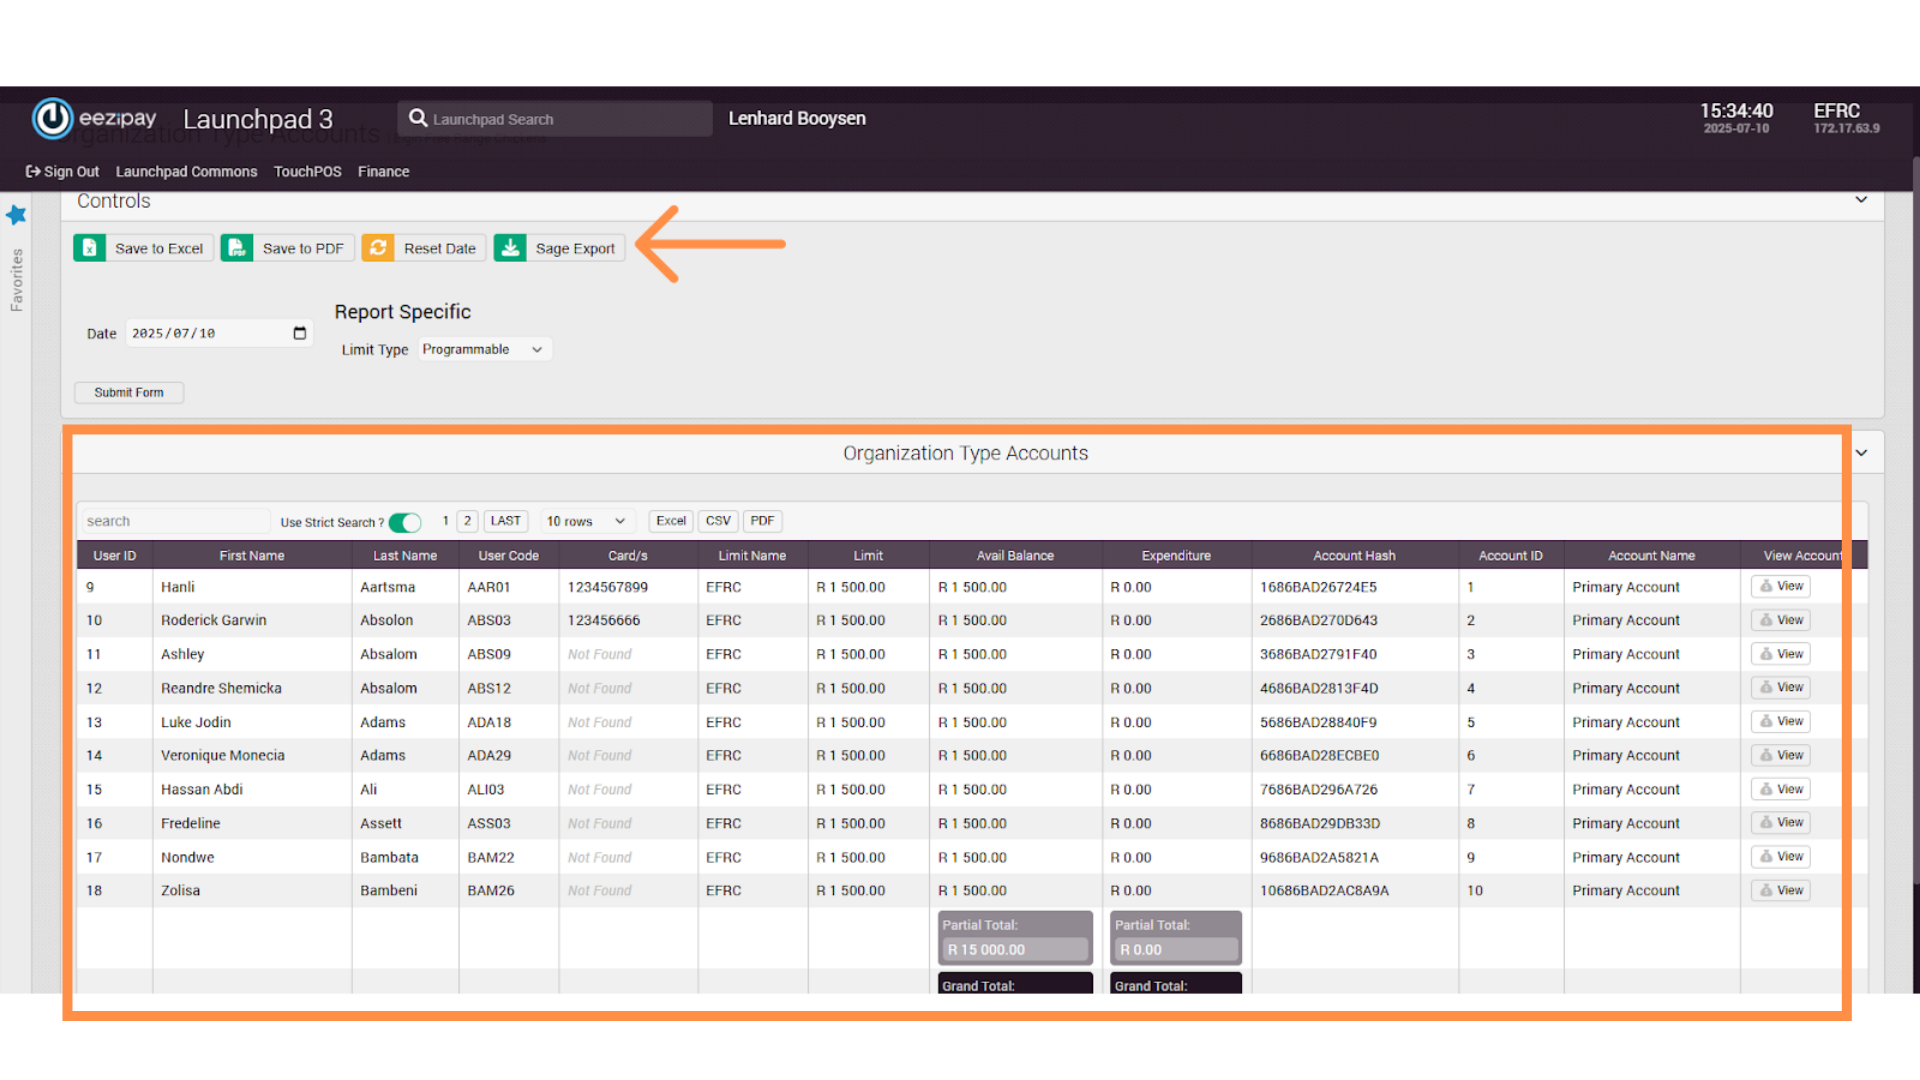
14. Export Sage Report
15. Store Reporting

16. Drawing a Report

17. Report Generation & Export
18. Launchpad Reports
19. Payment Summary Report
20. User Cash Up History Report

21. Drawing a Simple Report

22. Advanced Reporting
23. Advanced Transaction Report

24. Drawing an Advanced Transaction Report

25. Customer Transaction Report

26. Drawing the Customer Transaction Report

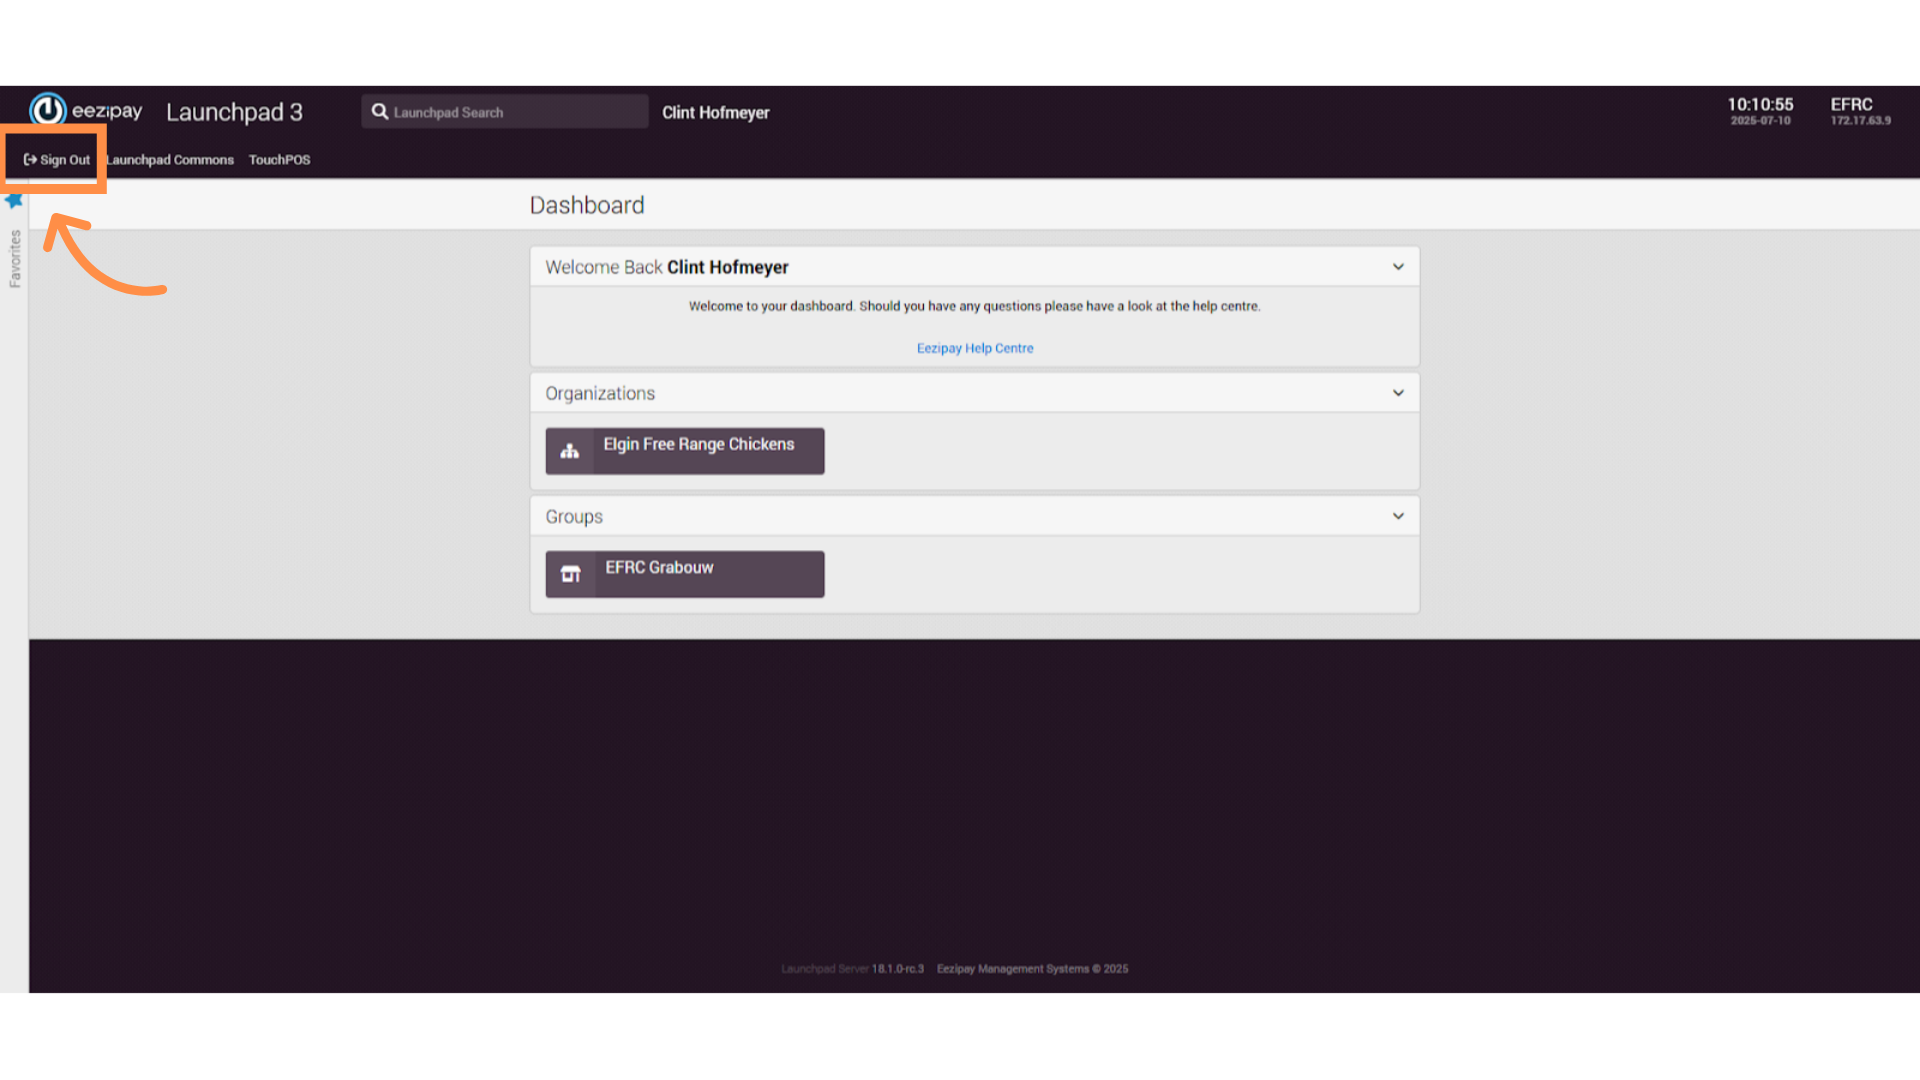
27. How to Sign Out of the System
28. System Logged Out

EFRC – Launchpad – Finance User Guide
1. How to Log into Launchpad
2. Organization Type Account Report

3. User Types Section
4. Organisation Type Account Report

5. Selecting Programmable Limit Type

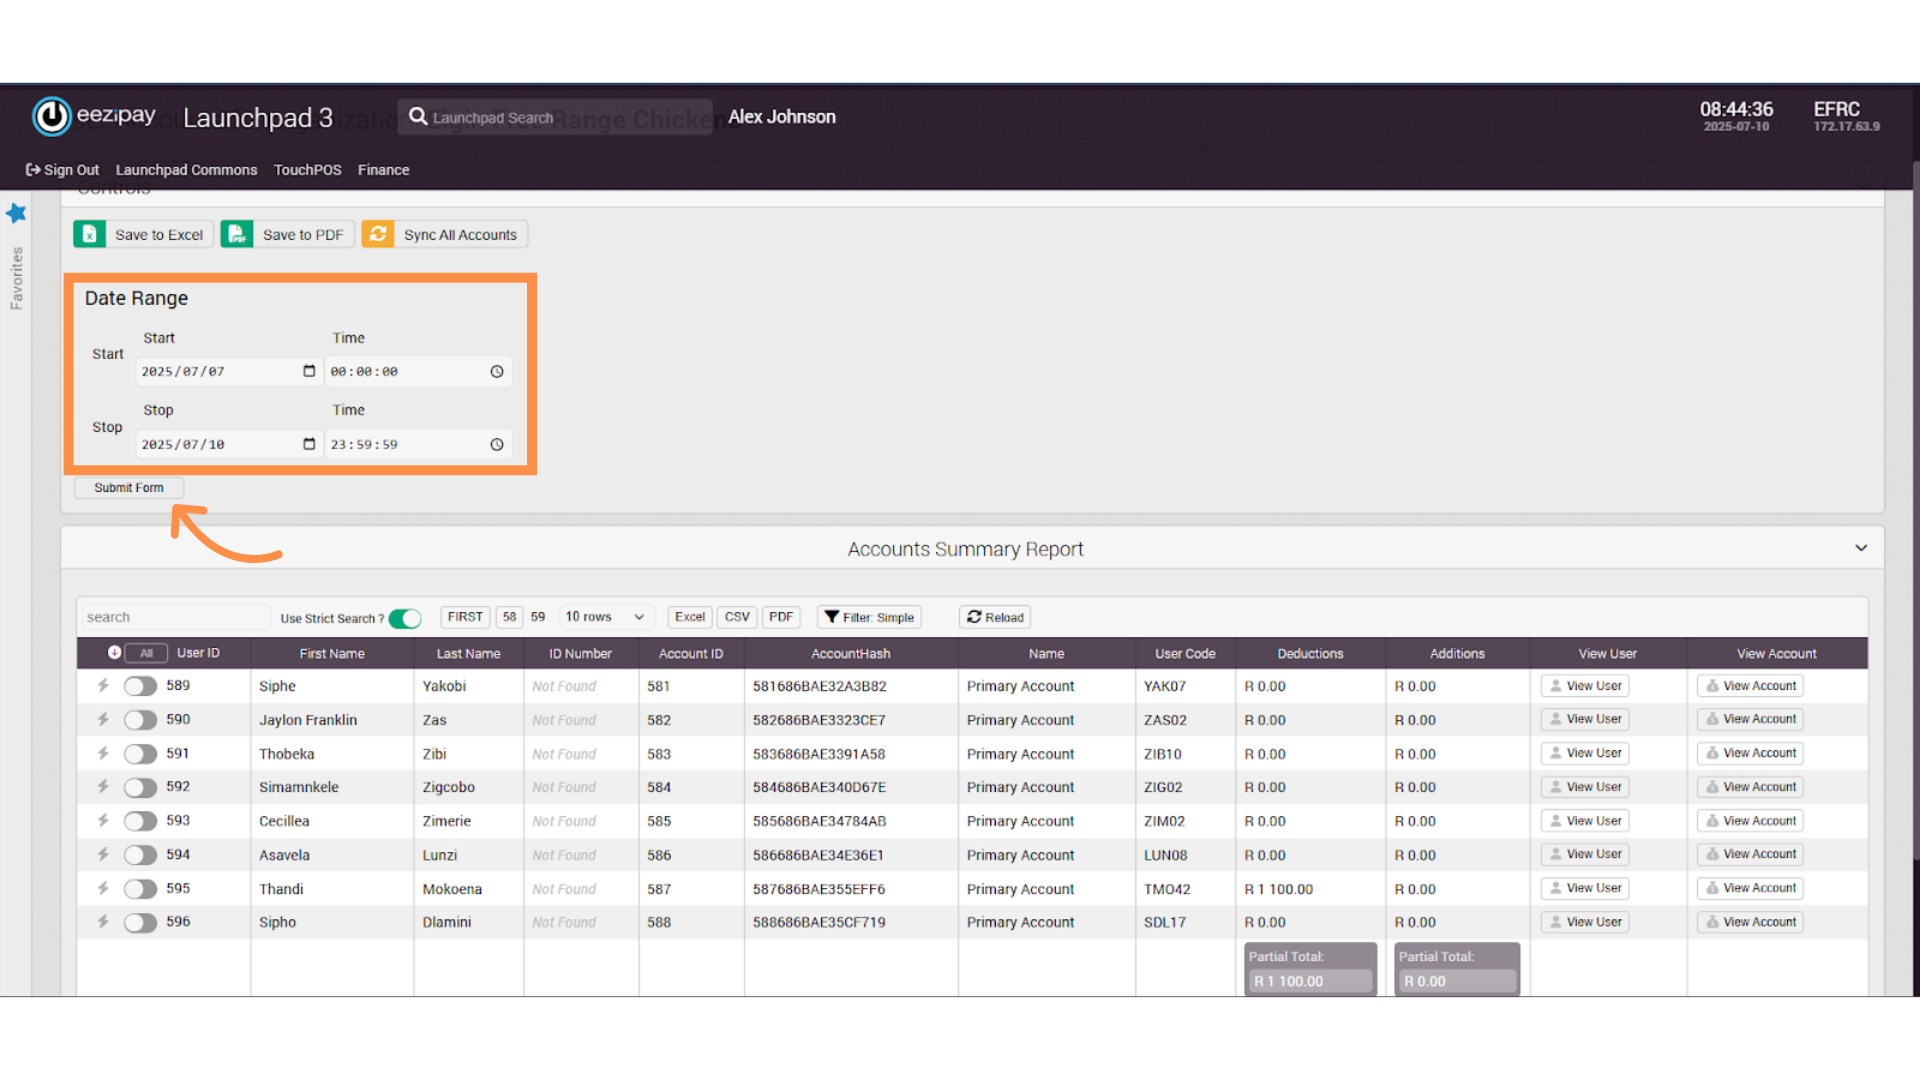
6. Viewing the Account Summary Report

7. Generate the Account Summary Report
8. Store Reporting
9. Drawing a Report

10. Report Generation & Export

11. Launchpad Reports

12. Payment Summary Report

13. User Cash Up History Report

14. Drawing a Simple Report
15. Advanced Reporting

16. Advanced Transaction Report

17. Drawing an Advanced Transaction Report
18. Customer Transaction Report
19. Drawing the Customer Transaction Report

20. How to Sign Out of the System
21. System Logged Out

